ME(H4SO)-80
MECHANICAL
Cylinder Block
CAUTION:
Ensure that the total “re-tightening angle” [in
the former two steps], do not exceed 180°
°°
°.
30) Install the oil level gauge guide, and then tight-
en the attaching bolt (left side only).
31) Install the rocker cover.
32) Install the crankshaft sprocket. <Ref. to
ME(H4SO)-55, INSTALLATION, Crankshaft
Sprocket.>
33) Install the camshaft sprocket. <Ref. to
ME(H4SO)-53, INSTALLATION, Camshaft
Sprocket.>
34) Install the timing belt assembly. <Ref. to
ME(H4SO)-49, INSTALLATION, Timing Belt As-
sembly.>
35) Install the timing belt cover. <Ref. to
ME(H4SO)-47, INSTALLATION, Timing Belt Cov-
er.>
36) Install the crankshaft pulley. <Ref. to
ME(H4SO)-45, INSTALLATION, Crankshaft Pul-
ley.>
37) Install the generator and A/C compressor
brackets on cylinder head.
38) Install the V-belt. <Ref. to ME(H4SO)-43, IN-
STALLATION, V-belt.>
39) Install the intake manifold. <Ref. to FU(H4SO)-
18, INSTALLATION, Intake Manifold.> or <Ref. to
FU(H4SOw/oOBD)-18, INSTALLATION, Intake
Manifold.>
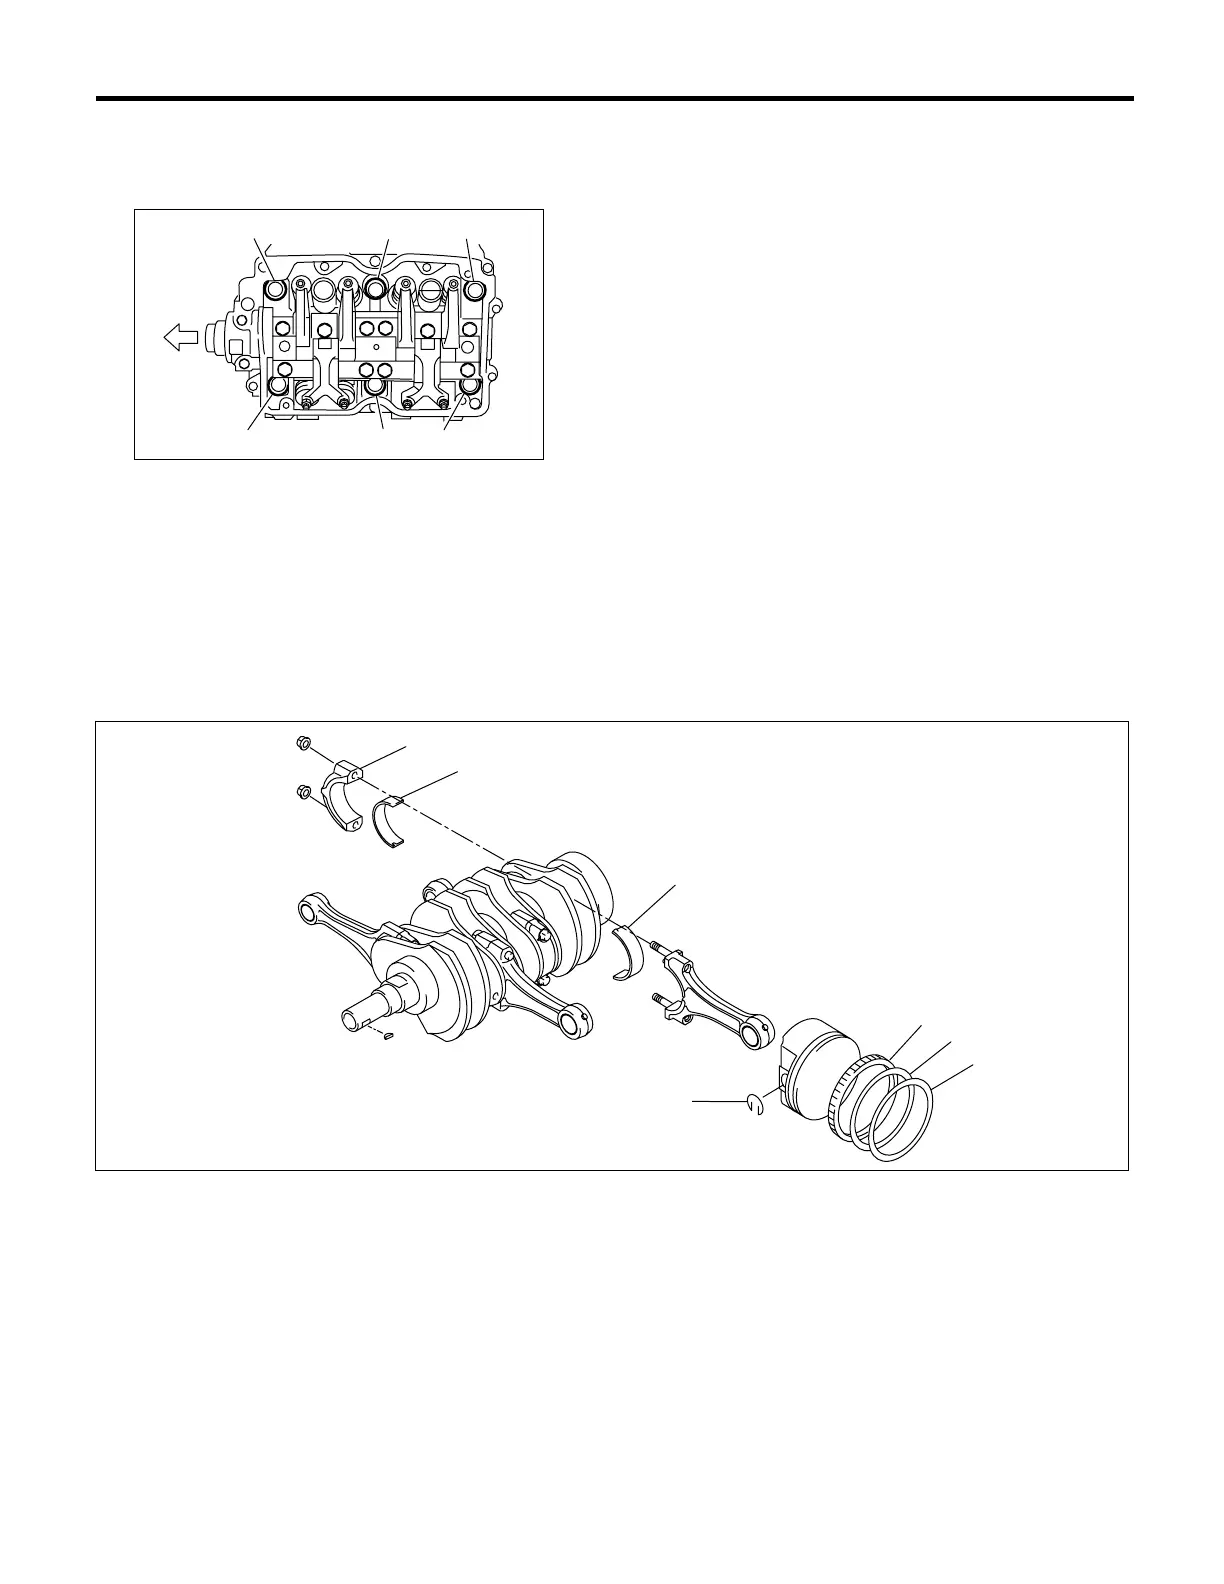
C: DISASSEMBLY
1) Remove the connecting rod cap.
2) Remove the connecting rod bearing.
NOTE:
Arrange the removed connecting rod, connecting
rod cap and bearing in order to prevent confusion.
3) Remove the piston rings using the piston ring ex-
pander.
4) Remove the oil ring by hand.
NOTE:
Arrange the removed piston rings in good order to
prevent confusion.
5) Remove the circlip.
(A) Front
ME-00309
(a)
(b)
(c)
(e)
(f)
(A)
(d)
(1) Connecting rod cap (3) Top ring (5) Oil ring
(2) Connecting rod bearing (4) Second ring (6) Circlip
ME-00168
(2)
(2)
(6)
(5)
(4)
(3)
(1)













 To Next Page