104
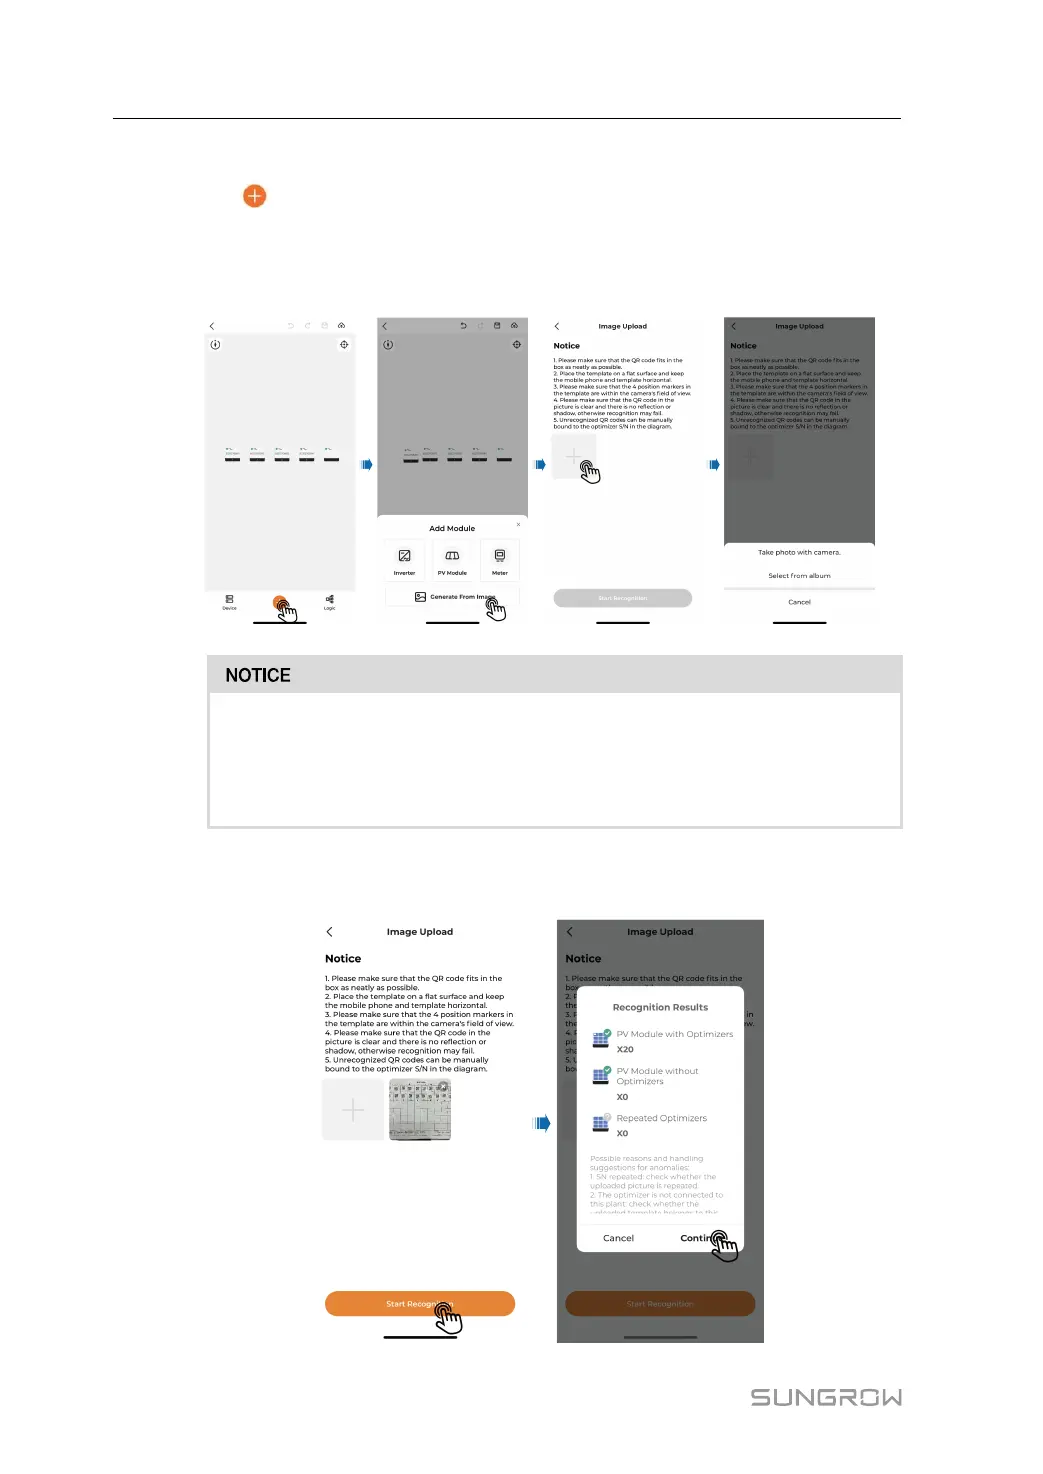
Step 2 Add a PV module:
1 Tap
at the bottom of the screen.
2 Choose Generate From Image. Tap the plus button in the middle of the screen, and
choose Take photo with camera or Select from album to upload the physical layout
template.
• Do not take photos of the physical layout template under strong light.
Otherwise, the QR code may not be recognized due to reflection of light.
• Please turn off the live photo function on the phone when taking photos and
upload a still photo. Otherwise, the QR code may not be recognized.
3 Tap Start Recognition. Wait for the Recognition Results to pop up on the screen, and
then tap Continue.
7 iSolarCloud App User Manual
 Loading...