52
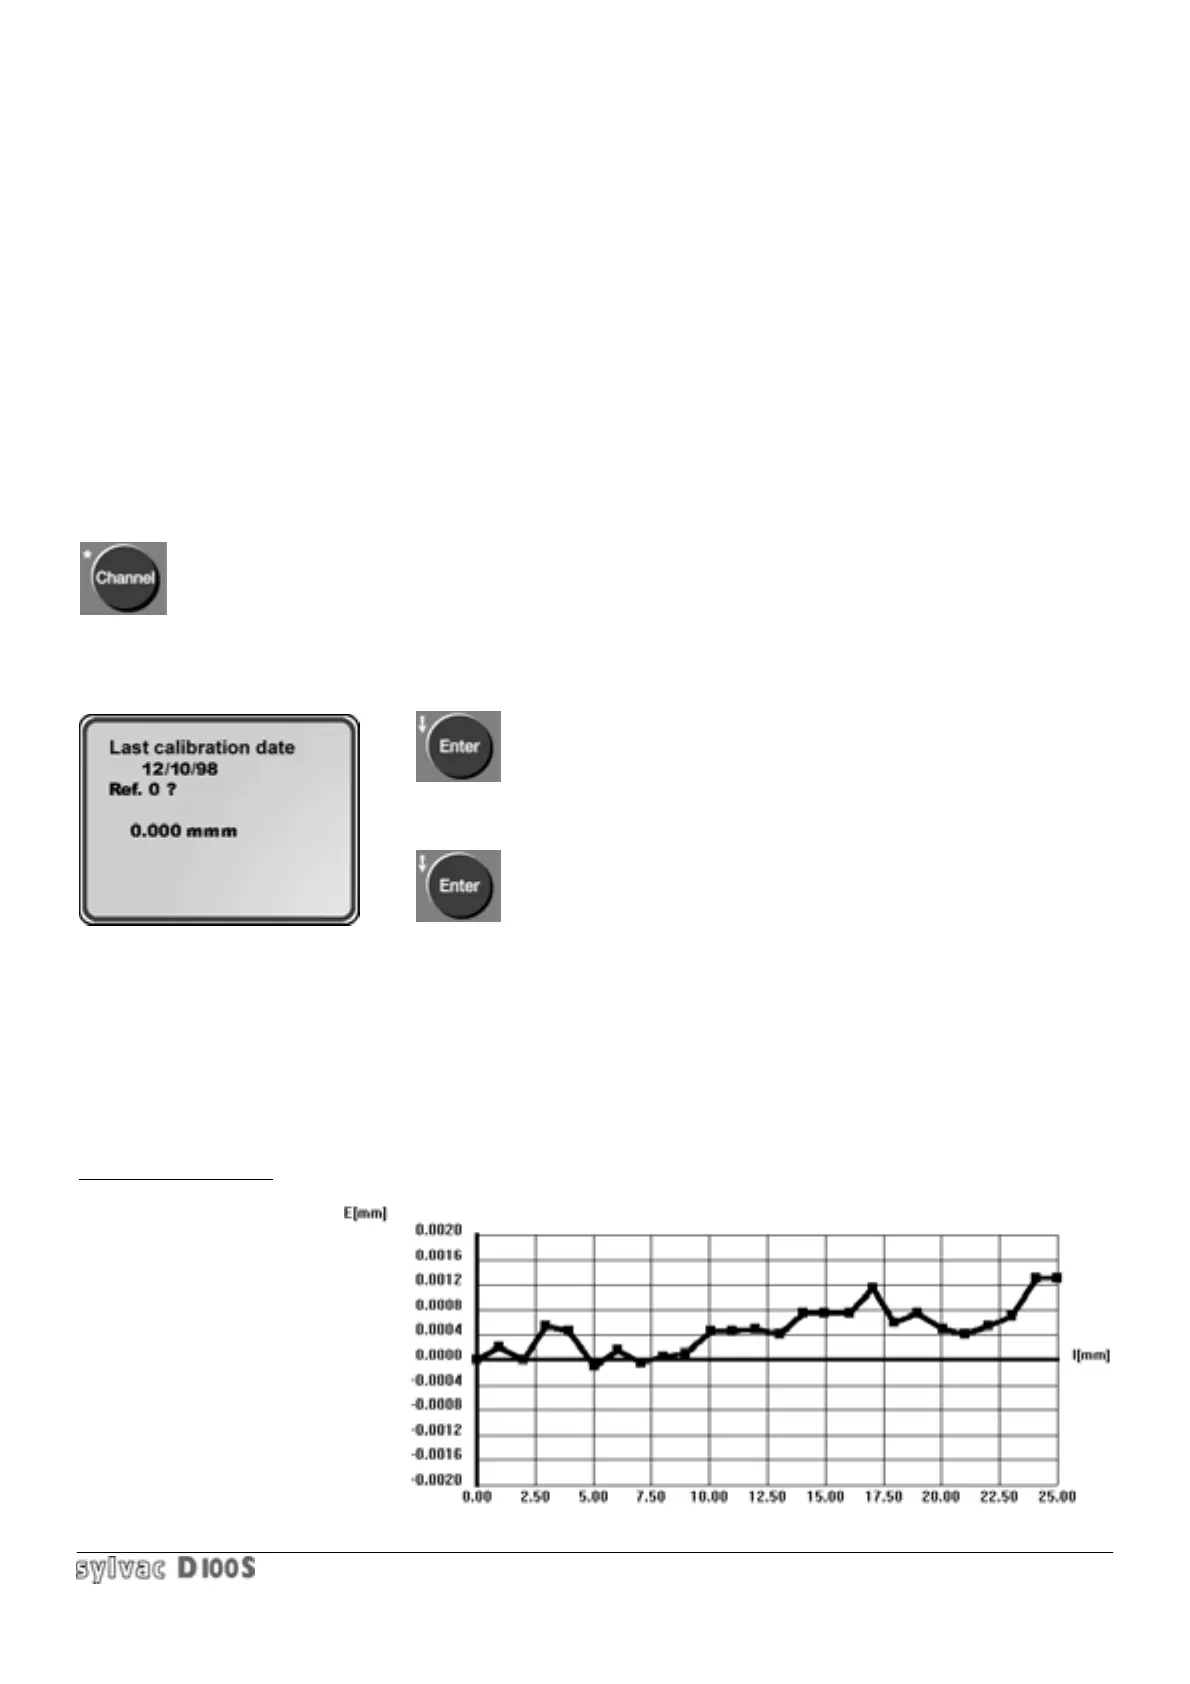
The date of the last calibration is shown.
6/ Place probe on reference base (value 0). Press enter Enter key.
7/ Insert 2 mm test block for the P2, 5 mm for a the P5, a 10 mm
for the P10, 25 mm for a P25 or 50 mm for a P50.
8/Enter exact value of pad on keyboard : 2, 5, 10, 25 or 50 mm, then
press Enter key.
1.7 CALIBRATION OF THE UNIT
1.7.1 General calibration
The D100S units are calibrated at the factory. However if a re-calibration is required, proceed as follows :
1/ Fix a P2, P5, P10, P25 or P50 probe to a vertical support.
2/ Select a resolution of 0.0001 mm or 0.00001 in.
3/ With the probe in its fully extended contact-free position, reset display to zero (Preset key).
4/ Mechanically position probe under reference base so that readout indicates a measurement :
for P2 between 0.2 and 0.3 mm
P5 between 0.7 and 0.8 mm
P10 between 0.4 and 0.5 mm
P25 between 0.8 and 0.9 mm
P50 between 1.0 and 1.2 mm
5/ Switch off unit, then switch on by pressing channel key for four seconds. The following display will appear :
The calibration value is automatically stored and can only be deleted by a new calibration (changing lithium module
Or accumulator does not effect the calibration).
1.7.2 Coupling probe to unit
The user can couple the probe-unit couple and correct from 2 to 25 points linearly.
Example of correction :
1/ Probe P25 with D100S without correction —> max error 1.4 um :