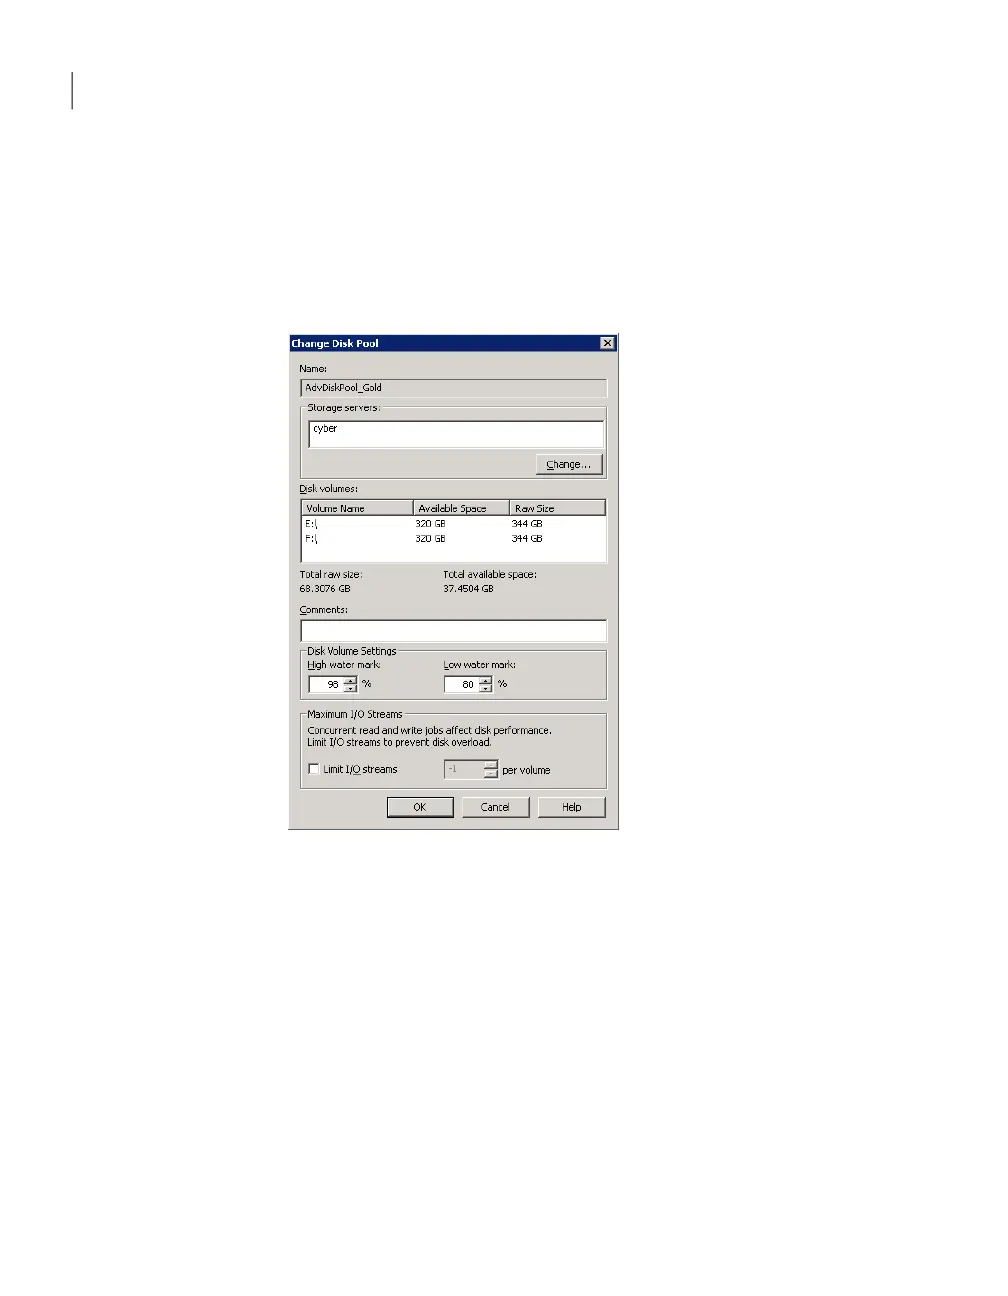
To change disk pool properties
1
In the NetBackup Administration Console, in the left pane, expand Media
and Device Management > Devices > Disk Pools.
2
In the right pane, select the disk pool you want to change.
3
Click Edit > Change.
4
In the Change Disk Pool dialog box, change properties.
See “AdvancedDisk disk pool properties” on page 30.
5
Click OK.
Changing AdvancedDisk disk pool state
Disk pool state is UP or DOWN.
To change the state to DOWN, the disk pool must not be busy. If backup jobs are
assigned to the disk pool, the state change fails. Cancel the backup jobs or wait
until the jobs complete.
Managing AdvancedDisk
Managing AdvancedDisk disk pools
42