AR 2000 Operator’s Manual
98
Step 4: Loading a Sample
Samples are loaded in the pressure cell after the cell is set up and calibrated. The following steps will detail
the sample loading procedure.
1. Rotate the drawrod so the reference mark on the magnet assembly is facing the front of the instrument.
Raise the rheometer head high enough to place the small magnet on the rotor. Once the small magnet is
in place, raise the rheometer head to the maximum height.
NOTE: DO NOT REMOVE MAGNET ASSEMBLY FROM THE RHEOMETER HEAD. IF IT IS
REMOVED, THE MAPPING WILL NO LONGER BE AS EFFECTIVE, CAUSING AN
INCREASE IN RESIDUAL TORQUE.
2. Remove the Peltier jacket from rheometer.
3. Leaving the small magnet in place, gently remove the rotor from the cup.
4. Load the sample into the cup. For very viscous samples, you may find it easiest to weigh the sample in the
cup, if the sample density is known (this can be done after removing the cup from the jacket).
NOTE: Volume is 9.5 ± 0.5 mL.
5. Ensure that the small magnet is still aligned with
the mark on the rotor assembly.
6. Replace the rotor assembly and fully tighten.
7. Replace the Peltier jacket onto the Smart Swap Base
of the rheometer.
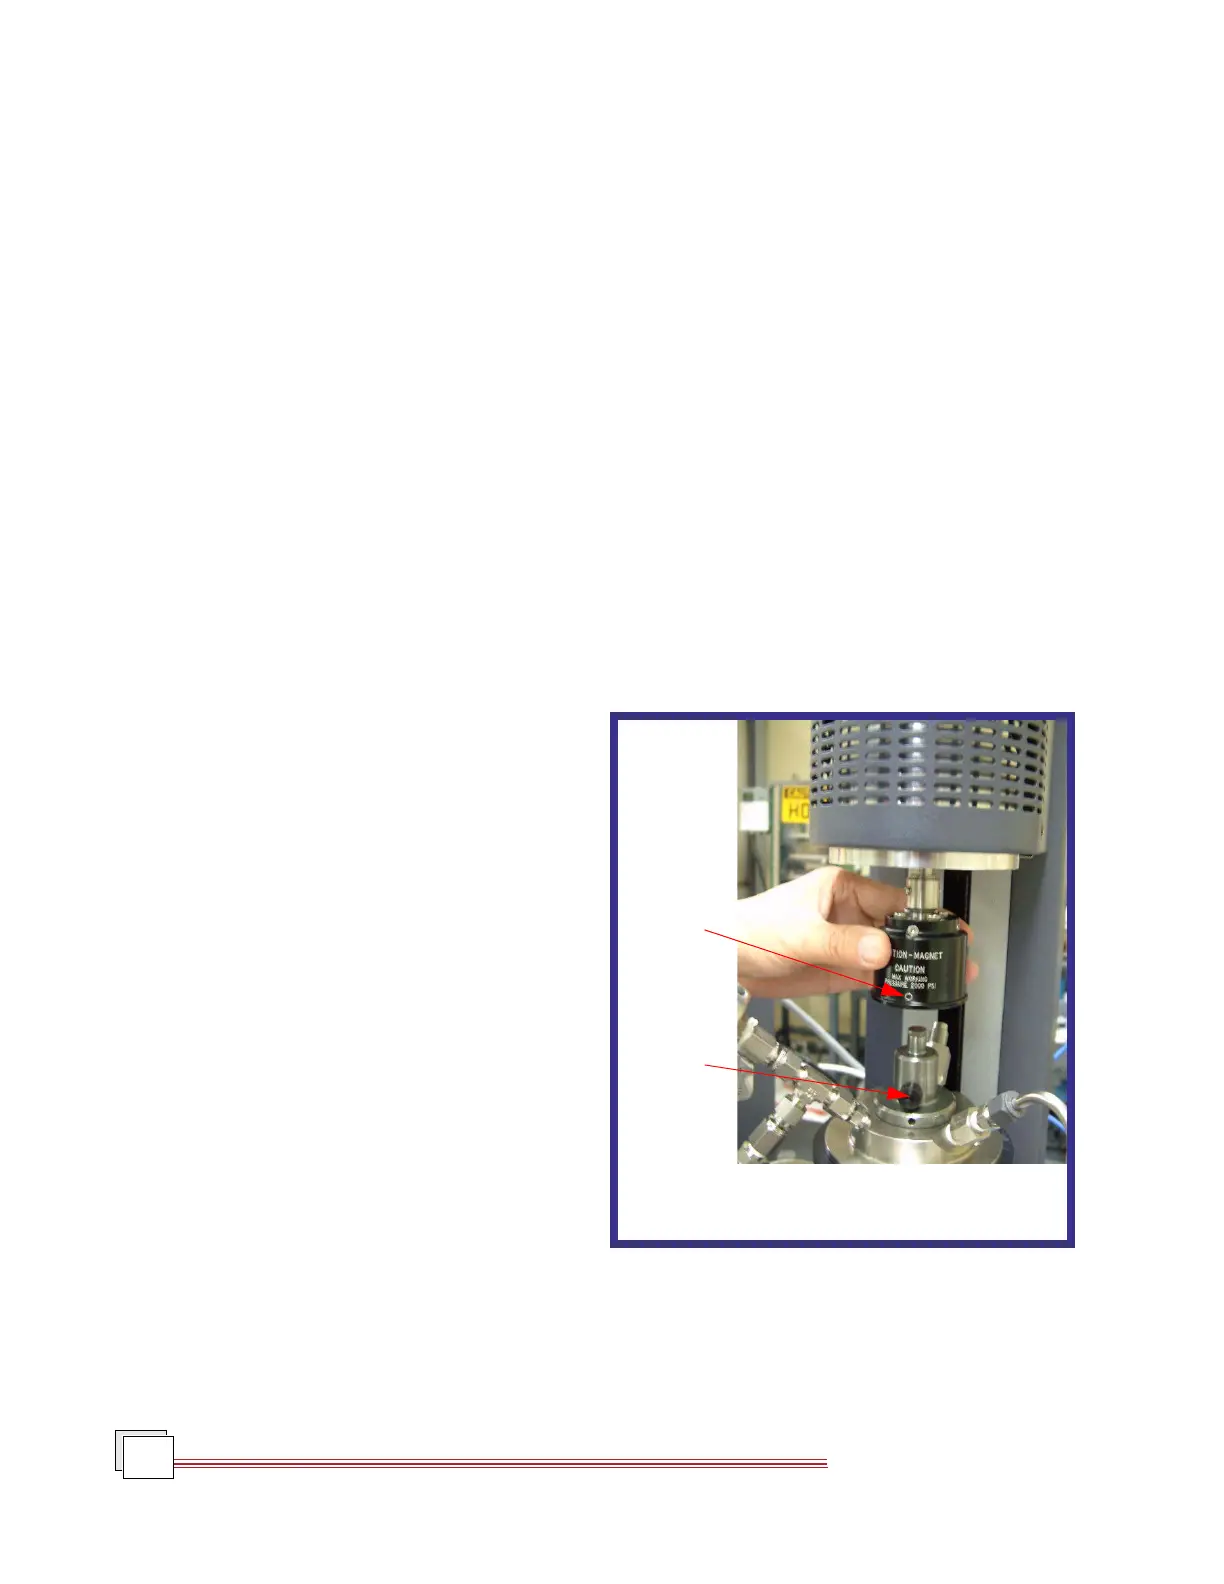
8. Rotate the draw rod so the magnet assembly refer-
ence mark is aligned with the small magnet on the
Rotor. Ensure that the reference mark on the upper
geometry remains aligned with the small magnet
by lightly holding the rheometer draw rod and
begin lowering the rheometer head as shown in
Figure 8.18.
Figure 8.18
Aligning the Reference Mark
Reference
Mark
Small
Magnet