AR 2000 Operator's Manual
43
Using the ETC
This section provides information on how to install and set up the Environ-
mental Testing Chamber (ETC). For more information on the ETC, see the
Rheology Advantage online help.
1. Turn on the rheometer and move the rheometer head up to the maxi-
mum height. (Use the 'Head UP' button, located on the instrument
control panel.)
2. Fit the air-bearing clamp to the rheometer (see the start of this chapter).
3. Turn off the power to the rheometer control box.
4. Ensure that the two top screws (A and B in Figure 5.14) are fitted with
washers and are located in place—but make sure that they are almost
totally unscrewed (two turns in).
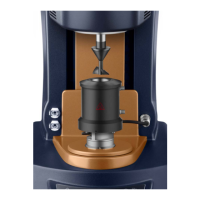
5. Open the ETC oven (see Figure 5.15) and then use the handles on the
oven doors to lift it onto the two top screws. Lightly tighten these
screws.
6. Insert the final two screws (C and D in Figure 5.15).
7. Adjust the position of the ETC on the screws and then tighten all
four.
8. Check the adjustment and adjust if required by loosening the screws
and shifting the position of the ETC on the rheometer.
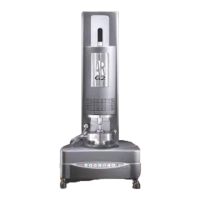
9. Connect the two cables on the ETC to the attachment connectors on
the rheometer as shown in Figure 5.16.
10. Open the ETC oven doors to gain access to the Smart Swap™
mounting.
Figure 5.14
Mounting Screws
Figure 5.15
The ETC Open
Figure 5.16
Connecting the Cables