4-41
4
ATTACHMENTS
DISASSEMBLY AND ASSEMBLY
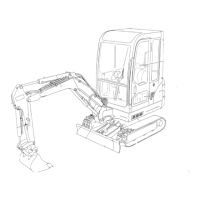
Removing the link
Fully retract the bucket cylinder and lower the front end of
the arm to the ground.
1. Pull out the cotter pin and remove the castle nut (1).
2. Suspend the bucket link (2) temporarily and remove
the pin (3).
• Place the bucket link on a skid.
• Be aware that one end of the guide link will fall down
when the pin (3) is pulled out.
3. Pull out the pin (4), and then remove the guide links L
(5) and R (6).
Installing the link
For installation of the link, follow the same procedure as for
removal in the reverse order.
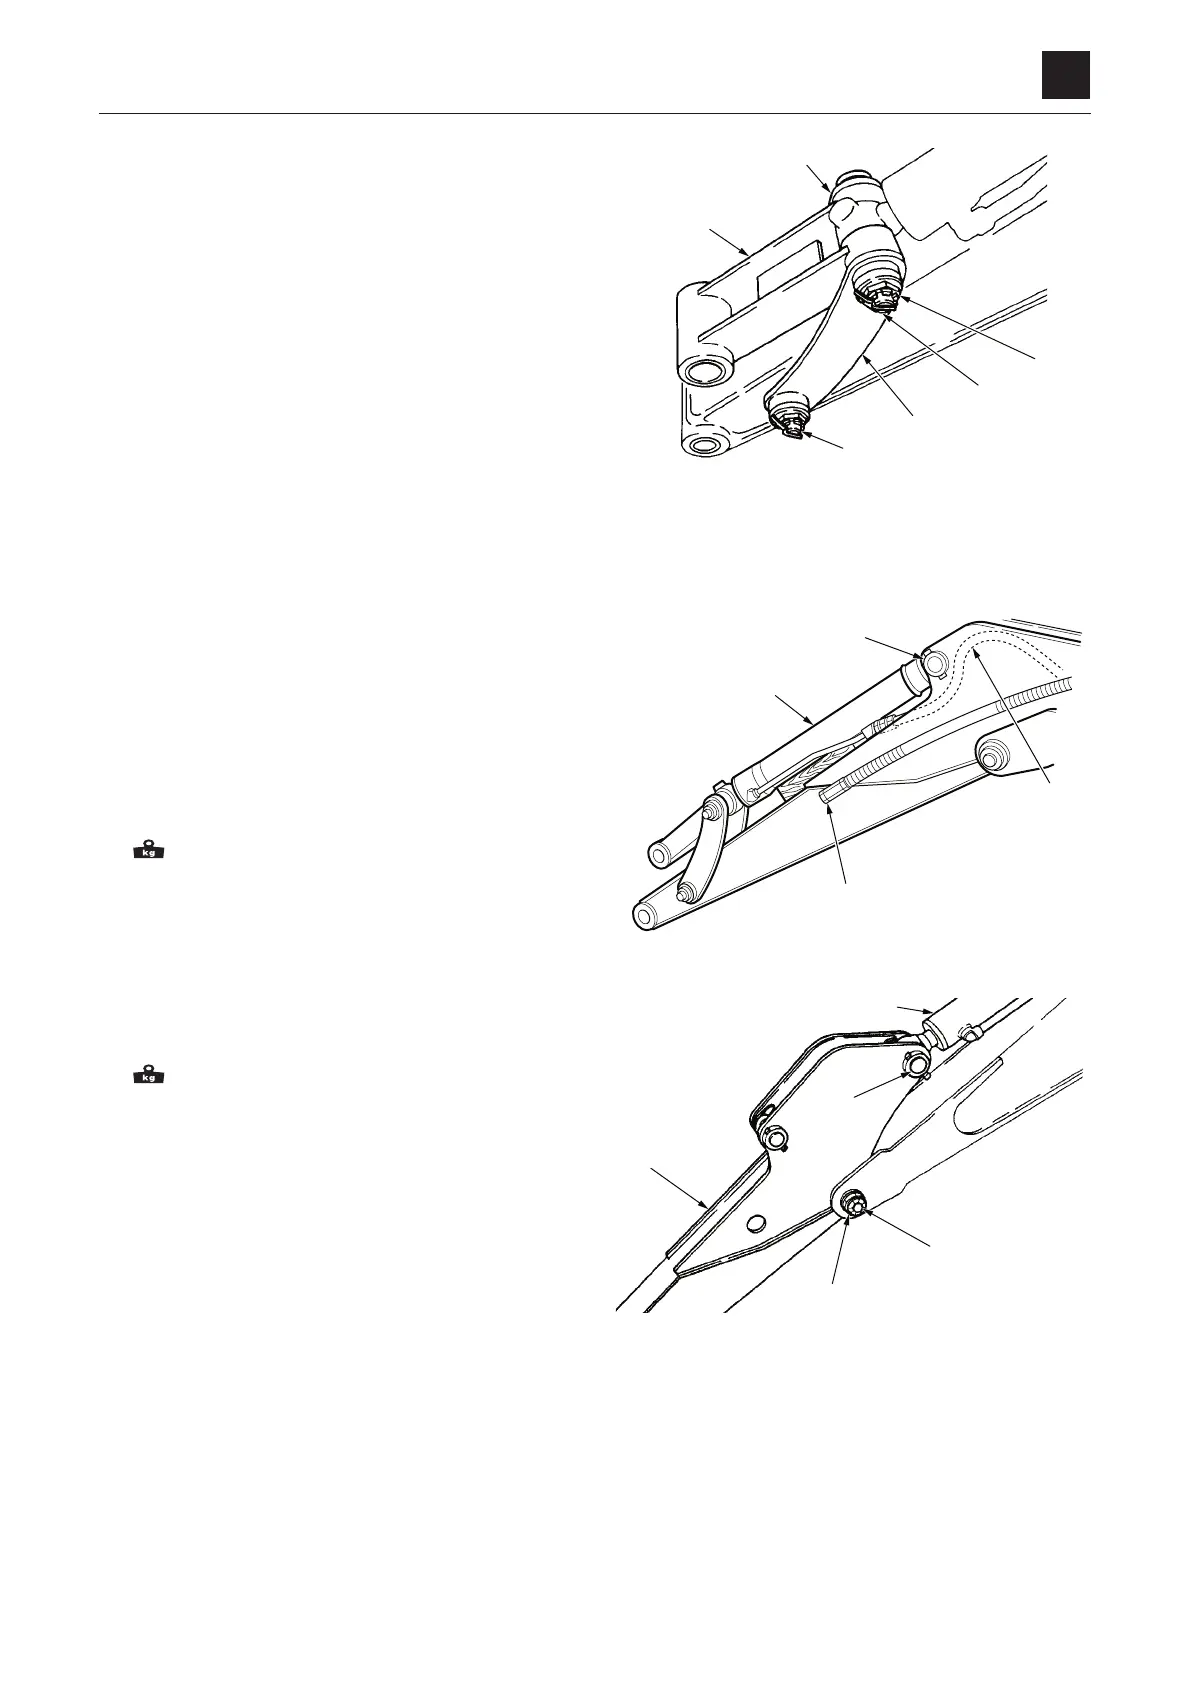
Removing the arm
1. Disconnect the hydraulic hoses (1) from the bucket cyl-
inder (2).
Next, disconnect the hydraulic hoses from the auxiliary
ports (3).
2. Suspend the bucket cylinder (1) temporarily, pull out
the pin (4) and then remove the bucket cylinder
Bucket cylinder 32 kg
3. Place the arm cylinder on a skid and pull out the pin
(6).
4. Pull out the cotter pin and remove the castle nut (7).
5. Suspend the arm (8) temporarily, pull out the pin (9)
and then remove the arm.
Arm: 91 kg
Installing the arm
For installation of the arm, follow the same procedure as for
removal in the reverse order.
Important:
When
securing the arm with the fixing pin (9) and the
castle nut (7), be sure not to overtighten the castle nut
(7).
T
emporarily tighten the castle nut (7) by hand, adjust
the position so that the hole on the castle nut (7) aligns
with the fixing pin (9), and then secure the nut with a
cotter pin.