Operating Instructions Model: EV8650
Page 14 of 62 TP05413002 Rev. 03
Copyright © 2009 by Talaris Ltd., Basingstoke (UK)
3.3 Batch Settings
Select pre-set Batch Settings
The EV8650 is in batch/count mode if the display shows PIECE Cnt when the MODE key
is pressed.
Select the batch size to be counted by pressing the BATCH key.
Use this key to step through the pre-set values.
e.g. 100, 50, 25, 20, 10, 5 (and OFF which is the continuous count mode).
On the EV8650 the batch size can be set from 1 to 999 using the Numeric Keypad.
Alternatively whilst the batch quantity is on the display, use the left or right arrow keys to
enter a batch quantity that is not included in the preset list.
The arrow keys will increment (Right Arrow) or decrement (Left Arrow) the batch number
shown on the display.
Press START/STOP key to return to the count display or wait for the display to time out.
Place the notes to be counted onto the feed hopper.
The machine will automatically start, with AUTO selected, or you can choose, if auto is de-
selected, to start it manually by pressing the START/STOP key.
The machine will stop when the batch size has been reached.
If there are insufficient notes in the feed hopper to complete a batch, the total counted will
flash on the count display. Without removing the notes in the stacker, add more notes to
the feed hopper and the machine will continue to count.
Remove the notes from the stacker when the batch is completed.
If the machine stops due to a ‘degraded note’ a rFEEd message will be displayed, rFEEd
indicates that the whole bundle should be fed again.
If AUTO is selected, press START/STOP to clear the error message.
The machine will restart automatically.
The next batch will be started automatically if there are notes in the feed hopper and
AUTO is selected.
If AUTO is not selected, press START/STOP to clear the error message and press
START/STOP again to continue the count.
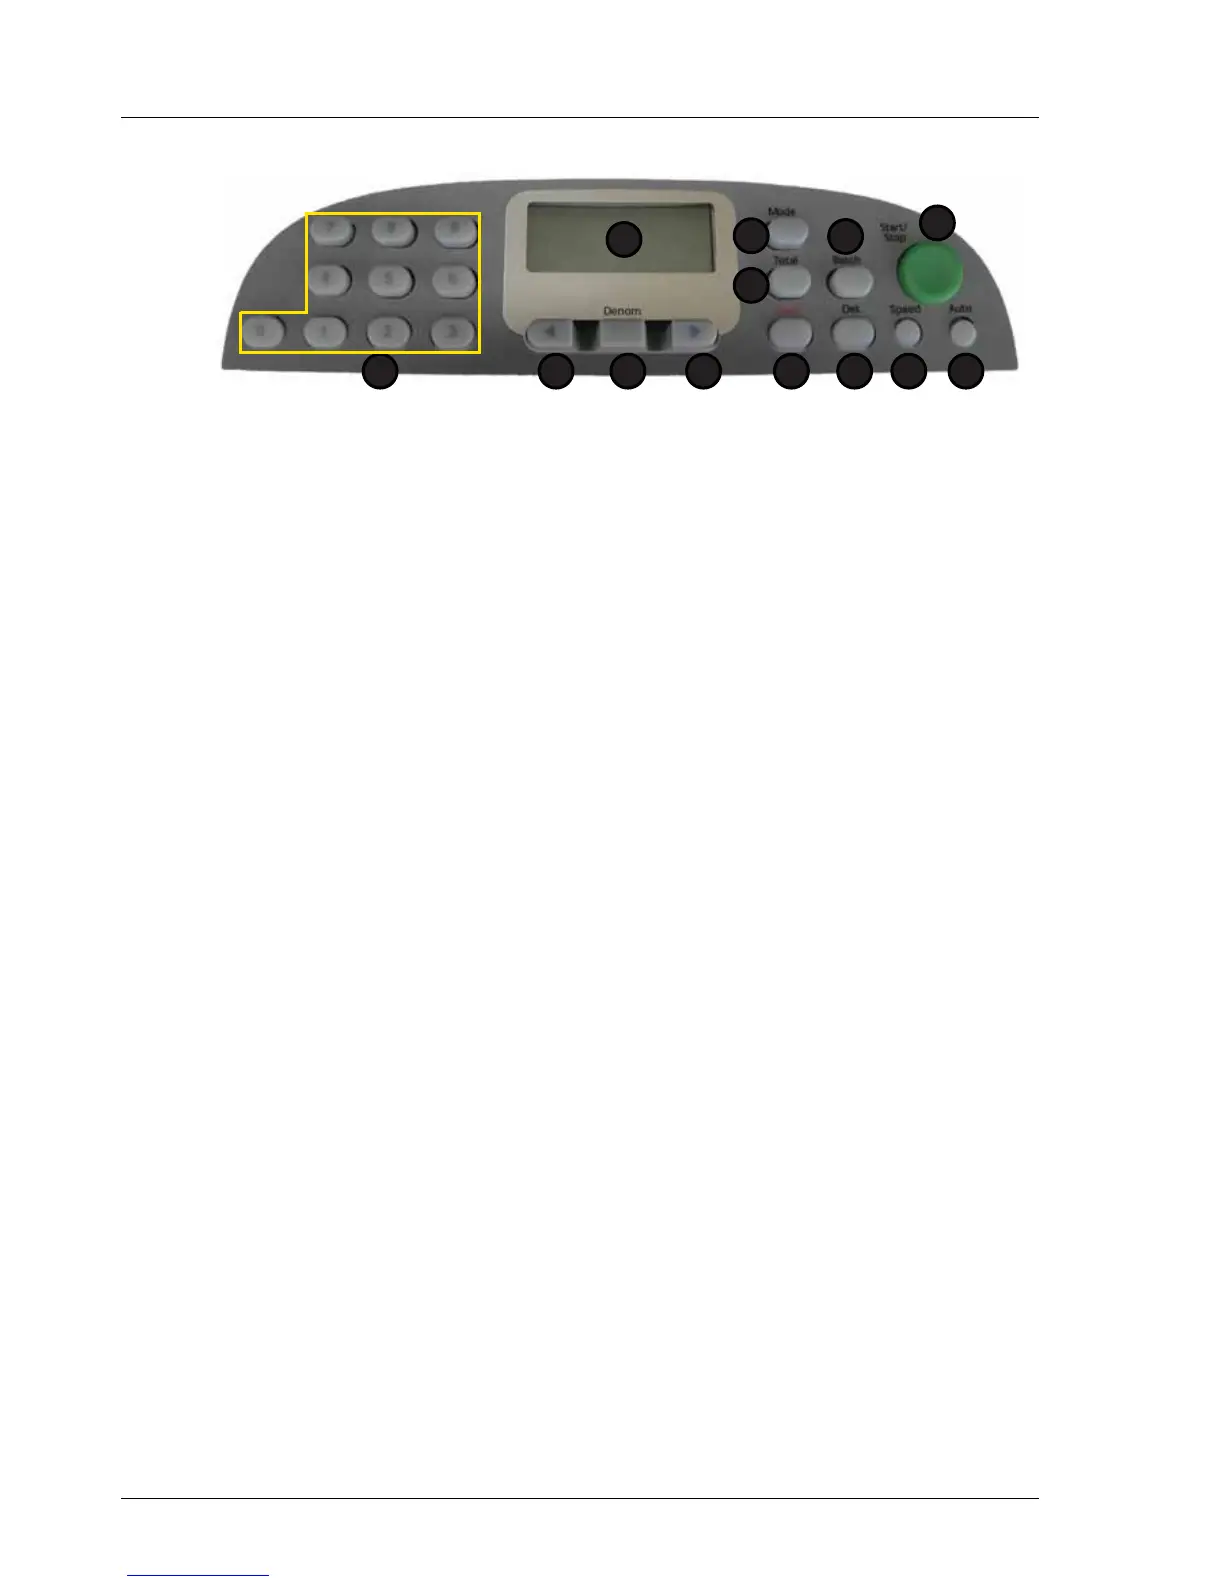
1. Display 7. Speed
2. Total 8. Det
3. Mode 9. Clear
4. Batch 10. Right Arrow
5. Start / Stop 11. Denomination
6. Auto 12. Left Arrow
13. Numeric Keypad
1
2
5
67
3
8
4
912 101113