Optional Remote Display Model: EV8650
Page 58 of 62 TP05413002 Rev. 03
Copyright © 2009 by Talaris Ltd., Basingstoke (UK)
5 Optional Remote Display
5.1 Instructions for fitting a Remote Display
I
The remote display can come with or without a mounting bracket. If you do have the
bracket, just push the connector into the corresponding section on the base of the remote
display. You can now attach the bracket with the display on it to where you require it.
If you do not have the bracket, then just place the remote display in the best position for
the customer to see it.
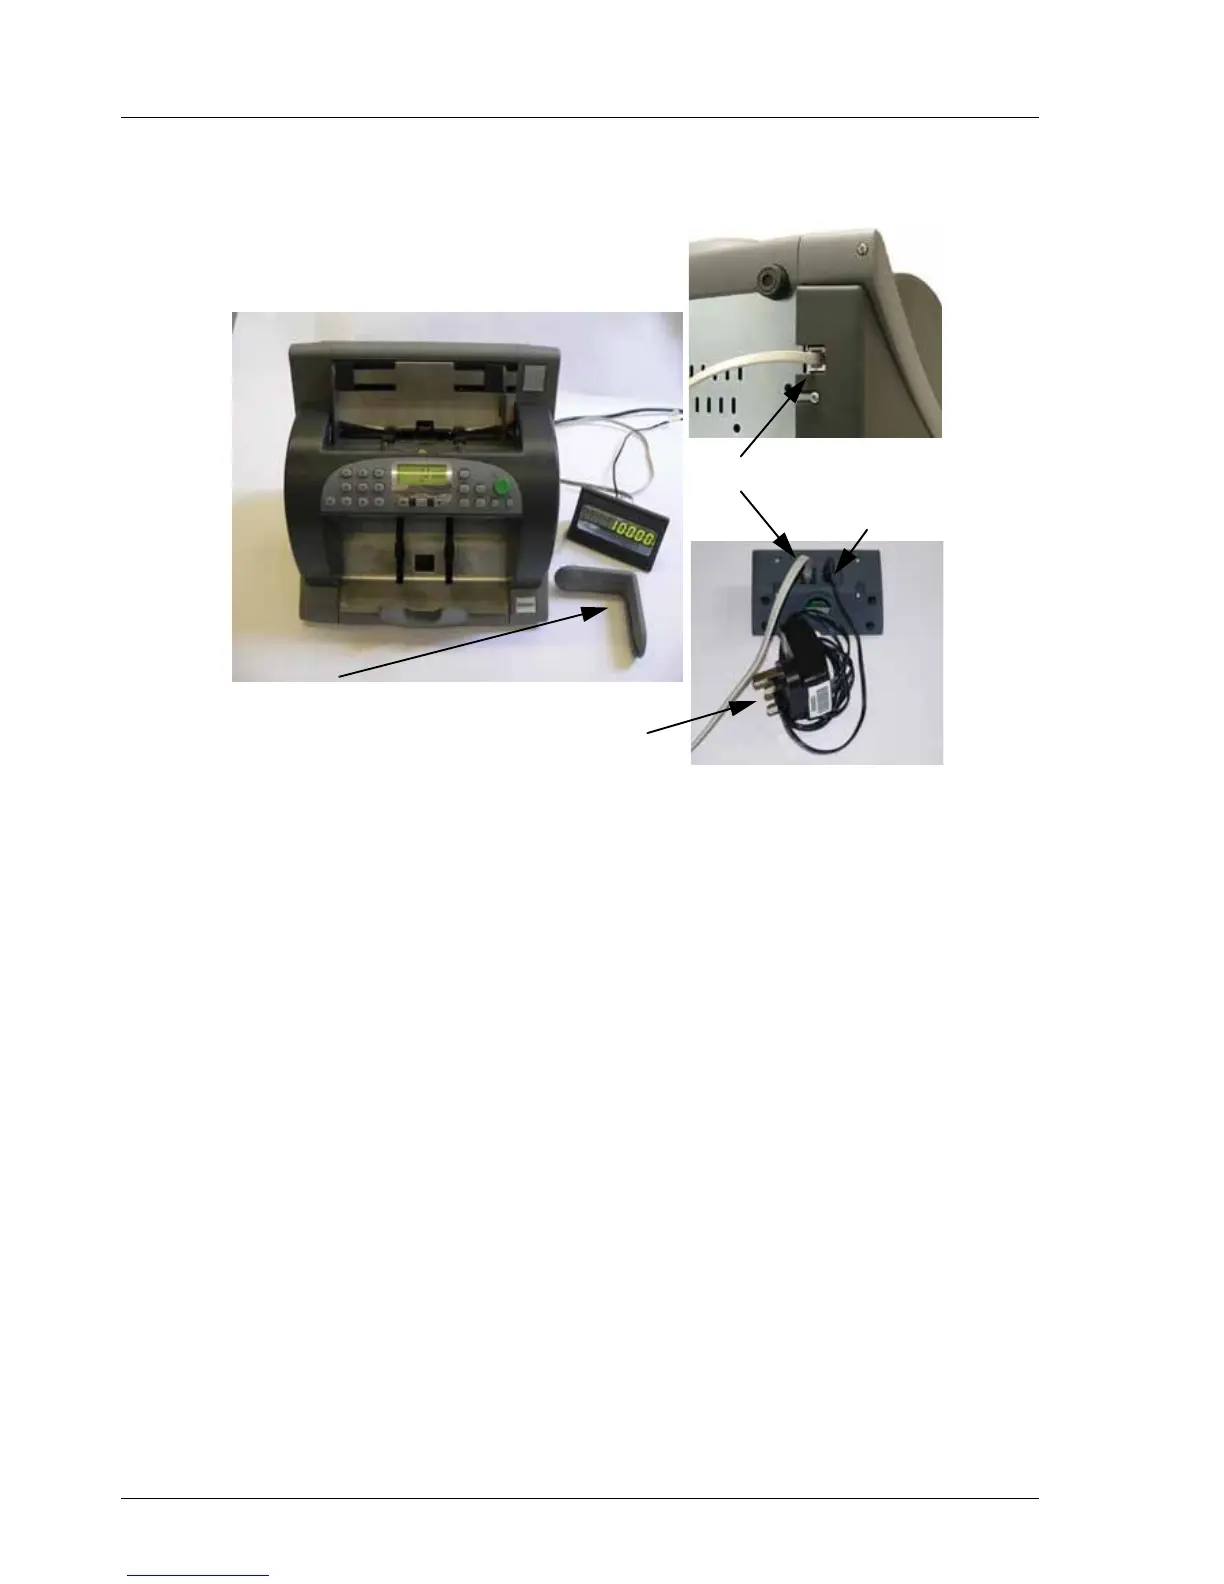
Connecting the Remote Display to the Machine.
Please make sure the EV8650 is switched off first from the main supply.
The Remote display has it’s own power supply as shown in (figure 1).
First plug in the remote display cable into the port shown in (figure 2) and also into the
back of the remote display (figure 1) above
Now plug in the DC power cable connector into the remote display (figure 1).
Now connect the remote display power supply to the line voltage.
You can now switch the machine back on.
5.2 Configuring The Remote Display
The remote display will have 8 digits and will display the notes counted in non value
count mode or will show the transaction value in value balancing mode. The remote
display will also correspond with the EV8650 display.
A factory default has been set to retain the count on the remote display, until you press
the CLEAR key or start a new transaction. If you do not want this option, you can set the
remote display to go blank after a selected time period.
It is also possible to configure the remote display to show error messages.
Cable connection points
Optional bracket
DC power input
Display power supply (Fig 1)
(Fig 3)
(Fig 2)
 Loading...