Installing the Security System
37
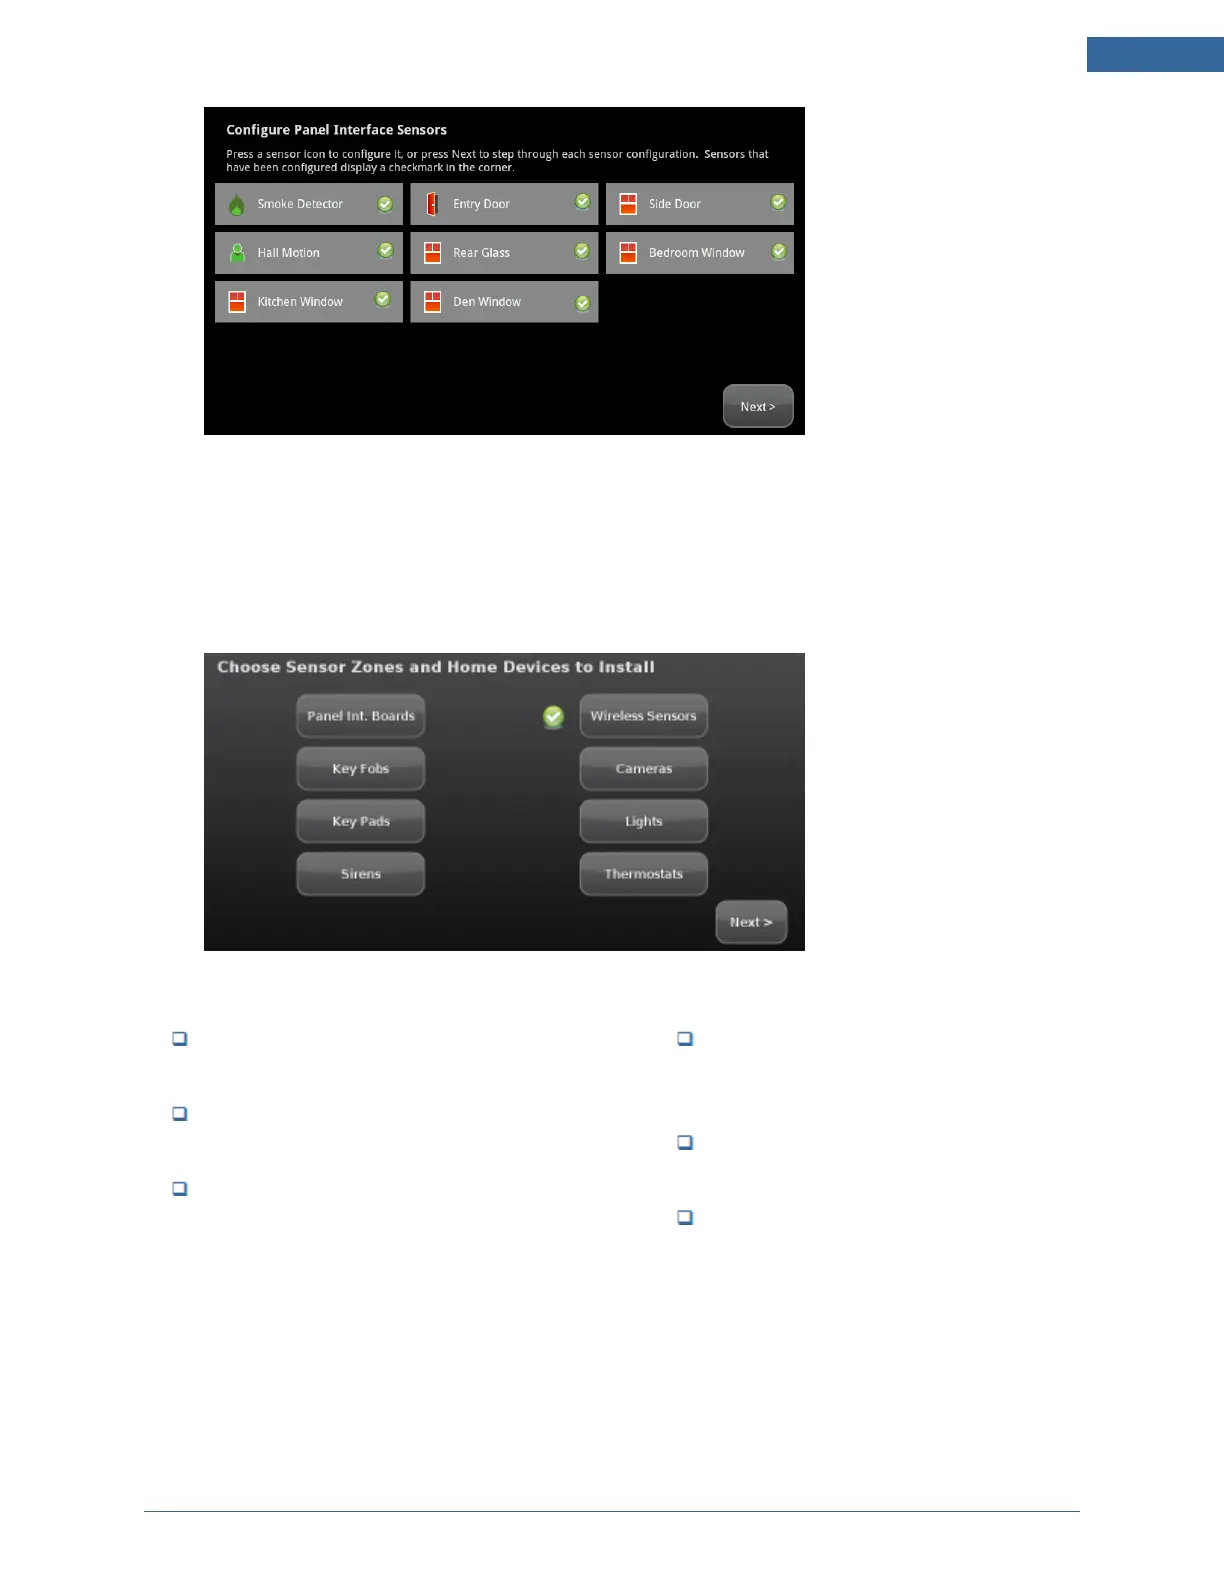
Figure 32: Sensors & Zones: Configure Wireless Sensors Screen
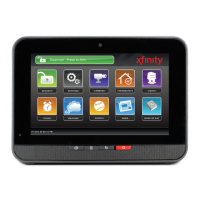
10. If all of the sensors have not been configured, the TouchScreen displays the Modify screens for
each sensor to allow you to review its details. Modify the details as needed or tap Next to cycle
through all the sensors.
The wireless sensors are marked as configured.
11. From this point you can configure any or all of the following devices:
Panel Interfaces (see Step E: Adding Panel Inter-
face Modules to the Security System on page 24)
Cameras (see Step G: Adding Cameras to the
Security System on next page)
Lights (see Step H: Adding Lighting Devices to the
Security System on page 47)
Thermostats (see Step I: Adding a Ther-
mostat to the Security System on page
50)
Key Fobs (see Step J: Adding Key Fobs to
the Security System on page 53)
Key Pads (see Step K: Adding Key Pads
to the Security System on page 57)
After all the devices are configured—or if you want to configure the devices later—tap Next to go to Step
M: Testing the Alarm Functionality of the Security System on page 65.
 Loading...