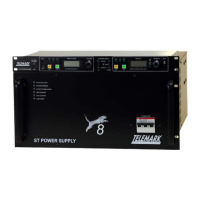
ST Series Power Supply Instruction Manual STANDARD OPERATION
telemark.com 43 of 64 Rev 1.0.0
4.3 OPERATION
Here we will discuss the proper Initial Start-up and Standard Operation procedures for
the ST Power Supply.
4.3.1 Initial Start-Up
When all connections have been made as described in Chapter 3 – INSTALLATION,
the power supply is ready for use.
Make sure that the “CONTROL SELECT” toggle switch is in center “LOCAL” position
and both “VOLTAGE” and “EMISSION” potentiometers are turned all the way down at 0
(zero).
Ensure both rear panel breakers are turned on, then apply mains power to the HVPS.
Turn on the main breaker on the front panel of the HVPS. The fan will come on, which
can be heard, the green power LED (PWR) on the controller will light up, the yellow
REG LED (Regulation) will light up, and the green interlock LEDs (for the interlocks that
are satisfied) will be lit. The two LCD meters will also turn on.
Let fan come up to speed (~10-15 seconds).
Once all interlocks are satisfied, both amber (yellow) OFF push buttons for HV and
Source will be lit which indicates the power supply is in the “Stand By” or "Ready" state.
NOTE: If the HV OFF button is still not illuminated, double check that
the ST HVPS external EPO (J5 on rear panel) is satisfied or has the
provided jumper plug installed.
When HV is ready (amber/yellow OFF push button illuminated), HV can be turned on by
pressing the green ON push button. After a short delay of less than one second the
green push button will be illuminated, indicating that HV is on.
The “REG” LED will turn off.
NOTE: If the “REG” LED is still illuminated, stop the start-up procedure.
Power off the HVPS and doublecheck all connections to the Vacuum
Chamber.
Slowly dial up the “VOLTAGE” potentiometer, watching the DC Output Voltage LCD
meter. Keep increasing HV up to the source’s operational voltage, paying attention to