8. Align the slots in the brackets with the mounting holes on the back of
the top incubator. Secure the brackets with the screws provided in the
stacking kit.
9. Make sure the hinge pins are in the hinge brackets. Slide the door onto
the hinge pins.
10. Secure the door heater cable to the connector below the door and
replace the kick plate on the top unit, taking care not to crimp cable.
11. The stacked incubators are ready for service.
Remove vinyl from shelf channels, duct sheets, and air duct, if present.
Using a suitable laboratory disinfectant, disinfect all interior surfaces
including shelves and shelf supports, door gaskets, blower wheel and CO
2
sensor. Refer to Section 5.
Caution Before using any cleaning or decontamination method except
those recommended by the manufacturer, users should check with the
manufacturer that the proposed method will not damage the equipment.
Accidental spills of hazardous materials on or inside this unit are the
responsibility of the user.
s
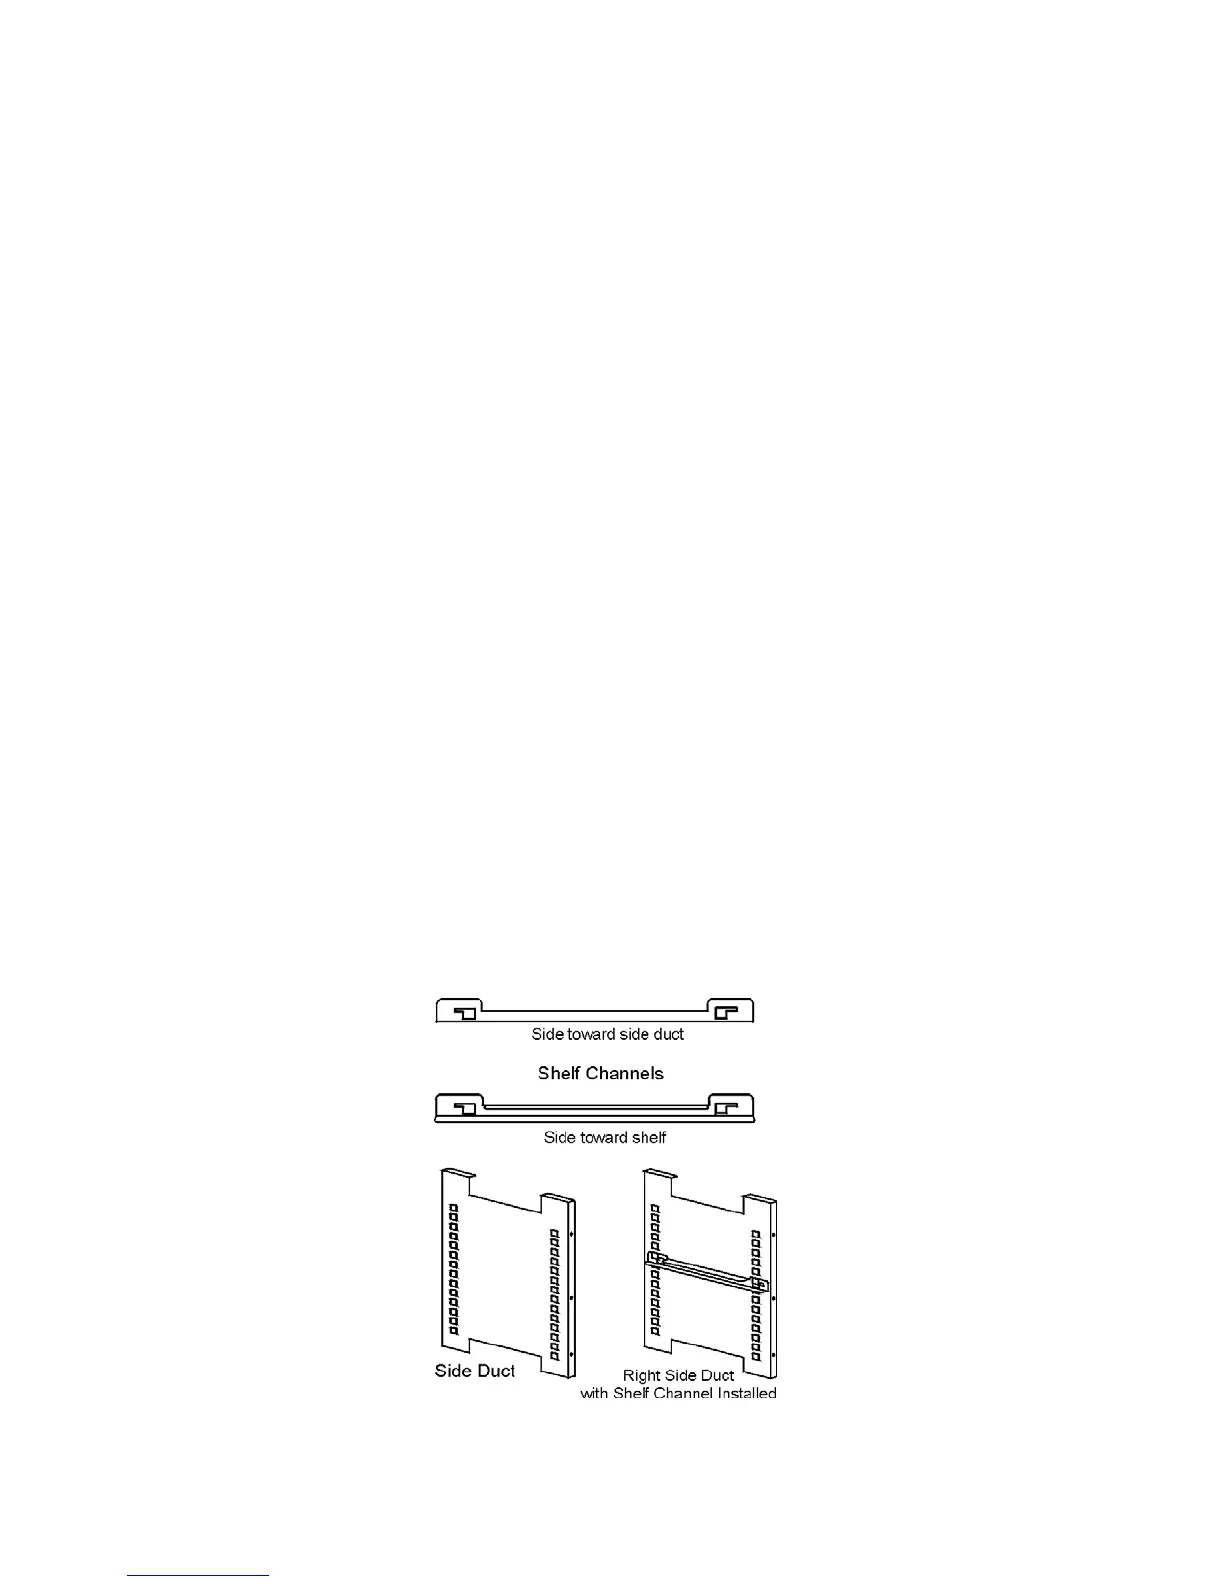
1. Install the large sheet metal shelf supports with the tabs facing into the
center of the chamber with their slots up. There are no right side or
left side supports. Simply turn one of them to fit the opposite side. Tilt
the shelf supports as they are placed in the chamber so the tops fit into
the top air duct, then guide them into the vertical position. Figure 1-7
shows the support as it would be oriented for right side of chamber.
1-6 Model 310 Series DH Incubator Thermo Scientific
Section 1
Installation and Start-Up
Preliminary Cleaning and
Disinfecting
Installing the Shelves
Figure 1-7. Shelf Channels and Ductwork
Stacking (continued)