Leveling the Unit
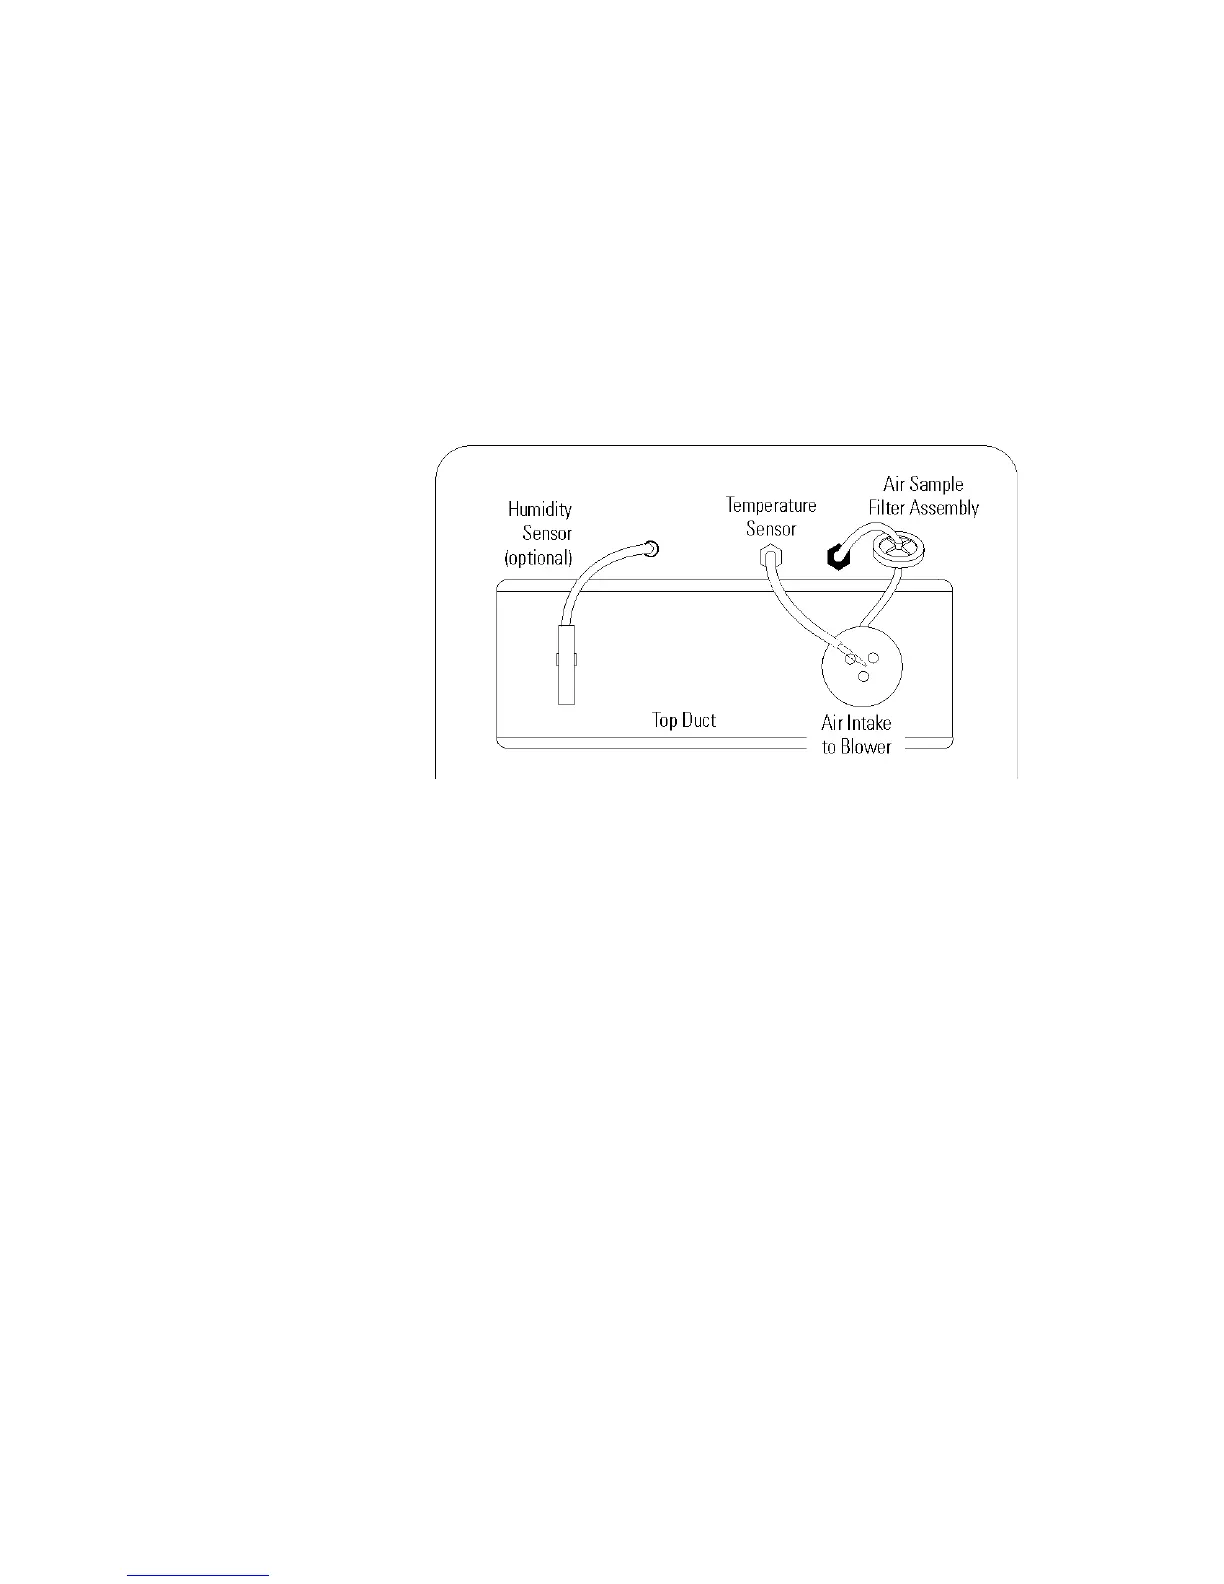
1. Remove the filter from the shipping bag.
2. Install the air sample filter assembly to the black hose barb behind the
top duct.
3. Insert the other end of the filter assembly into the larger hole in the air
intake to the blower. Refer to Figure 1-10.
4. Verify that the temperature sensor is installed into the smaller hole in
the intake, as in Figure 1-10.
Check for level by placing a bubble style level on one of the shelves. Turn
the hex nut on the leveler counterclockwise to lengthen the leg or
clockwise to shorten it. Level the unit front-to-back and left-to-right.
See the serial tag on the side of the unit for electrical specifications or refer
to the electrical schematics at the end of this manual.
Caution Connect the incubator to a grounded, dedicated circuit.
The power cord connector is the mains disconnect device for the
incubator. Position the incubator so the unit can be easily disconnected.
s
1-8 Model 310 Series DH Incubator Thermo Scientific
Section 1
Installation and Start-Up
Figure 1-10. View of Chamber Ceiling
Installing the Air Sample
Filter
Connecting the Unit to
Electrical Power