ChangingtheSuctionFilter
ServiceInterval:Every400hours
Note:Determinetheappropriatesuctionltermesh
sizethatyouneedforyourjob;refertoSelectinga
SuctionFilter(page34).
1.Parkthemachineonalevelsurface,engagethe
parkingbrake,shutoffthepump,shutoffthe
engine,andremovethekey.
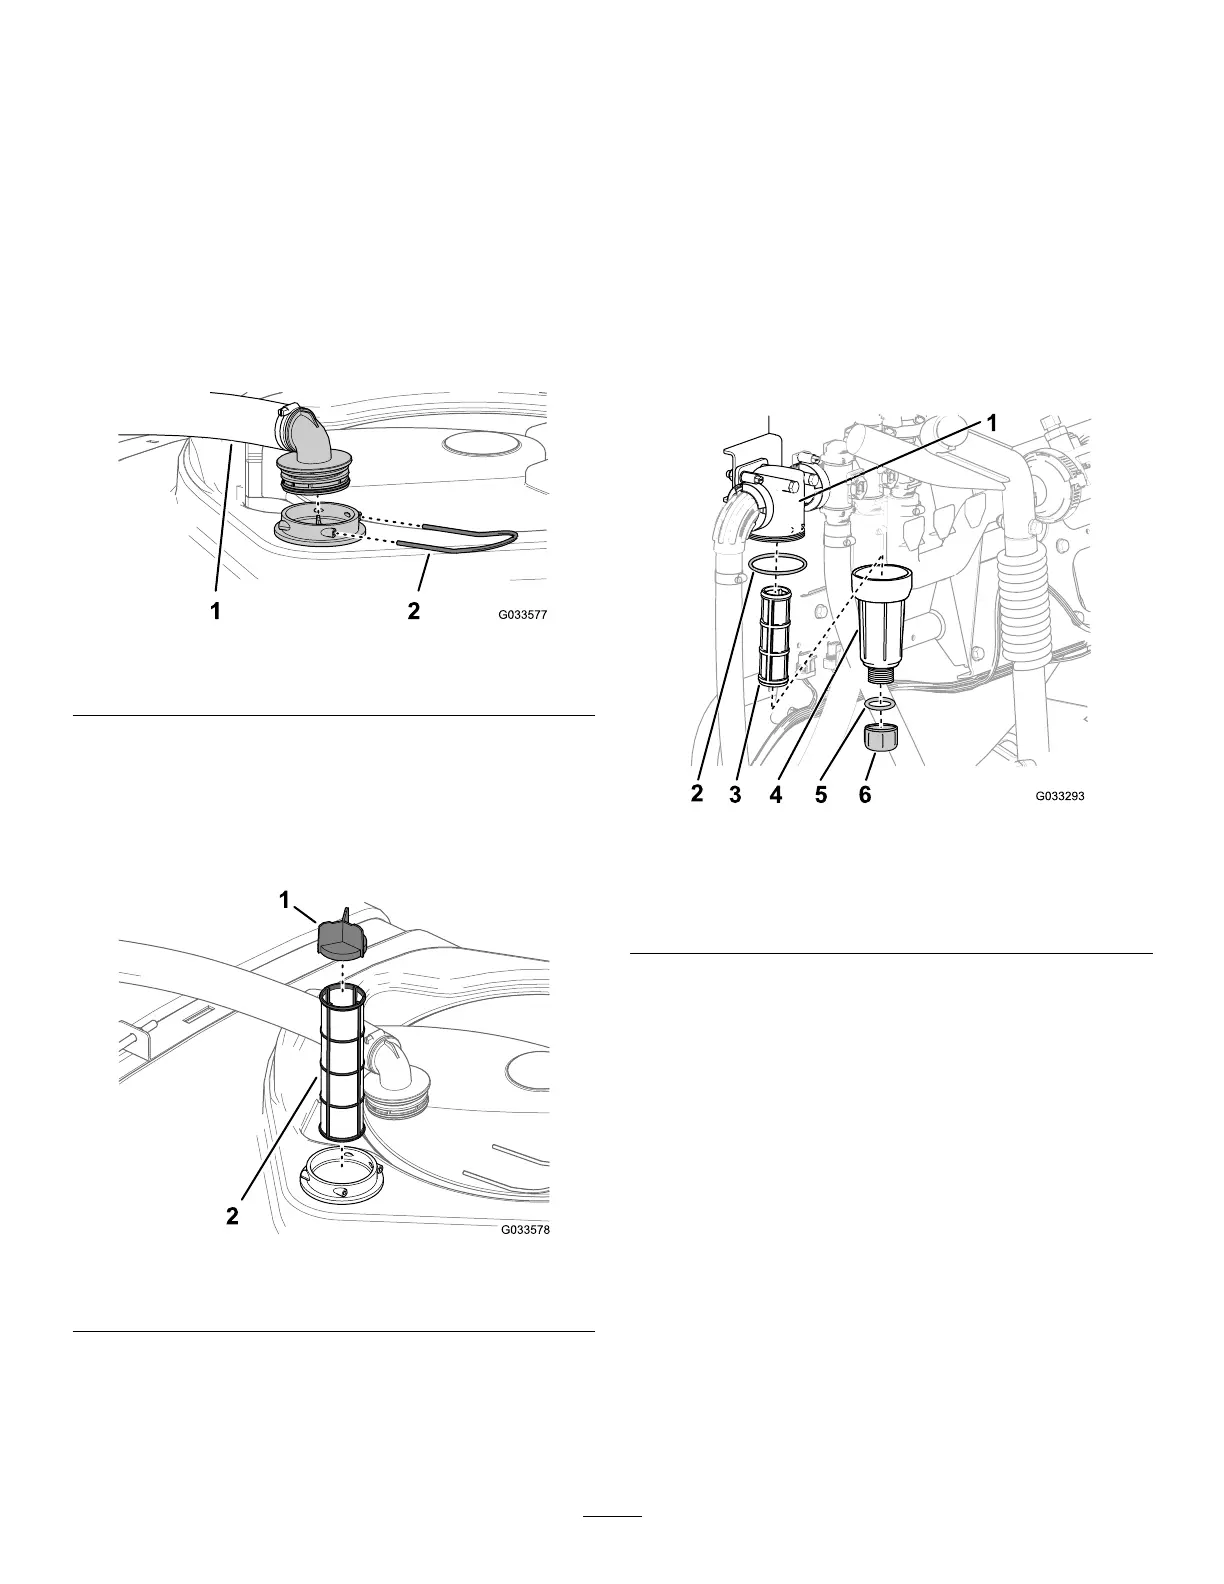
2.Atthetopofthesprayertank,removethe
retainerthatsecuresthehosettingattachedto
thelargehosefromthelterhousing(Figure53).
g033577
Figure53
1.Suctionhose
2.Retainer
3.Removethehoseandhosettingfromthelter
housing(Figure53).
4.Removetheoldsuctionlterfromthelter
housinginthetank(Figure54).
Note:Discardtheoldlter.
g033578
Figure54
1.Screenvane2.Suctionlter
5.Installthenewsuctionlterintothelterhousing.
Note:Ensurethatthelterisfullyseated.
6.Alignthehoseandhosettingtothelter
housingatthetopofthetank,andsecurethe
ttingandhousingwiththeretainerthatyou
removedinstep2.
ChangingthePressure
Filter
ServiceInterval:Every400hours
1.Movethemachinetoalevelsurface,shutoffthe
sprayerpump,shutofftheengine,andremove
thekey.
2.Alignadrainpanunderthepressurelter
(Figure55).
g033293
Figure55
1.Filterhead4.Bowl
2.O-ring(bowl)5.O-ring(drainplug)
3.Filterelement6.Drainplug
3.Rotatethedrainplugcounterclockwiseand
removeitfromthebowlofthepressurelter
(Figure55).
Note:Allowthebowltodraincompletely.
4.Rotatethebowlcounterclockwiseandremove
fromitslterhead(Figure55).
5.Removetheoldpressurelterelement(Figure
55).
Note:Discardtheoldlter.
6.ChecktheO-ringforthedrainplug(located
insidethebowl)andtheO-ringforbowl(located
insidethelterhead)fordamageandwear
(Figure55).
Note:ReplaceanydamagedorwornO-rings
fortheplug,bowl,orboth.
7.Installthenewpressurelterelementintothe
lterhead(Figure55).
54