6.Turntheeyeletrodintheactuatorrodtoshorten
orlengthentheextendedactuatortothedesired
position(Figure59).
Note:Youmustturntheeyeletrodinhalfor
completerevolutionssothatyoucanassemble
therodtotheboom.
7.Oncethedesiredpositionhasbeenachieved,
tightenthejamnuttosecuretheactuatorand
eyeletrod.
8.Raisetheboomtoalignthepivotwiththe
actuatorrod.
9.Whileholdingtheboom,insertthepinthrough
bothboompivotandactuatorrod(Figure58).
10.Withthepininplace,releasetheboomand
securethepinwiththecotterpreviously
removed.
11.Repeattheprocedureforeachactuatorrod
bearing,ifnecessary.
Cleaning
CleaningtheFlowMeter
ServiceInterval:Every200hours/Yearly(whichever
comesrst)(moreoftenwhenusing
wettablepowders).
1.Thoroughlyrinseanddraintheentirespraying
system.
2.Removetheowmeterfromthesprayerand
ushitwithcleanwater.
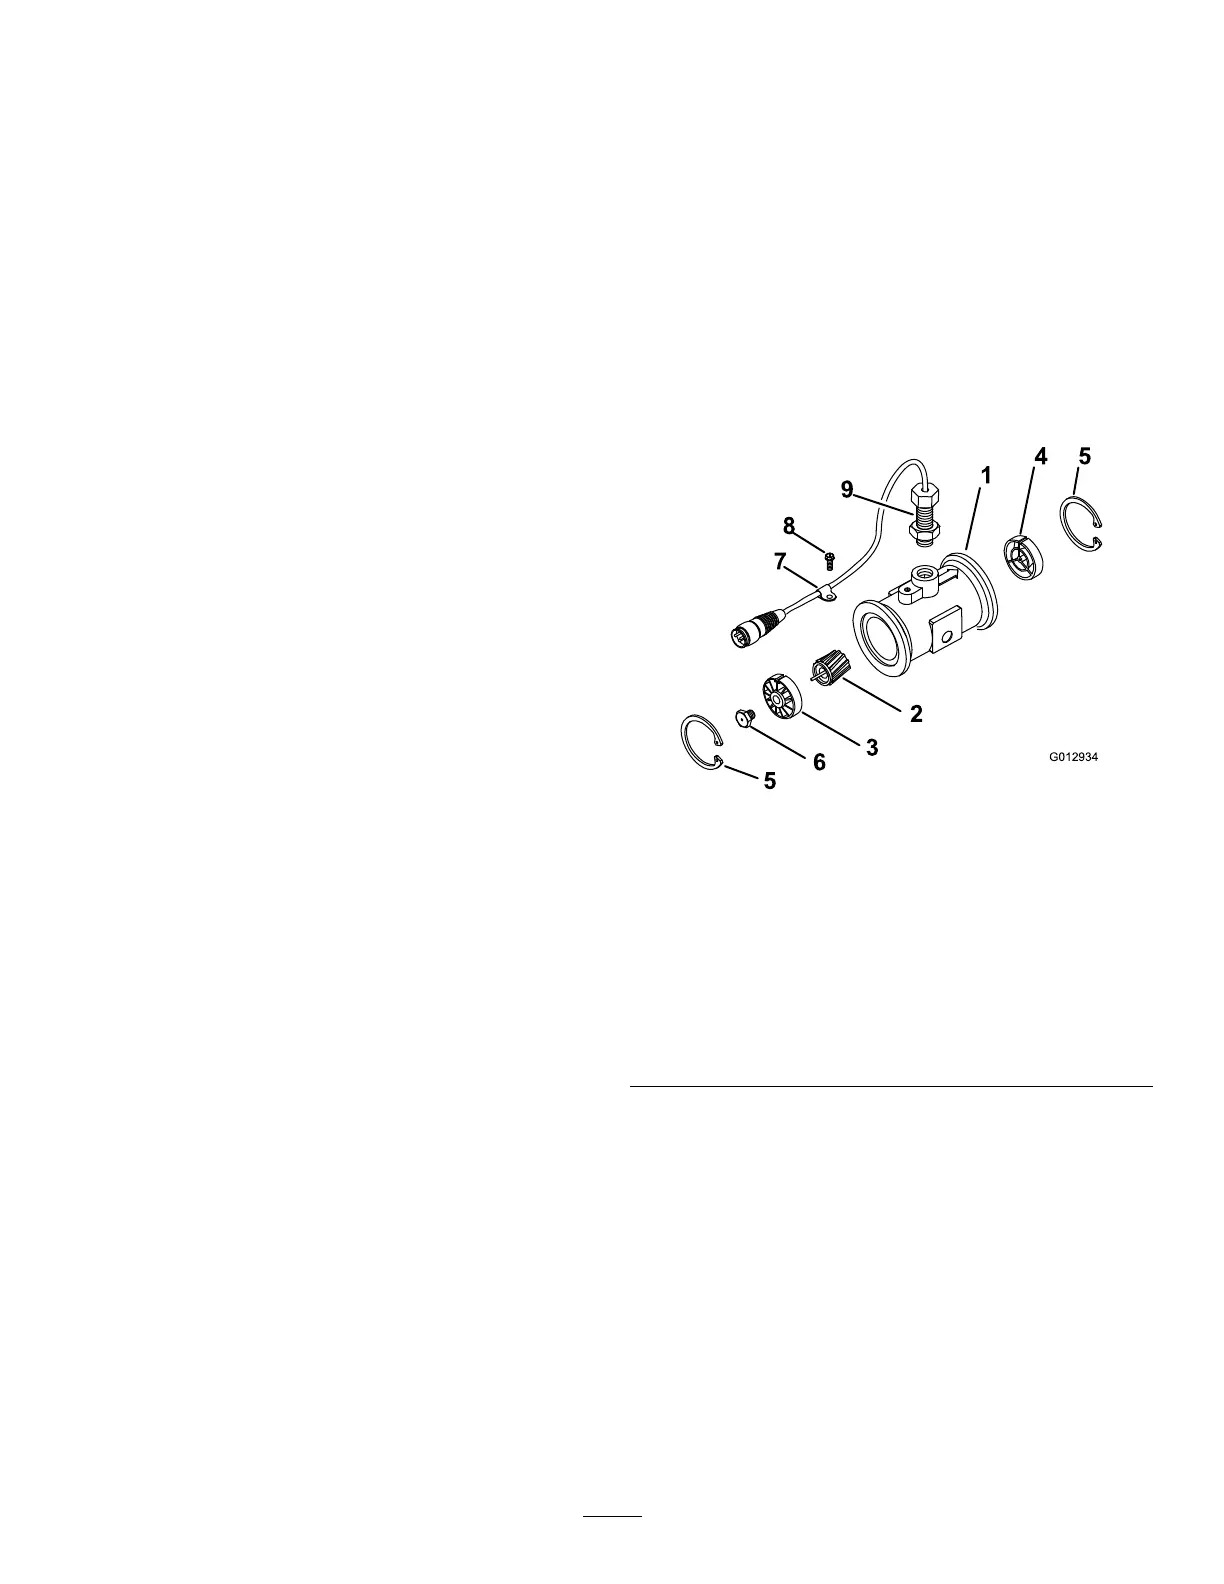
3.Removetheretainerringontheupstreamside
(Figure60).
g012934
Figure60
1.Flange(ow-meterbody)
7.Upstreamhubandbearing
(withkeywayup)
2.Downstreamhub(with
keywayup)
8.Turbinestud
3.Retainingring9.Wire-harnessclamp
4.Downstreamarrow
(ow-meterbody)
10.Flange-headscrew
5.Upstream
11.Sensorassembly
6.Rotor/magnet
4.Cleantheturbineandtheturbinehubtoremove
metallingsandanywettablepowders.
5.Inspecttheturbinebladesforwear.
Note:Holdtheturbineinyourhandandspin
it.Itshouldspinfreelywithverylittledrag.Ifit
doesnot,replaceit.
6.Assembletheowmeter.
7.Usealowpressure(50kPaor5psi)airjetto
ensurethattheturbinespinsfreely.
Note:Iftheturbinedoesnotspinfreely,loosen
thehexstudonthebottomoftheturbinehubby
1/16ofaturnuntilitdoesspinsfreely.
57