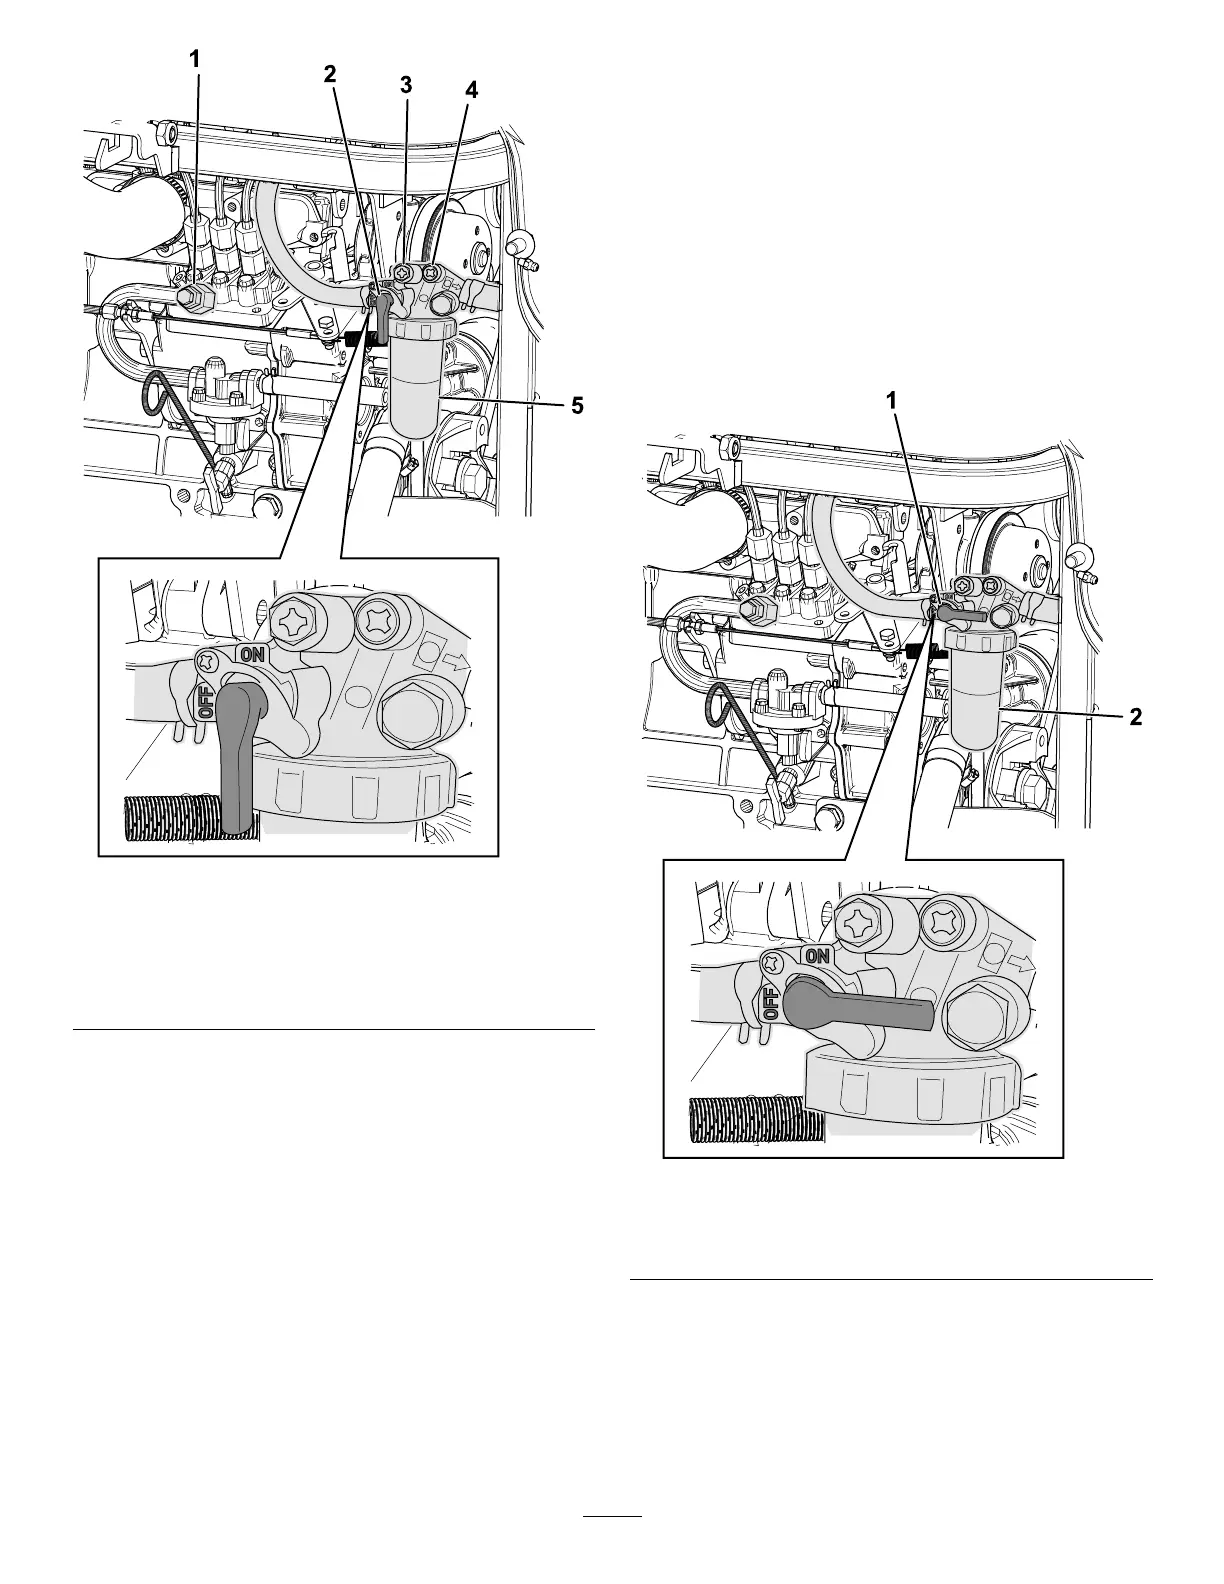
g435357
Figure 58
1. Engine air-bleed screw
4. Second air-bleed screw
2. Fuel lter lever in the O N
position
5. Fuel lter
3. First air-bleed screw
Note: The engine should start after you perform
this procedure. However , if the engine does not
start, air may be trapped between the injection
pump and the injectors. Contact your authorized
T oro distributor .
14. Wipe clean any fuel that has accumulated
around the injection pump.
Replacing the Fuel-Filter
Element
Service Interval : Every 400 hours —Replace the
fuel-lter element.
1. Clean the area around the fuel-lter ( Figure 59 ).
2. Rotate the fuel lter lever to the O FF position
( Figure 59 ).
3. Remove the lter and clean the lter-mounting
surface ( Figure 59 ).
4. Lubricate the lter gasket with clean fuel.
5. Assemble the lter element onto the lter
assembly .
6. Assemble the lter bowl and bowl nut onto the
lter head and tighten the nut by hand
7. Rotate the fuel lter lever to the O N position
( Figure 58 ).
g435358
Figure 59
1. Fuel lter lever in the O FF
position
2. Fuel lter
8. Prime the fuel system; refer to Bleeding the Fuel
System ( page 52 ) .
Note: Repair all fuel leaks before operating the
machine.
53