Belt Maintenance
Checking the Condition of
the Alternator Belt
Service Interval : Every 200 hours
Check alternator belt for wear or damage.
Note: Replace the alternator belt if you nd it worn
or damaged.
T ensioning the Alternator
Belt
Service Interval : After the rst 10 hours
Every 200 hours
1. Park the machine on a level surface.
2. Disengage the PT O, lower the cutting unit, and
engage the parking brake.
3. Shut of f the engine and remove the key .
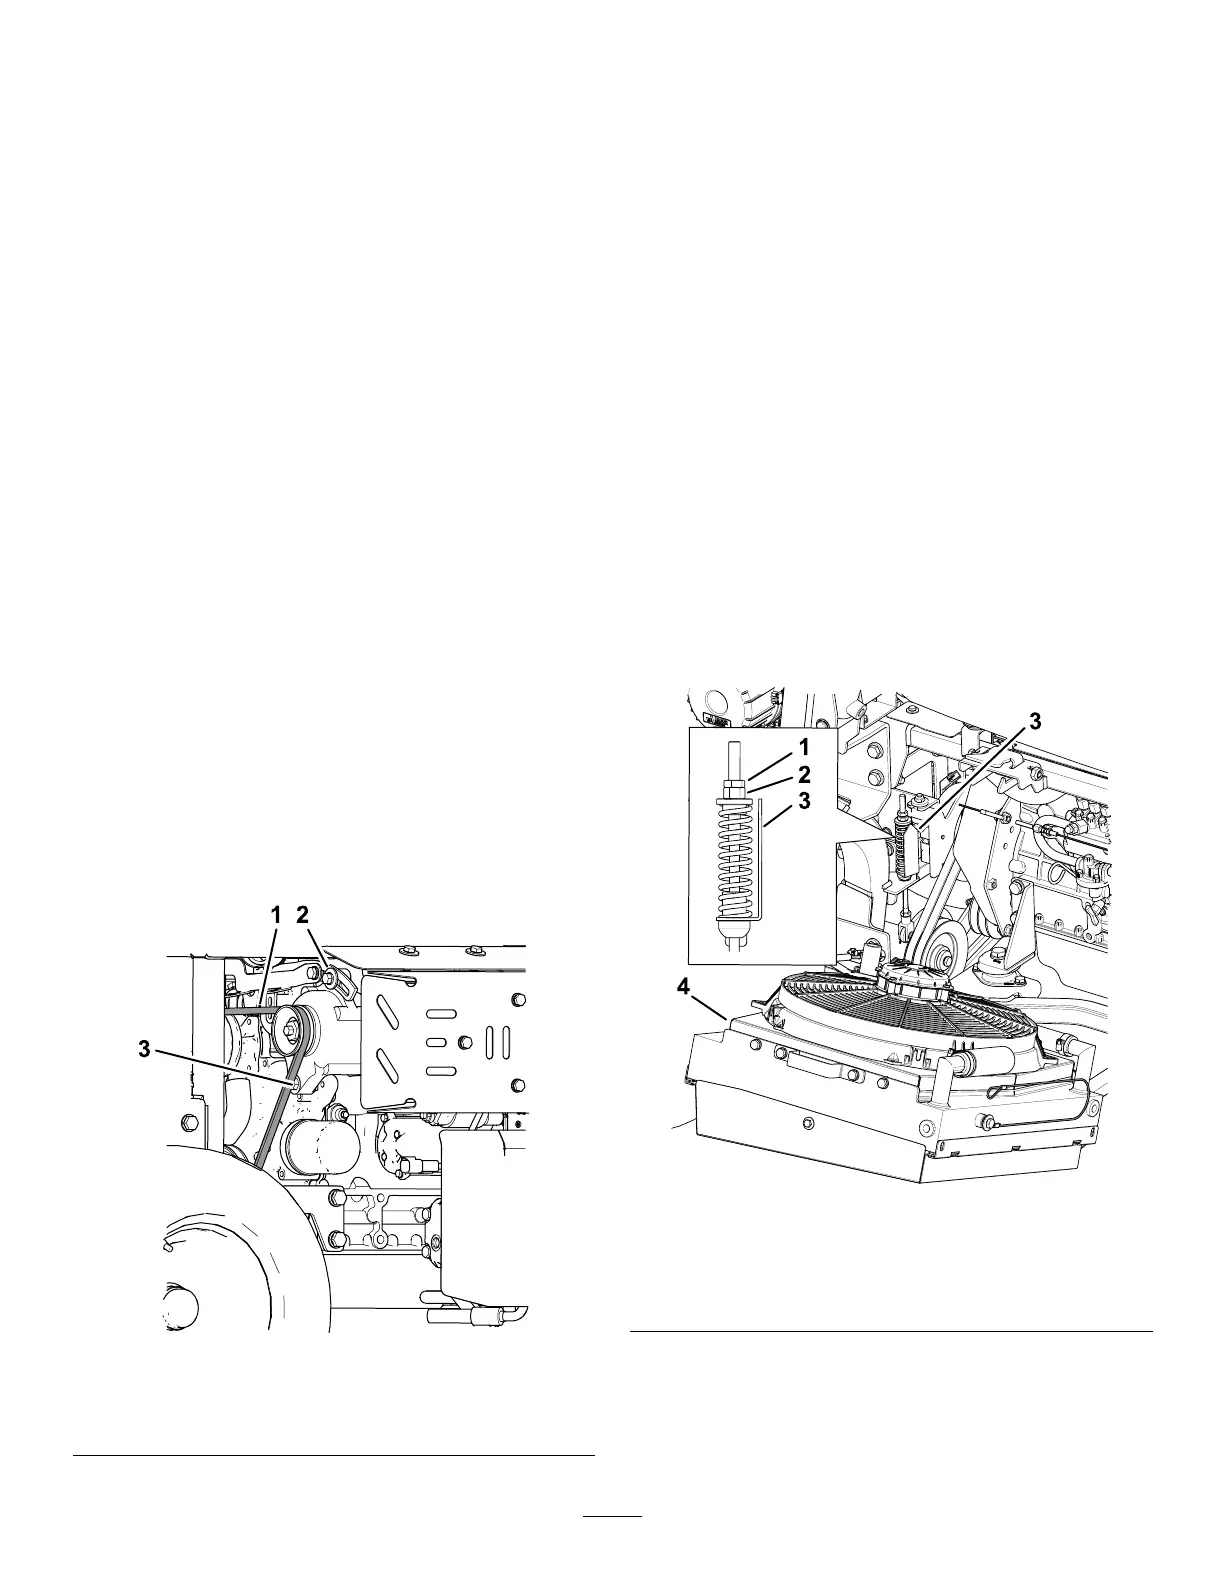
4. Loosen the alternator pivot bolt and lock bolt
( Figure 76 ).
5. T ension the alternator belt until you achieve 10
mm (3/8 inch) belt deection midway between
the pulleys with a force of 4.5 kg (10 lb).
6. T ighten the alternator lock bolt ( Figure 76 ).
7. T ighten the alternator pivot bolt ( Figure 76 ).
g435746
Figure 76
1. Alternator belt 3. Alternator pivot bolt
2. Alternator lock bolt
Servicing the PT O Belts
Checking the PT O Belt T ension
Service Interval : After the rst 10 hours —Check the
tension of the PT O belt.
After the rst 50 hours —Check the tension of
the PT O belt.
Every 200 hours —Check the condition of and
tension of the PT O belt.
1. Park the machine on a level surface.
2. Disengage the PT O, lower the cutting unit, and
engage the parking brake.
3. Shut of f the engine and remove the key .
4. Look at the tension-indicator arrow of the
idler-pulley tensioner .
The outer surface of the washer should align
with the tension-indicator arrow
5. If needed, rotate the nut for the idler-pulley
tensioner until the tension-indicator arrow aligns
with the outer surface of the washer ( Figure 77 ).
g435745
Figure 77
1. Jam nut 4. Belt-tensioning spring
2. Nut 5. W asher
3. T ension-indicator arrow 6. Radiator
Replacing the PT O Belts
Important: Replace the PT O belts as a matched
set.
63