Removing the PT O Belts
1. Park the machine on a level surface.
2. Disengage the PT O, lower the cutting unit, and
engage the parking brake.
3. Shut of f the engine and remove the key .
4. Access the left side and top of the engine; refer
to Accessing the Engine from the Engine-Access
Cover ( page 47 ) and Accessing the Engine from
the Left Side ( page 48 ) .
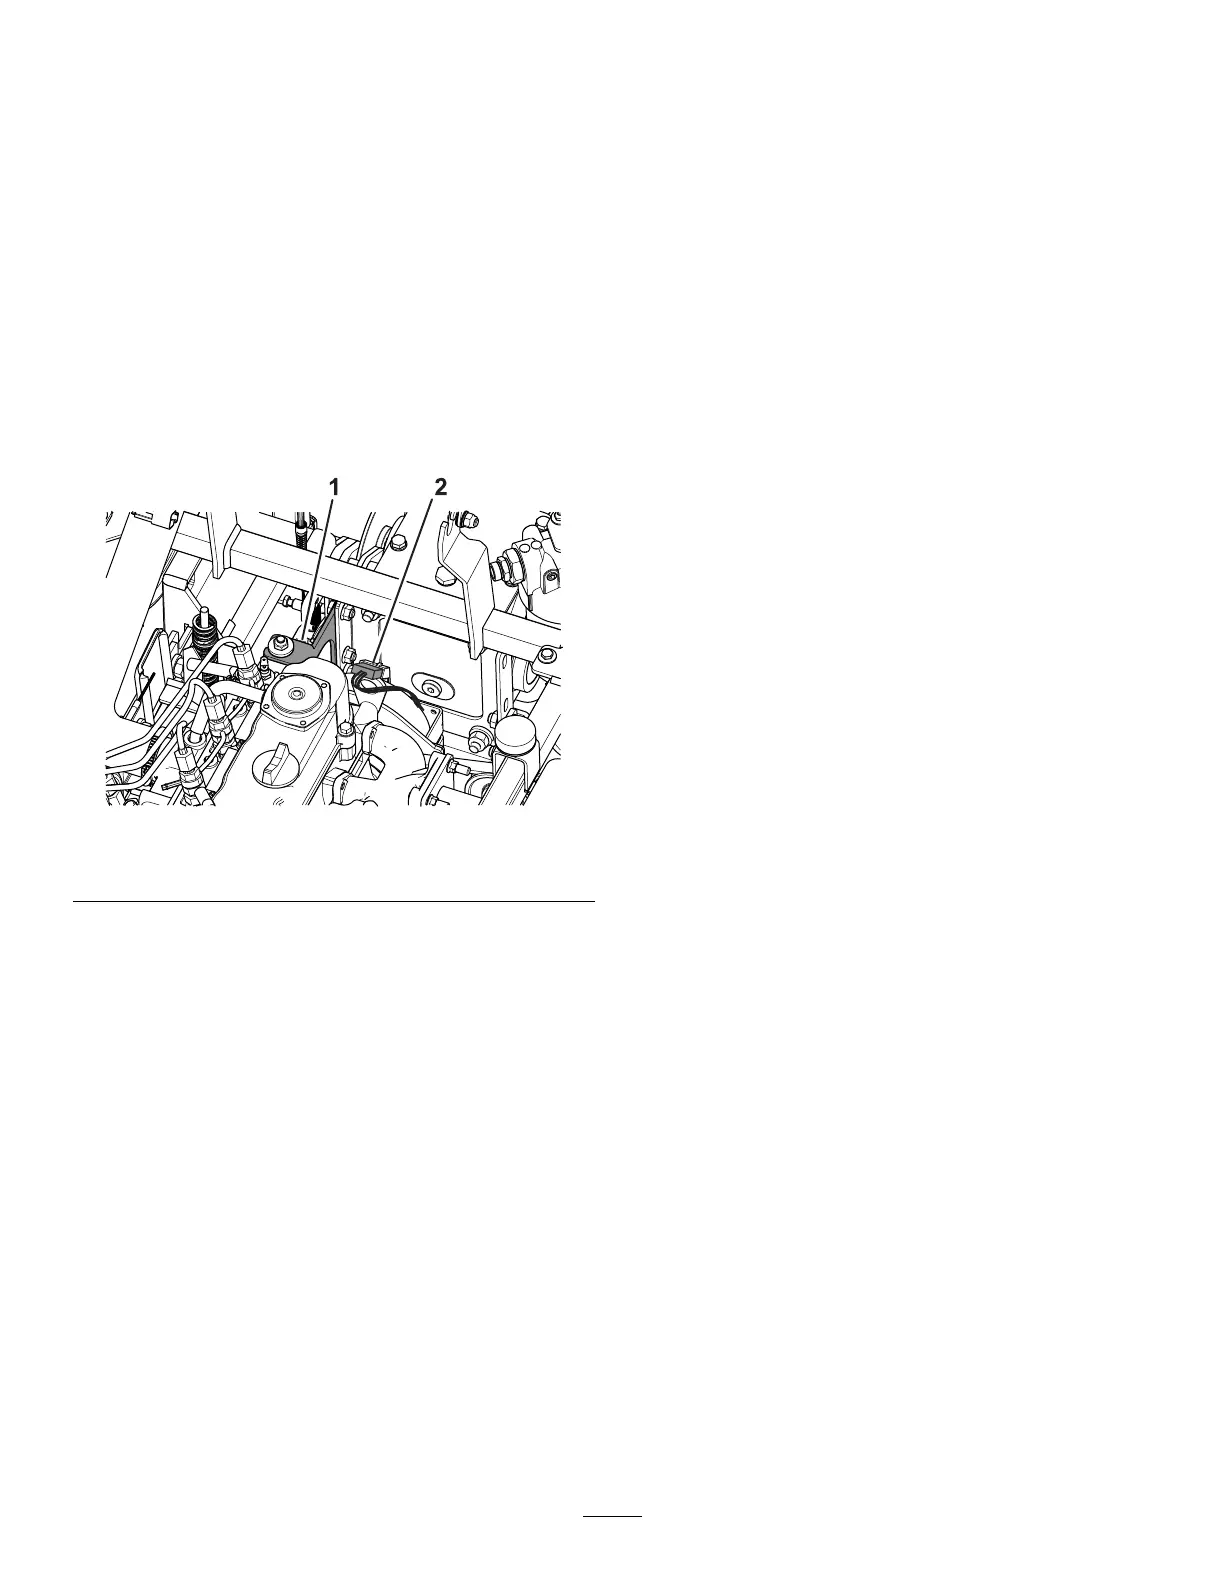
5. Disconnect the wire connector for the clutch
( Figure 78 ).
6. Remove the 3 bolts and 3 nuts that secure the
clutch bracket to the frame and clutch ( Figure
78 ).
g435871
Figure 78
1. Clutch bracket
2. Wire connector
7. Loosen the nut for the idler-pulley tensioner;
refer to Checking the PT O Belt T ension ( page
63 ) .
8. Move the idler pulley upward and remove the
belts from the machine ( Figure 77 ).
Installing the PT O Belts
1. Align the be PT O belts over the pulleys ( Figure
77 ).
2. Install the clutch bracket to the frame and clutch
with the previously removed bolts and nuts; refer
to Removing the PT O Belts ( page 64 ) .
3. T ighten the nut for the idler-pulley tensioner;
refer to Checking the PT O Belt T ension ( page
63 ) .
4. Close the radiator to the machine; refer to
Accessing the Engine from the Left Side ( page
48 ) .
64