Adjusting the Height-of-Cut
Pointer
1. With the mower blades aligned front to back and
the front of the blades adjusted to 64 mm (2-1/2
inch) from the ground, check the position of the
height-of-cut indicator .
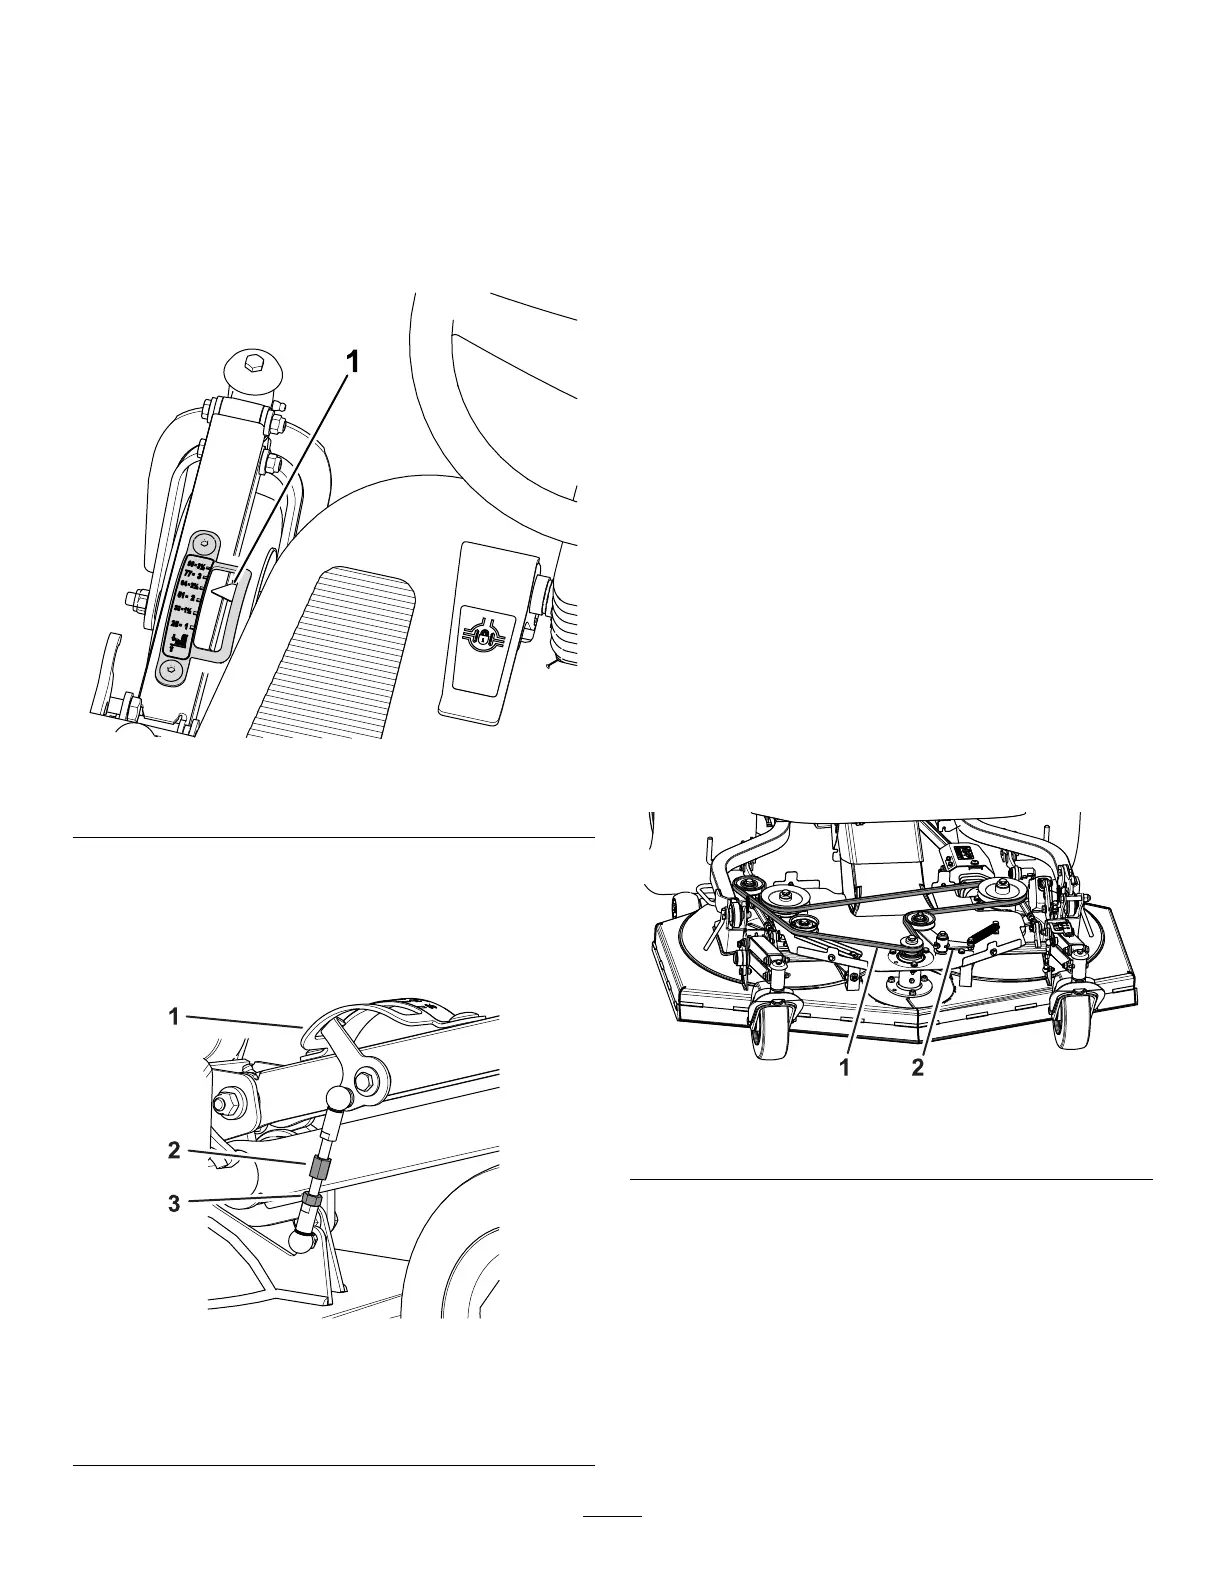
2. Sit in the operator ’ s seat and look at the pointer
of the height-of-cut indicator ( Figure 104 ).
g474738
Figure 104
1. Height-of-cut indicator [64 mm (2-1/2 inch)]
3. If the pointer of the height-of-cut indicator is not
aligned to 64 mm (2-1/2 inch) mark, perform
the following:
A. Loosen the jam nut that secures the
height-of-cut link ( Figure 105 ).
g435868
Figure 105
1. Pointer (height-of-cut
indicator)
3. Jam nut
2. Height-of-cut link
B. Rotate the link until the pointer of the
height-of-cut indicator is aligned to 64 mm
(2-1/2 inch) mark when viewed from the
operator ’ s seat ( Figure 104 and Figure 105 ).
C. T ighten the jam nut ( Figure 105 ).
Replacing the Cutting Unit
Belt
Removing the Cutting Unit Belt
1. Park the machine on a level surface, disengage
the PT O, and lower the cutting unit.
2. Engage the parking brake, shut of f the engine,
and remove the key .
3. Remove the belt cover; refer to Removing the
Belt Cover ( page 73 ) .
4. Remove the idler arm spring from the cutting
unit post ( Figure 106 ).
5. Remove the belt from the pulleys of the cutting
unit.
Installing the Cutting Unit Belt
1. Route the new belt around the pulleys as shown
in Figure 106 .
g433222
Figure 106
1. Belt 2. Idler arm
2. Install the idler arm spring onto the cutting unit
post ( Figure 106 ).
3. Install the belt cover; refer to Installing the Belt
Cover ( page 73 ) .
78