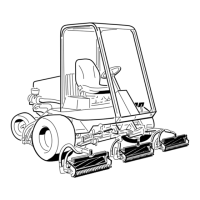
RemovingtheHydraulicTank
1.Parkthemachineonalevelsurface,lowerthecuttingunits,shutoffthe
engine,settheparkingbrake,andremovethekeyfromthekeyswitch.
2.Cleanthehydraulichoseendsandttingsonthehydraulictanktoprevent
contaminantsfromenteringintothehydraulicsystem.
3.Forassemblypurposes,labelallthehydraulichosesandttings.
4.Disconnectthehydraulichose(item16inFigure144)fromtheadaptertting
atthebottomofthehydraulictank,anddrainthehydraulicuidfromthe
tankintoasuitablecontainer.
5.Removetheremaininghydraulichosesfromthettingsonthehydraulictank
anddrainthehosesintoasuitablecontainer.
6.Installcleancapsorplugsonthehydraulichosesandttingstoprevent
systemcontamination.
7.Removethehydraulictankfromthemachine(Figure144).
8.Removethetankstrainer(item4inFigure144)fromthehydraulictankand
discardtheO-ringfromthetankstrainer.
9.Ifthehydraulicttingsaretoberemovedfromthehydraulictank,markthe
ttingorientationforassemblypurposes.Removethettingsfromthetank
anddiscardtheO-ringsfromthettings.
InspectingtheHydraulicTank
1.Cleanthehydraulictankandtankstrainerwithsolvent.
2.Inspectthehydraulictankforleaks,cracks,orotherdamage.
InstallingtheHydraulicTank
1.Ifthehydraulicttingswereremovedfromthehydraulictank,lubricateand
installnewO-ringstothettings.Toproperlyalignandinstallthettingsinto
thetankopenings,usethemarksthatyoumadeduringtheremovalprocess.
Tightenthettings;refertoInstallingtheHydraulicFittings(SAEStraight
ThreadO-RingFittingintotheComponentPort)(page6–13).
2.LubricateandinstallnewtankstrainerO-ringontothestrainer.Threadthe
tankstrainerintothehydraulictankwithyourhand.Then,useawrench,turn
thestrainerintothetankport1-1/2to2fullturnsbeyondngertight.
3.Positionthehydraulictanktothemachine.Ensurethattherecessbumper
(item13inFigure144)ontherightsideoftheframeisinsertedintothe
recessinthetank.
4.Securethehydraulictanktotheframewiththe2clamps(item20inFigure
144),2washer-headscrews,and2angenuts.
5.Removethecapsorplugsthatwereinstalledtothehydraulichosesand
ttingsduringtheremovalprocess.
6.Usethelabelsthatyouattachedduringtankremovaltocorrectlyconnect
thehydraulichosestothettingsonthehydraulictank;refertoInstallingthe
HydraulicHoseandTube(O-RingFaceSealFitting)(page6–11).
7.Fillthehydraulictankwiththecorrectquantityofnewhydraulicuid.
8.Operatethemachine.Checkthehydraulic-uidlevelandadjustifnecessary.
9.Checkthehydrauliccomponentsforleaks.Tightenanylooseconnections.
Reelmaster
®
5410/5510/5610Series
Page6–155
HydraulicSystem:ServiceandRepairs
15216SLRevC

 Loading...


