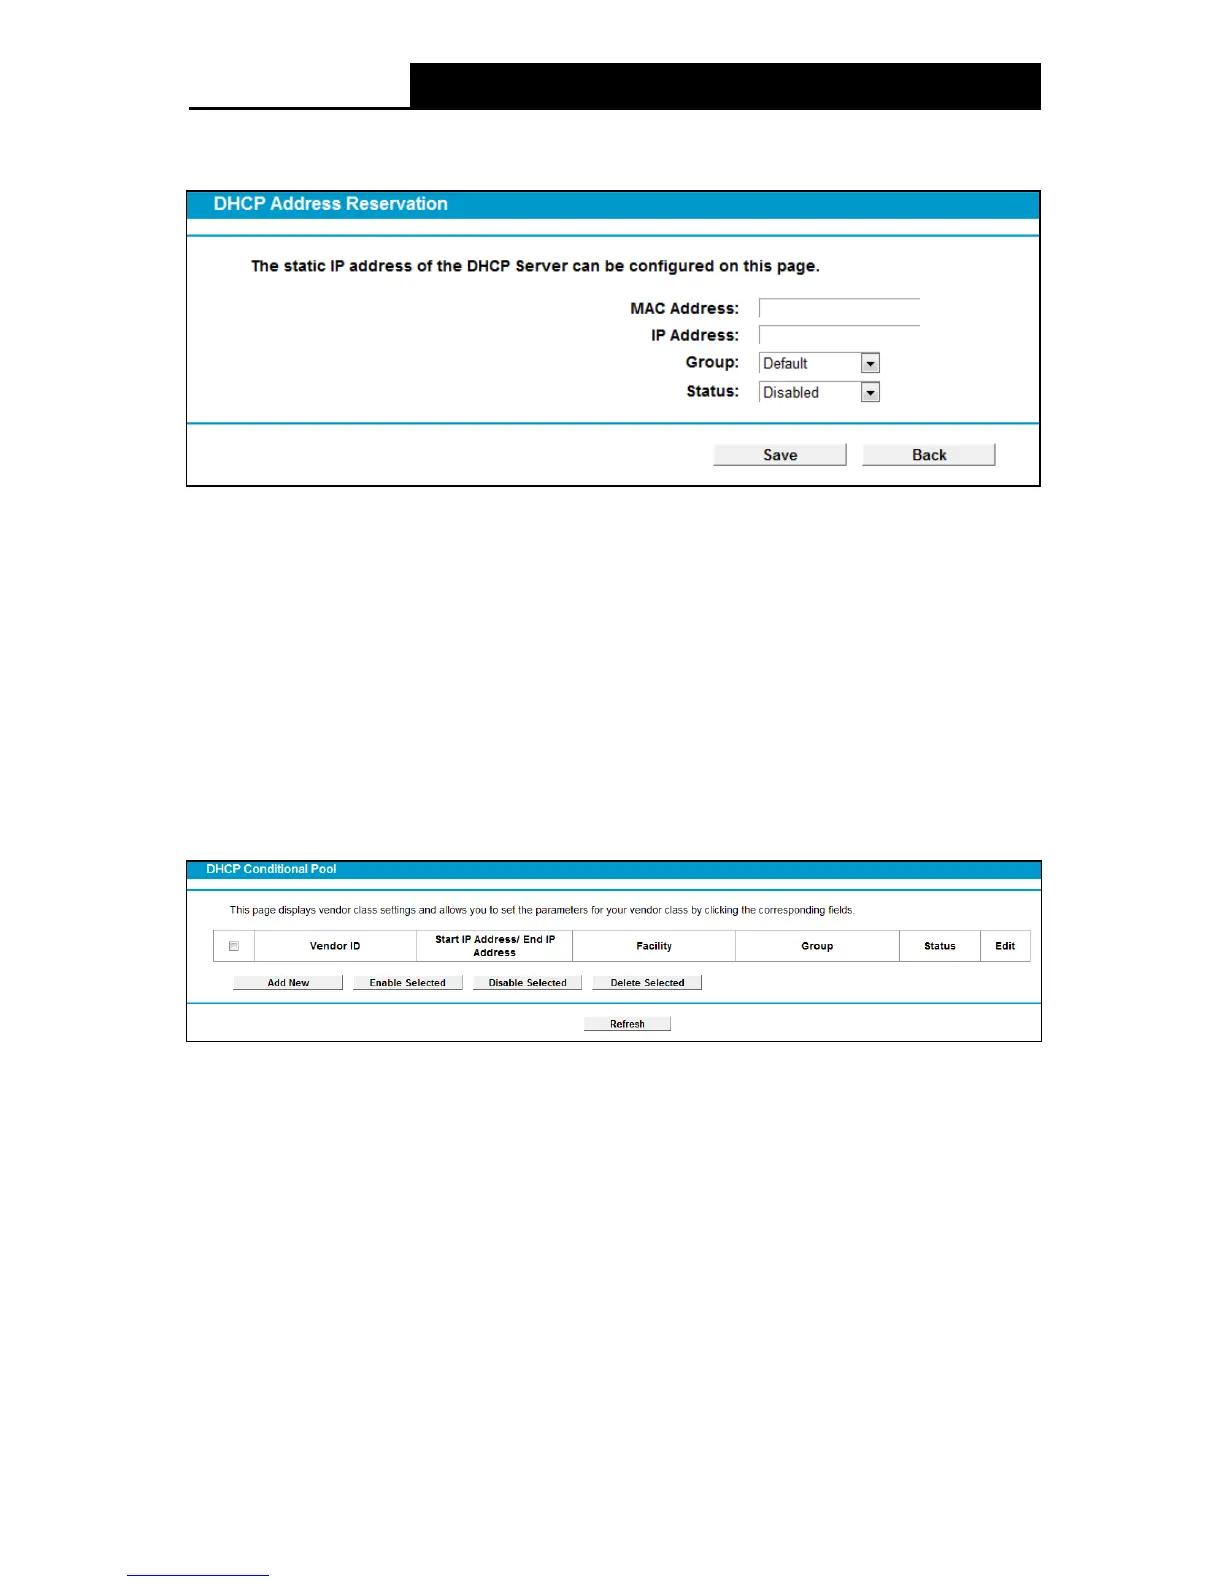
56
notation) of the computer for which you want to reserve an IP address.
3. Click the Save button.
Figure 4-41
To modify or delete an existing entry:
1. Click the Edit in the entry you want to modify. If you want to delete the entry, click the De lete .
2. Modify the information.
3. Click the Save button.
Click the Enable/Disable Selected button to make selected entries enabled/disabled.
Click the Delete Selected button to selected entries.
4.7.4 Conditional Pool
Choose menu “DHCP Server”“Conditional Pool”, you can see the next screen (shown in
Figure 4-42). This page displays vendor class settings and allows you to set parameters for
vendor class by clicking corresponding buttons.
Figure 4-42
To add a vendor class:
1. Click the Add New button. Then Figure 4-43 will pop up.
2. Enter parameters for the vendor class.
Click the Sav e button.
 Loading...