WPS: Enable or disable the WPS function here.
Current PIN: The current value of the GPON router's PIN is displayed here. The default PIN
of the GPON router can be found in the label or User Guide.
Restore PIN: Restore the PIN of the GPON router to its default.
Gen New PIN: Click this button, and then you can get a new random value for the GPON
router's PIN. You can ensure the network security by generating a new PIN.
Add device: You can add a new device to the existing network manually by clicking this
button.
b). To add a new device:
If the wireless adapter supports Wi-Fi Protected Setup (WPS), you can establish a wireless
connection between wireless adapter and GPON router using either Push Button Configuration
(PBC) method or PIN method.
Note:
To build a successful connection by WPS, you should also do the corresponding configuration of
the new device for WPS function meanwhile.
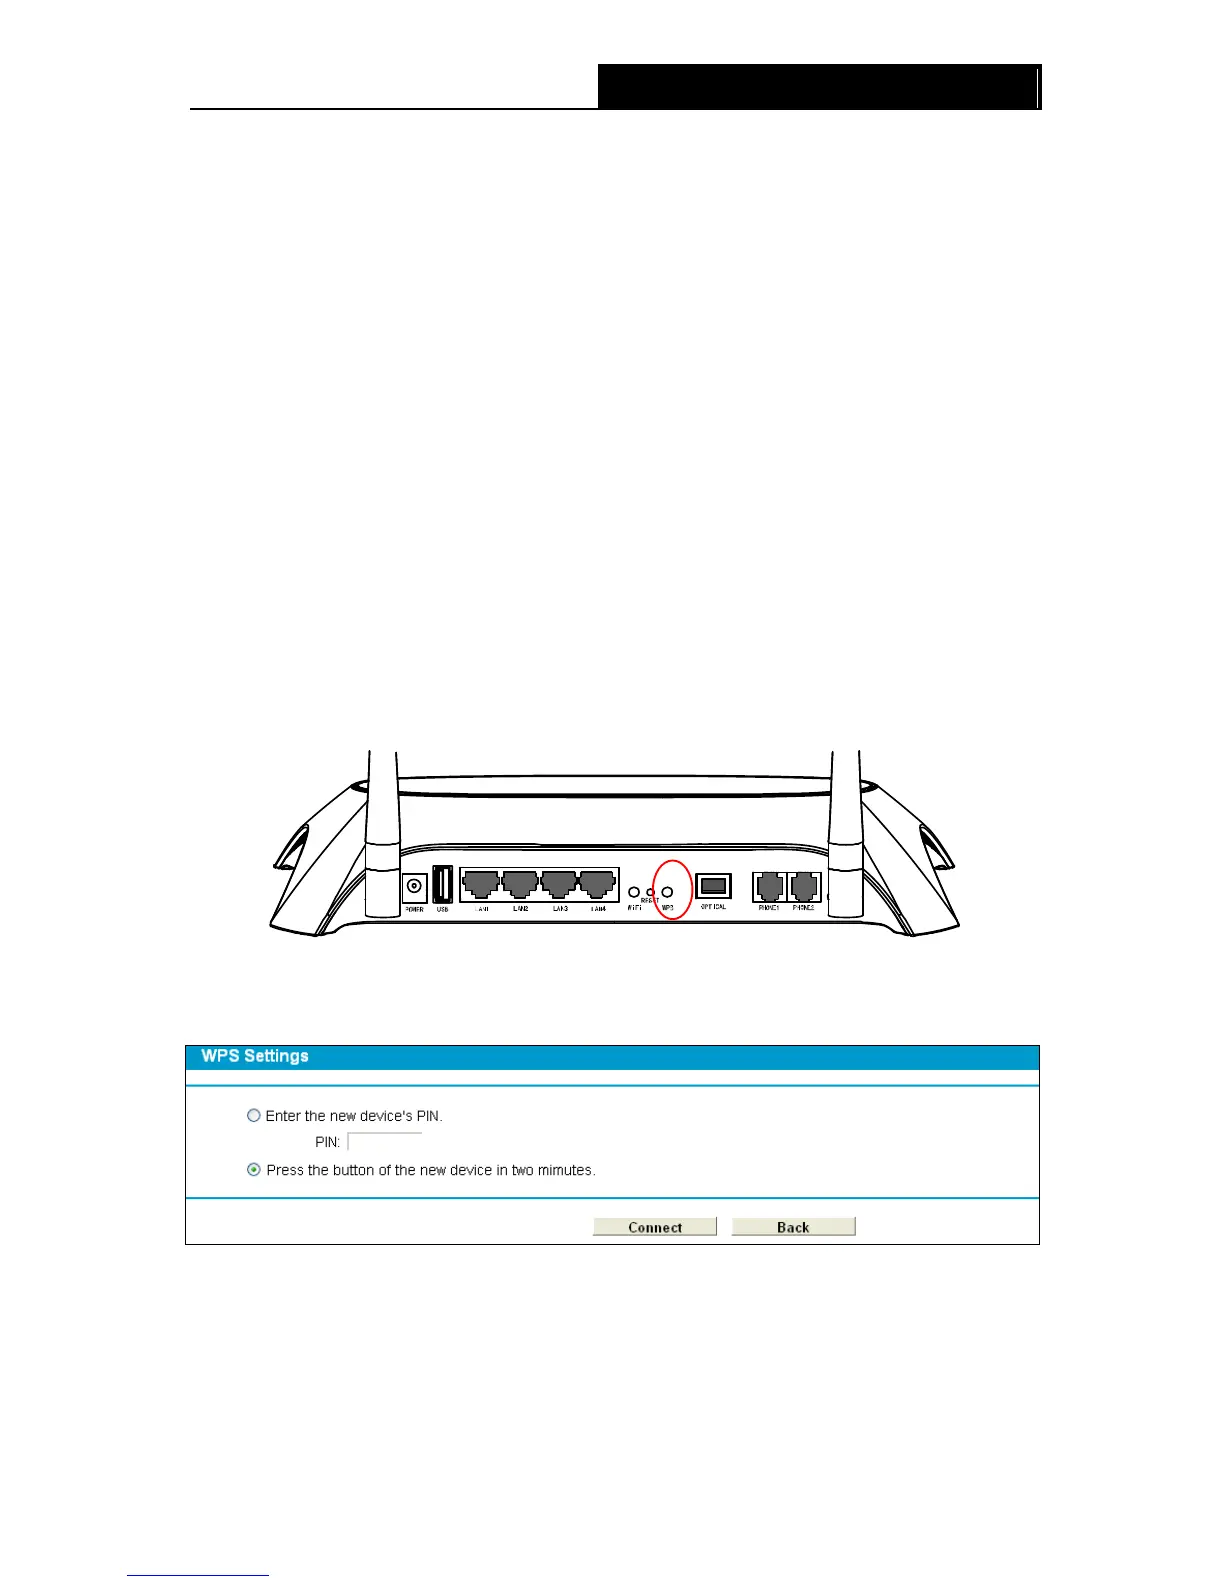
I. Use the Wi-Fi Protected Setup Button
Use this method if your client device has a Wi-Fi Protected Setup button.
Step 1: Press the WPS button on the back panel of the GPON router, as shown in the following
figure.
You can also keep the default WPS Status as Enabled and click the Add device button in Figure
4-34, then Choose “Press the button of the new device in two minutes” and click Connect.
(Shown in the following figure)
Figure 4-35
Step 2: Press and hold the WPS button of the client device directly.
Step 3: The Wi-Fi Protected Setup LED flashes for two minutes during the Wi-Fi Protected Setup
process.
Step 4: When the WPS LED is on, the client device has successfully connected to the GPON
router.
45