Edit: Here you can modify an existing schedule.
To add a new schedule, follow the steps below:
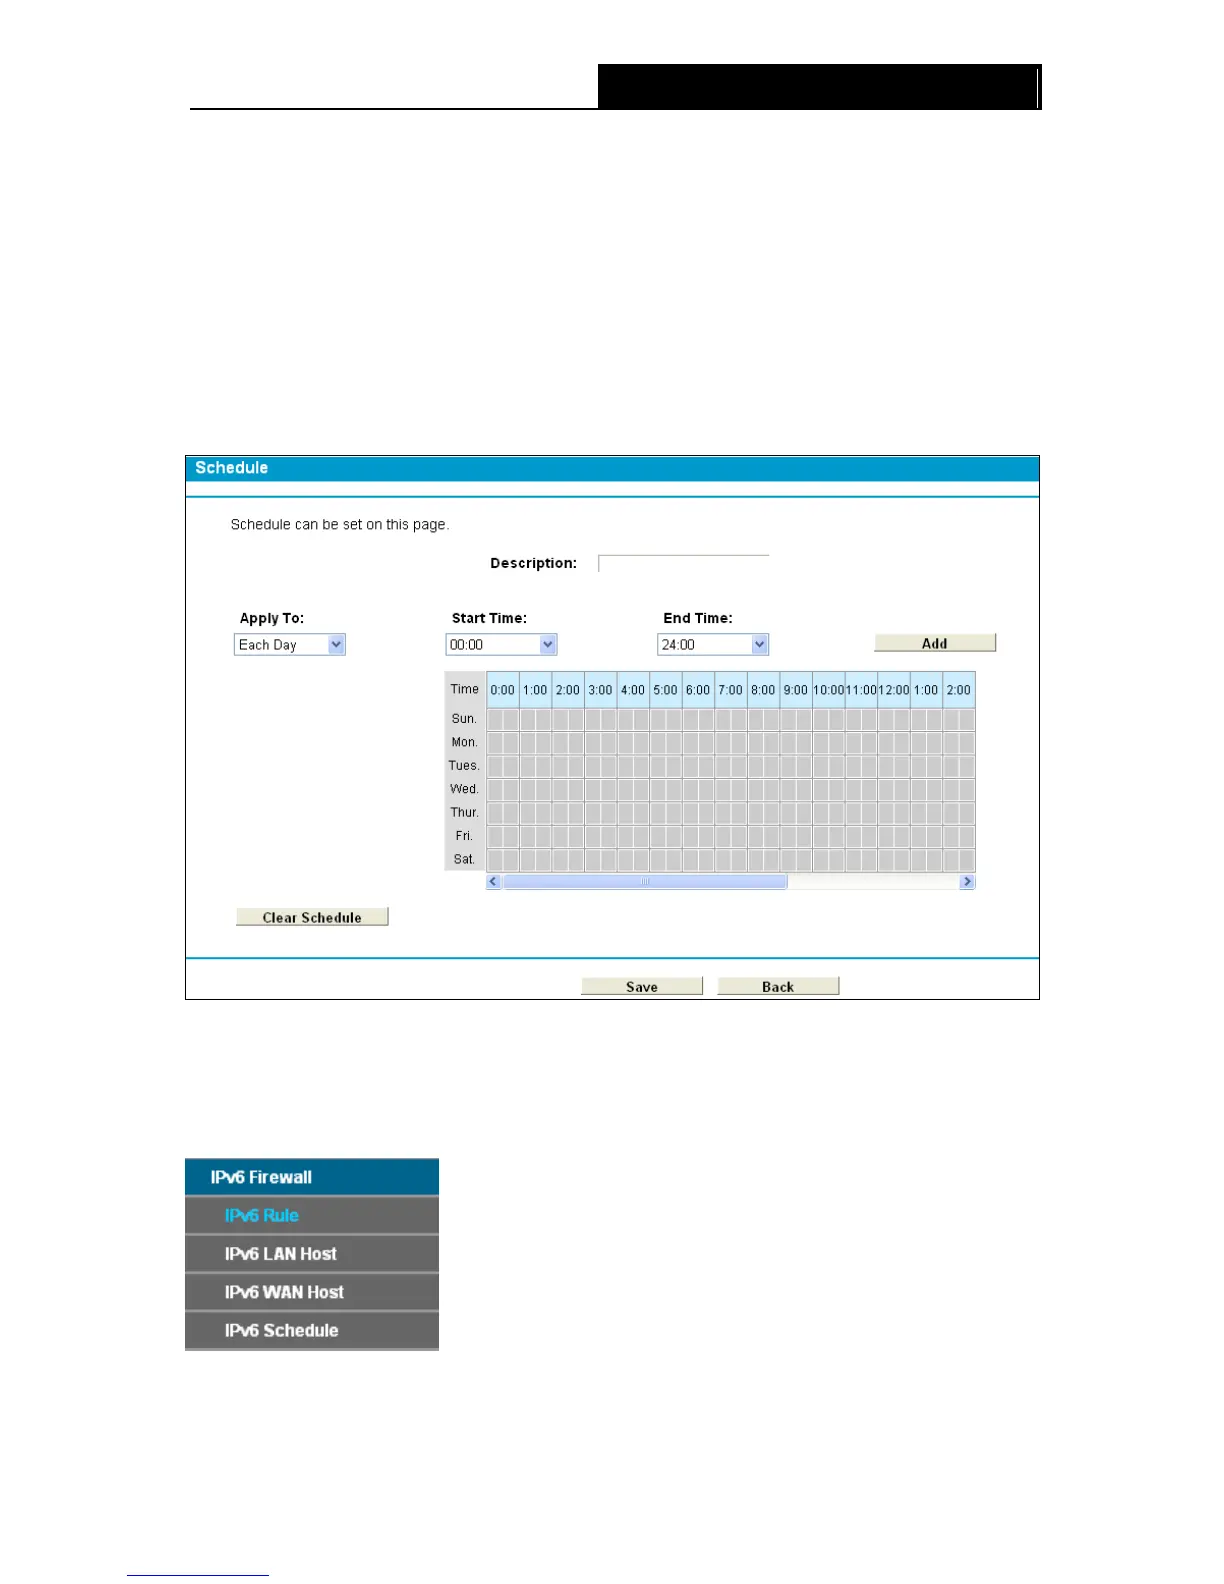
1. Click Add New button and the next screen will pop-up as shown in Figure 4-98.
2. In Description field, create a unique description for the schedule (e.g. Schedule_1).
3. In Apply To field, select the day or days you need.
4. In time field, you can select all day-24 hours or you may enter the Start Time and Stop Time
in the corresponding field.
5. Click Save to complete the settings.
Click the Clear Schedule button to clear your settings in the table.
Figure 4-98
Click the Delete Selected button to delete the selected entries in the table.
4.15 IPv6 Firewall
There are four submenus under the IPv6 Firewall menu: IPv6 Rule, IPv6 LAN Host, IPv6 WAN
Host and IPv6 Schedule. Click any of them, and you will be able to configure the corresponding
function.
91