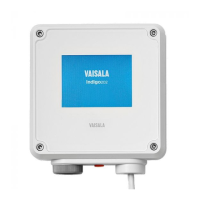
1. Open the transmitter cover.
2. Use a pen to mark the places of the mounting holes on the installation surface.
3. Drill the mounting holes and insert the wall plugs in the holes.
4. If you intend to wire the transmitter through the rubber lead-through at the back:
a. Remove the center of the rubber lead-through.
b. Lead the cables to the inside of the transmitter enclosure before mounting.
For more information on wiring from the back, see the wiring options.
5. Mount the transmitter base using at least one screw at the top and one at the bottom.
6. Connect the wiring to the applicable screw terminals.
7. Reattach the transmitter cover.
Tighten the screws hand-tight using the 4-mm Allen key (recommended tightening
torque 3.6 Nm).
More information
‣
Wiring options (page 23)
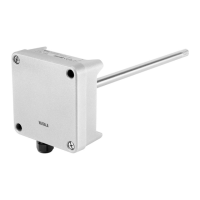
3.2.1 Mounting with adapter plate
• 4-mm Allen key, provided
• M5×20 screws (4 pcs) for attaching the transmitter to the adapter plate,
provided
• Screws and wall plugs (4 pcs) for attaching the adapter plate to the mounting
holes. Select the screws and plugs according to the properties of the
installation surface.
• Drill with suitable drill bit
Using an adapter plate, you can install an Indigo300 transmitter to replace a Vaisala 330 series
transmitter in the exact same location. The adapter plate has an opening in the middle, which
you can utilize if you intend to wire the transmitter through the back.
Indigo300 User Guide M212849EN-A
18