1726 North Ballard Road, Suite 1 - Appleton, WI 54911 - 920.991.9082
Technical Support 855.804.5774 - Parts@waupacaelevator.com
PTM30061-C
1/21/2013
W
E
CRUSH
HAZARD
CUTTING
HAZARD
CRUSH
HAZARD
CRUSH
HAZARD
FALLING
HAZARD
CRUSH
HAZARD
PINCH
HAZARD
PUNCTURE
HAZARD
ECO-SYSTEM
HAZARD
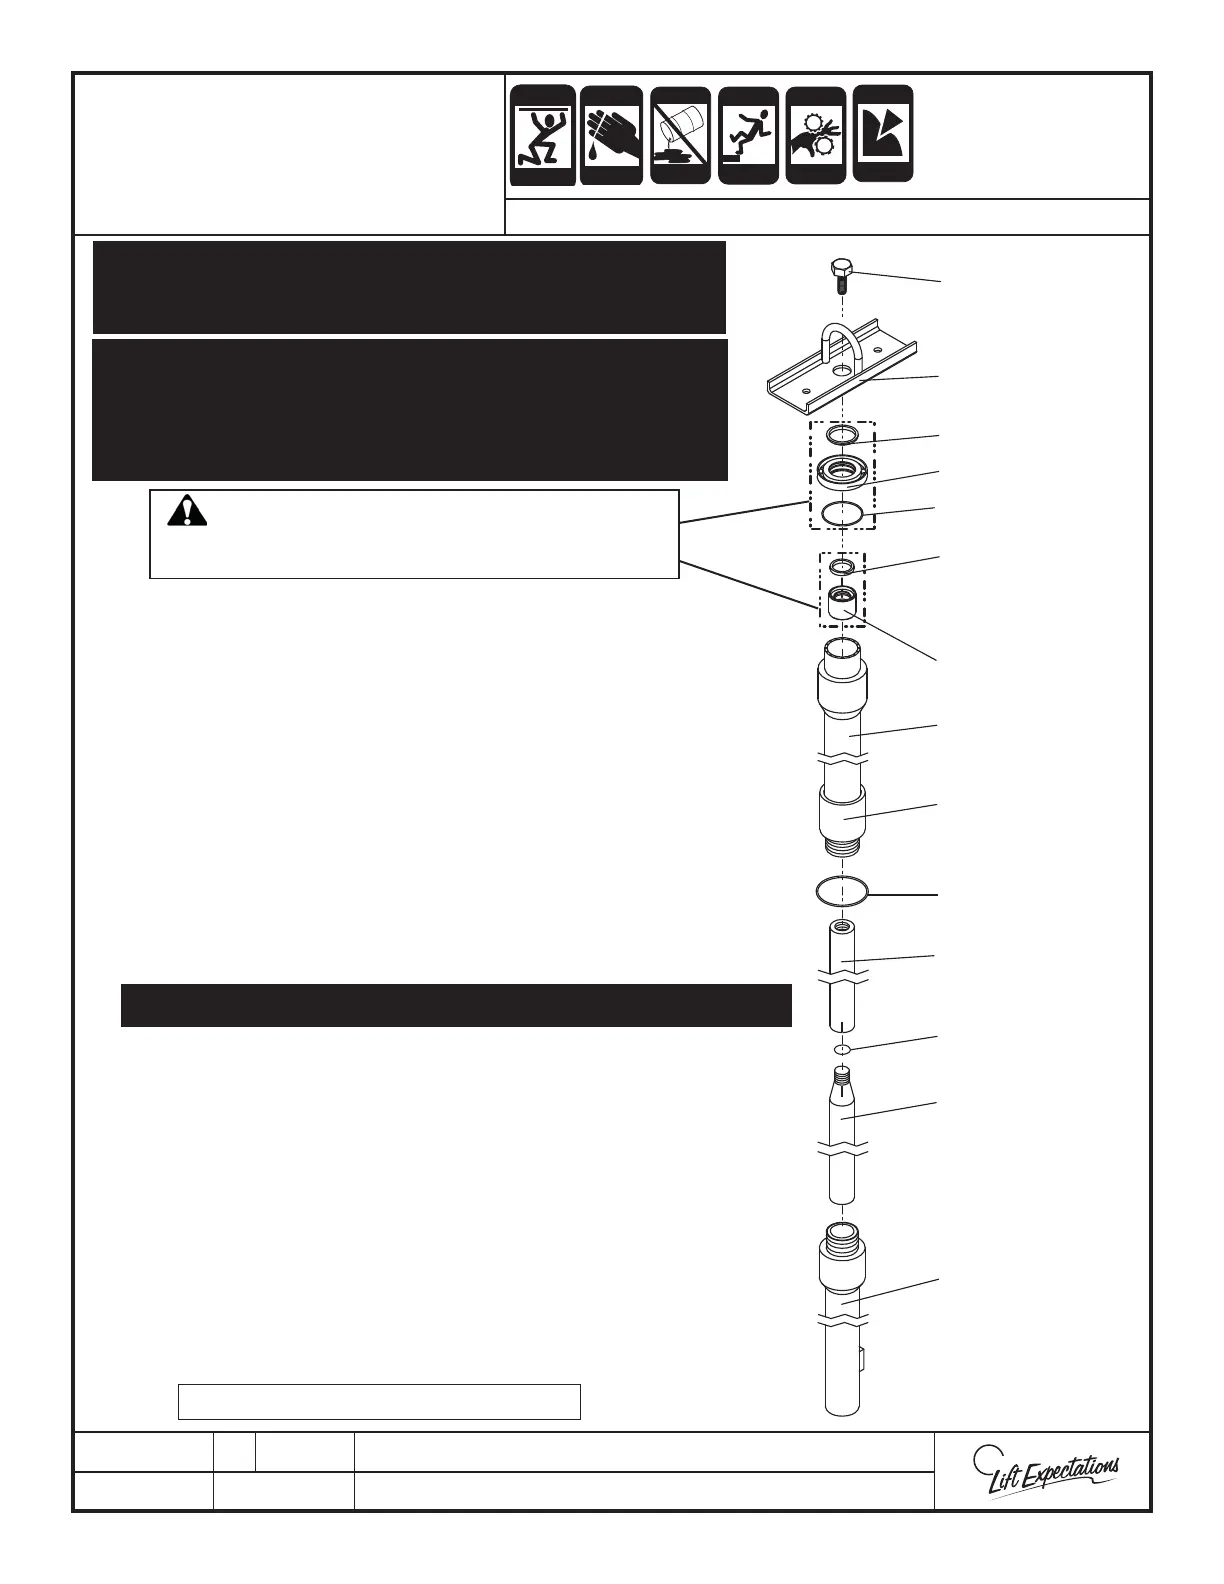
Step 1 Disassemble jack parts (leave bottom piston in bottom
sleeve) and bring into hoistway. Use a spanner wrench (142mm,
pin diameter 8mm) for this step. Use bell hoist for chain
hoisting parts into place. Clean all threads with a non-residual
solvent. Wood “V” blocks may help for maintaining jack position
while assembling.
Step
2 Set bottom assembly onto jack cup (refer to jack installation).
Step
3 Place O-ring between pistons. Do not crossthread! Thread top
piston & bottom piston together with provided thread locker until
painted lines match.
Step
4 Plumb and polish joint. Check for clear and smooth surface
between pistons.
Step
5 Fit O-ring onto bottom of top sleeve.
Step
6 Using provided thread locker, thread top sleeve into bottom
sleeve. Use a spanner wrench (142mm, pin diameter 8mm) for
this step. Refer to jack installation for PRV positioning. Remember,
DO NOT CROSSTHREAD!
Step
7 Fasten top sleeve to jack bracket. If a second jack bracket is
provided, fasten to bottom sleeve (reference eld drawings for
bracket locations.
Step
8 Insert gland assembly into top sleeve.
Step
9 Fasten ange assembly to top sleeve with socket head cap screws.
Refer to jack installation for over ow relief positioning.
Step
10 WAIT 24 HOURS BEFORE FILLING WITH OIL.
WARNING
DO NOT DISASSEMBLE THESE TWO ASSEMBLIES.
IF SEAL IS BROKEN, THE PARTS WILL NEED TO BE REPLACED.
ATTENTION
Make sure that all pistons, cylinder and components are kept from
damage, loss or contamination.
While threading be careful not to damage and/or scar the inside of top sleeve.
Return to Jack Installation Instructions
Carefully examine piston for damages, scratches, score marks or nicks.
The damage must be removed prior to changing or assembling seals,
using a 12” smooth at le, 180 and 240 grit emery cloth. Bad damage
can be removed using le on a 45° angle to the center line of piston,
nish the surface with 240 grit emery cloth.
BELL HOIST
FLANGE
O - RING
WIPER SEAL
MAIN SEAL
(TEXTURED
SIDE UP)
GLAND
TOP SLEEVE
O - RING
TOP PISTON
COLLAR
BOTTOM PISTON
BOTTOM SLEEVE
O - RING
BOLT
SERIES 114 - 116
TWO PIECE
JACK ASSEMBLY
 Loading...