1726 North Ballard Road, Suite 1 - Appleton, WI 54911 - 920.991.9082
Technical Support 855.804.5774 - Parts@waupacaelevator.com
PTM30143-C
06 MAR 2018
W
E
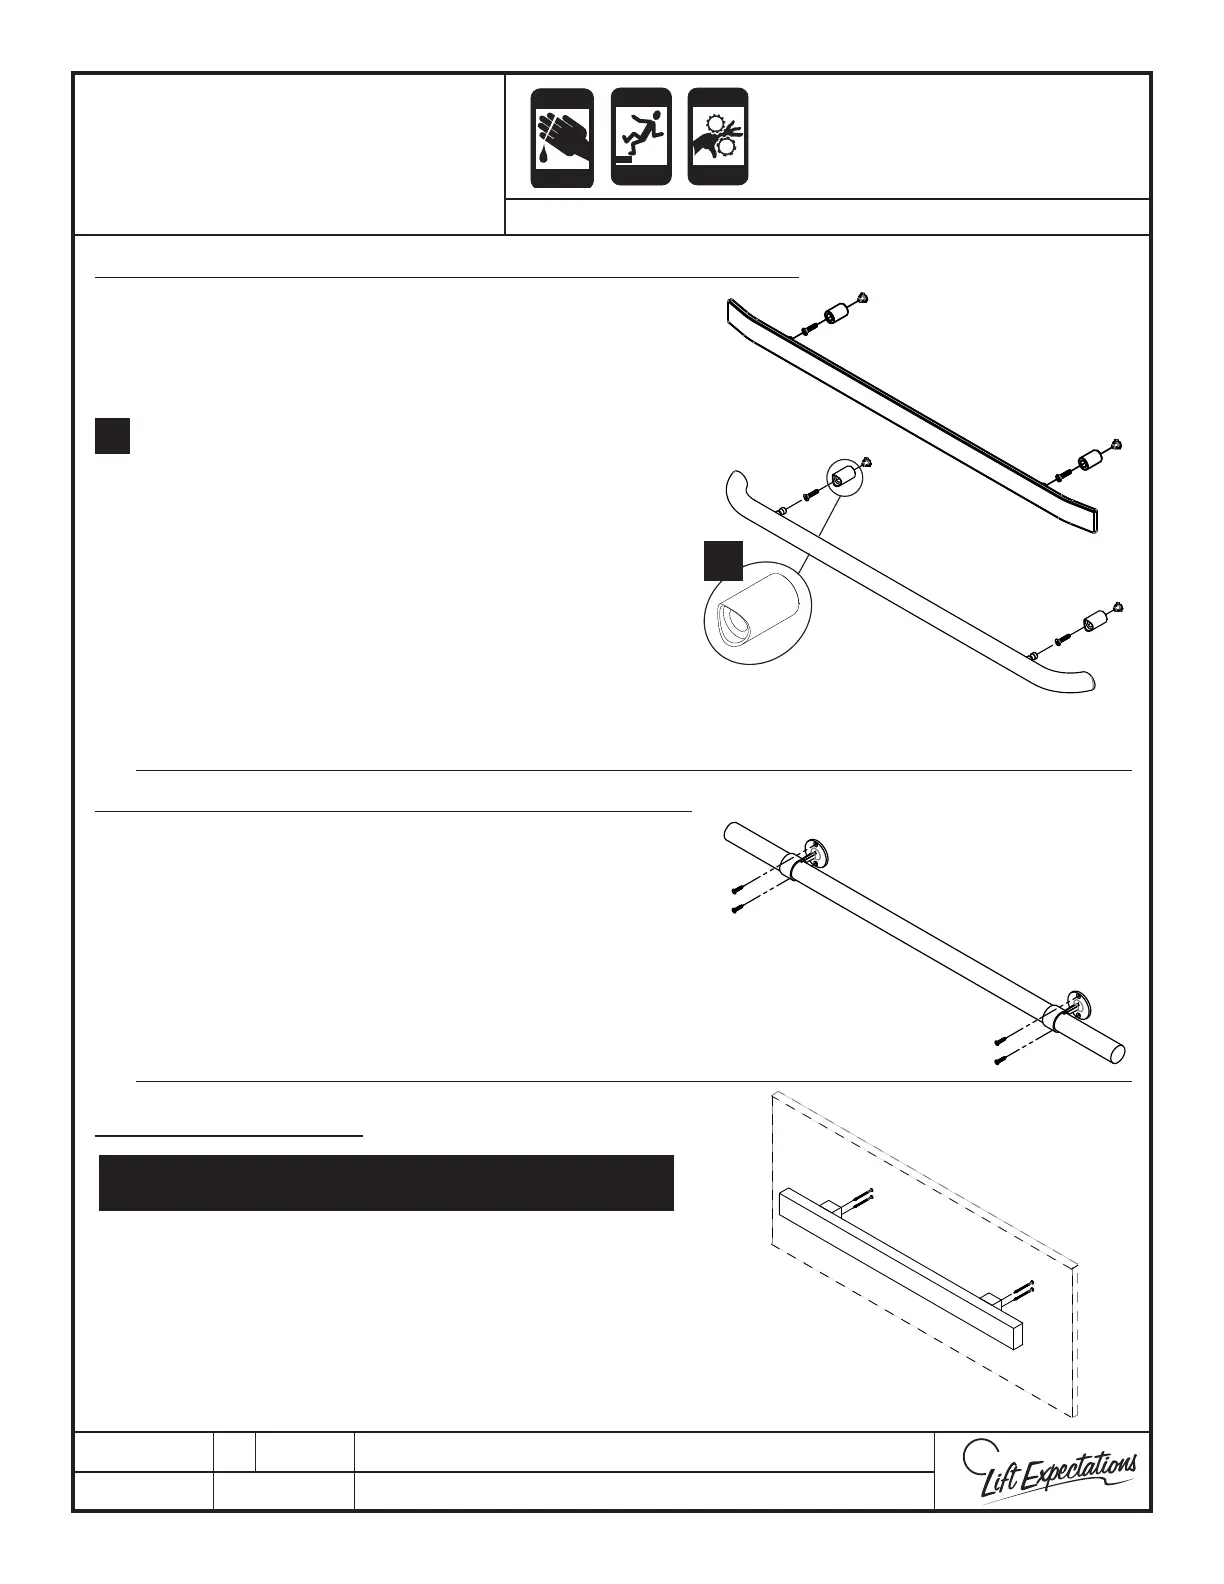
Note: Verify that both curved opening on the stando ’ s a r e
lined up with the round handrail prior to installation.
The at wood handrail needs to be fastened to the
back of the wall before car assembly
CRUSH
HAZARD
CUTTING
HAZ ARD
FALLING
HAZ ARD
CRUSH
HAZARD
PINCH
HAZ ARD
SERIES: ALL ELEVATOR
METAL ROUND or FLAT HANDRAIL with SPACER STANDOFFS
FLAT WOOD HANDRAIL
WOODEN DOWEL HANDRAIL with RING STANDOFFS
2
2.
1. Locate stando spacer on appropriate wall
with the pre-drilled holes and fasten snuggly in
place with set screws facing downward. Then
loosen the set screws
2. Align the edges of the stando so its level.
Verify the seams are free of gaps. Securely
fasten in place.
3. Align handrail with aluminum studs and press
into position on wall. Verify a tight t between
handrail and handrail spacer.
4. Securely fasten (2) 1/4” -20 x 1/4“ set screws in
place.
HANDRAIL
INSTALLATION
1. Locate wall with pre-drilled holes for handrail.
2. Align handrail with fastening holes and fasten
handrail to wall with (4) #10 x 3” wood screws.
1. Locate wall with pre-drilled holes for handrail.
2. Align handrail with fastening holes with set screws
facing downward.
3. Fasten handrail to wall with (4) 1” wood screws.
4. Lock handrail into position in stand o by fastening
(2) 8-32 x 3/16” set screws.
 Loading...