1726 North Ballard Road - Appleton, WI 54911 - 920.991.9082
Technical Support 800.238.8739 - TechSupport@WaupacaElevator.com
PTM30112-G
12/07/2012
W
E
CRUSH
HAZARD
CUTTING
HAZ ARD
CRUSH
HAZARD
CRUSH
HAZARD
FALLING
HAZ ARD
CRUSH
HAZARD
PINCH
HAZ ARD
PUNCTURE
HAZ ARD
A
B
E
C
F
D
C
DOWELS
WALL
POCKET
B
WALL
FASTENERS
PIN
E
WALL
E
2
1
3
UNI-STRUT
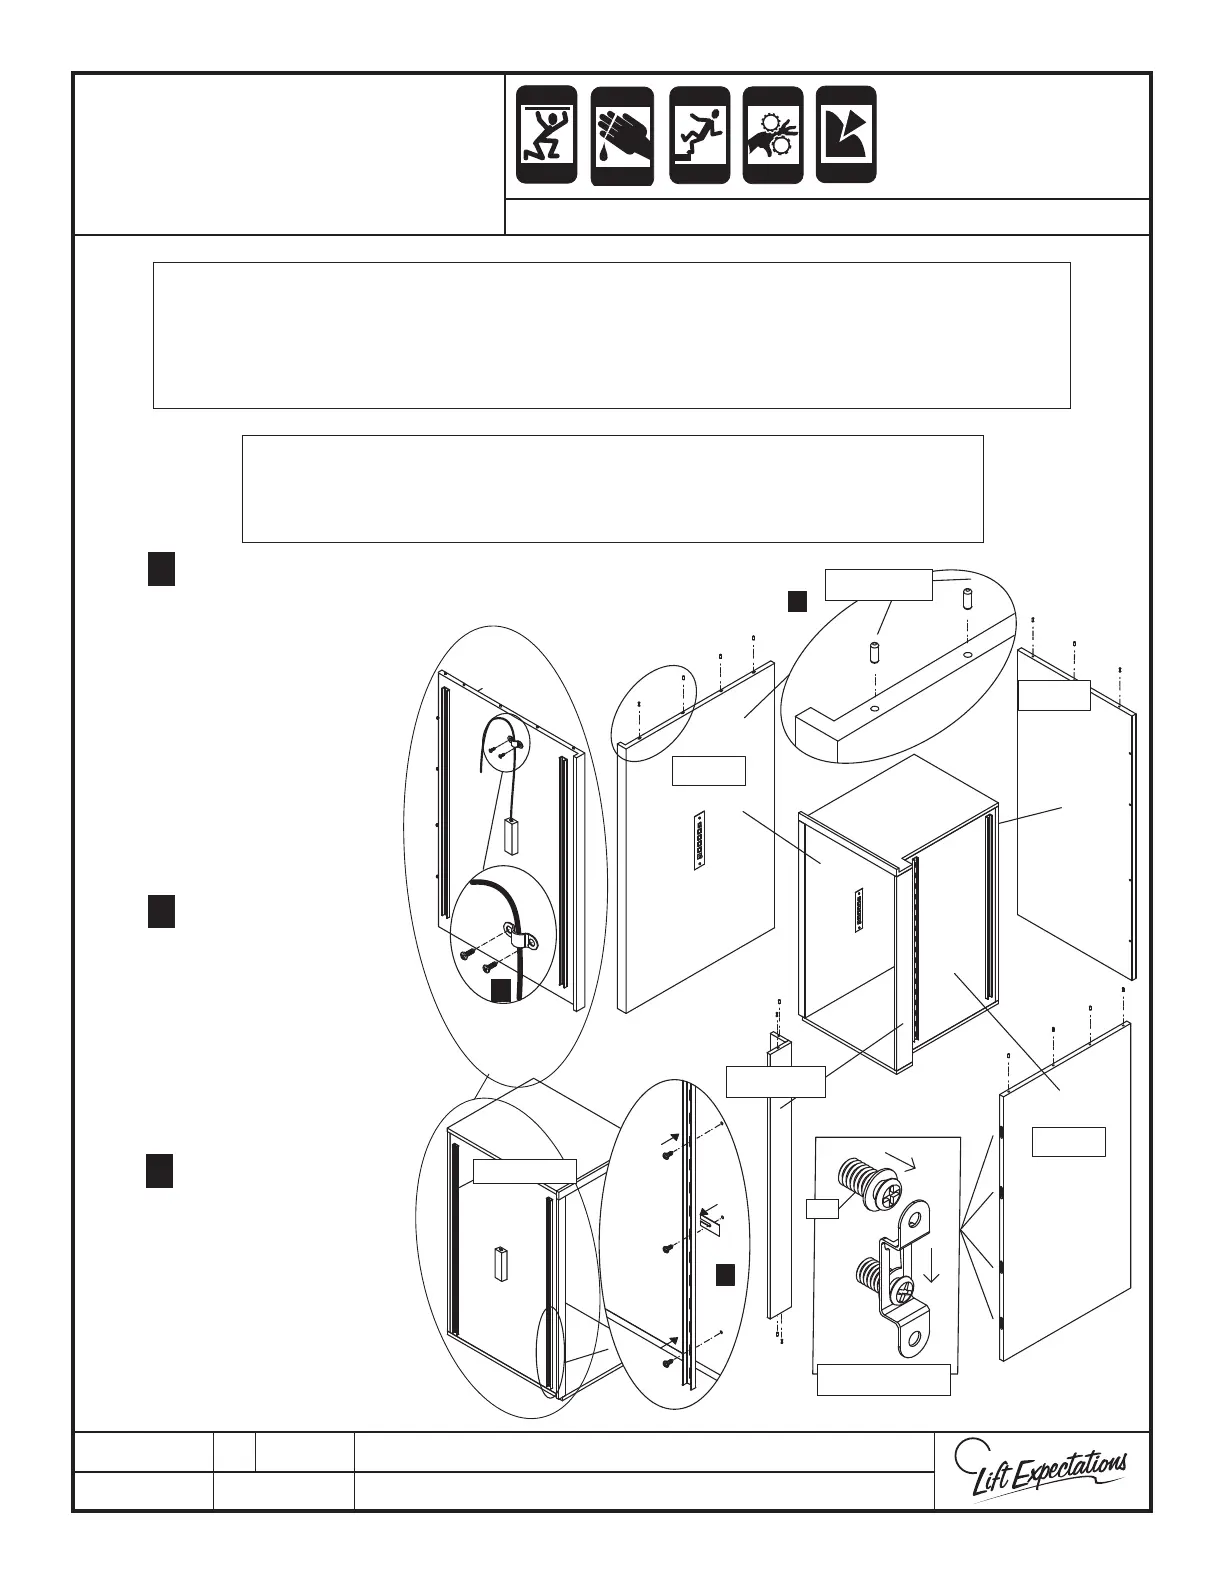
ATTENTION
Verify clearance between car oor and all hoistway walls. Refer to eld drawings for details.
Individual car layouts may be di erent; however, always treat the rail wall as the B wall during as-
sembly. Verify handrail type. Flat wood handrails must be installed before car assembly (reference
INTERIOR CAR FIXTURES page).
NOTE
We recommend the following tools should be available:
Wallboard Roll Lifter - Rubber Mallet - Drill - Level - Screw Driver Set
Step
Insert provided dowels into
pre-drilled holes along
the top of the walls (wall
B [or rail wall] will have
fasteners already attached to
the bottom). Insert dowels
into pre-drilled holes along
the top and bottom of post(s)
and pocket(s) if provided,
and opposing wall if
opposite opening layout.
Step 2
Warping before
installation may occur. To
correct the warping, place
provided shims between the
outside wall and the uni-strut
as necessary to correct the
warp. Verify the uni-struts are
securely fastened to the walls.
Step
The COP must be installed
into the wall prior to car
assembly. Using the provided
conduit clips & hardware,
secure the COP conduit to
the upper outside car wall for
easy access during cartop box
installation.
1
2
3
FRAMELESS CAR
ASSEMBLY
SERIES : 015 - 016 - 018 - 115 - 116 - 118
 Loading...