1726 North Ballard Road, Suite 1 - Appleton, WI 54911 - 920.991.9082
Technical Support 855.804.5774 - Parts@waupacaelevator.com
PTM30133-G
22 MAR 2018
W
E
CRUSH
HAZARD
CUTTING
HAZ ARD
CRUSH
HAZARD
CRUSH
HAZARD
CRUSH
HAZARD
CRUSH
HAZ ARD
FALLING
HAZ ARD
CRUSH
HAZARD
KINK
HAZ ARD
CRUSH
HAZARD
PINCH
HAZ ARD
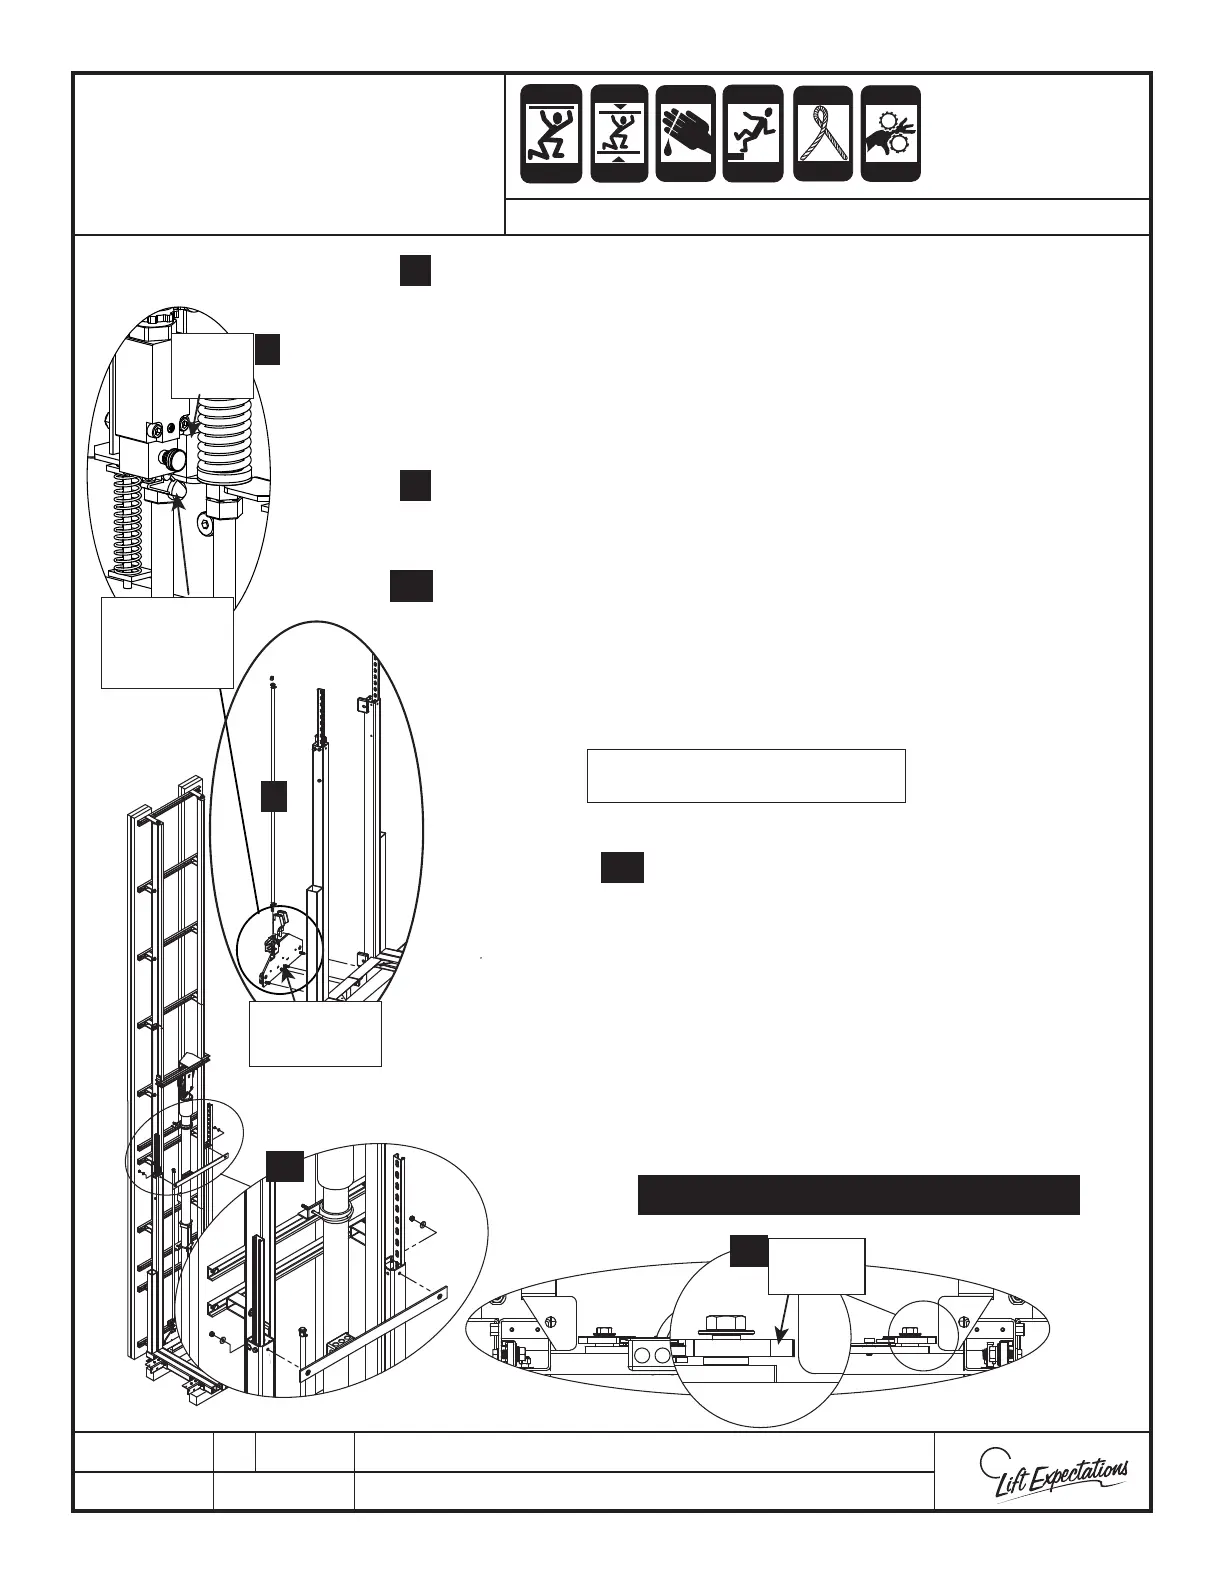
SLING ASSEMBLY AND
SAFETY INSTALLATION
Verify Fasteners are Securely Fastened!
SAFETY
ASSEMBLY
SAFETY
ACTUATOR
ROLLER
CAM
BLOCK
SAFETY
DOG
8.
11.
9.
10.
12.
11
Note: Do not put thick at washers
between safety and sling.
8
9
10
8.
9.
10.
SERIES : 115, 116, 118
On the safety assembly, verify there is a slight air gap between the safety
actuator roller and the cam block for slack cable switch. If no air gap is
present, loosen screws that fasten slack cable switch on bracket and slide
switch down in mounting slots, then fasten switch securely to bracket.
Verify slack cable switch will trip by pressing down on actuator arm until an
audible click is heard. Reset switch by pulling out on the reset button until
an audible click is heard.
Remove the cover from the 2” x 4” junction box. Connect the rigid conduit to
the 2” x 4” junction box on safety assembly. Connect the slack cable switch
plugs in the 2” x 4” junction box and reattach cover on the junction box.
Verify the DBG is 21” along the entire length of travel. Place the safety
assembly in position on the bottom back of the sling. Loosely fasten the
safety to the sling, ensuring there is an equal space on each side of the safety
dogs, with the following provided hardware:
(4) - 1/2” Flat Washers (x 1/4” thickness)
(4) - 1/2”-13 Nylock Nuts
Remove the cover from the 2” x 4” junction box of the
top cross member. Attach the top of the rigid conduit
to the 2” x 4” junction box. Fasten the top cross
member in place with the following provided
hardware:
(2) - 3/8” Flat Washers
(2) - 3/8”-16 Nylock Nuts
Connect the exible slack cable harness to the top of
the 2” x 4” junction box of the top cross member and
connect the plugs together. Reattach the 2” x 4”
junction box cover.
 Loading...