50 Disassembly and Repair Procedures Welch Allyn CP 100 and CP 200 Electrocardiograph
Replacing the Printer Assembly
Procedure
1. Open unit using the Disassembly
Procedures (page 49) directions.
2. Open the paper door and remove all paper
in the paper tray.
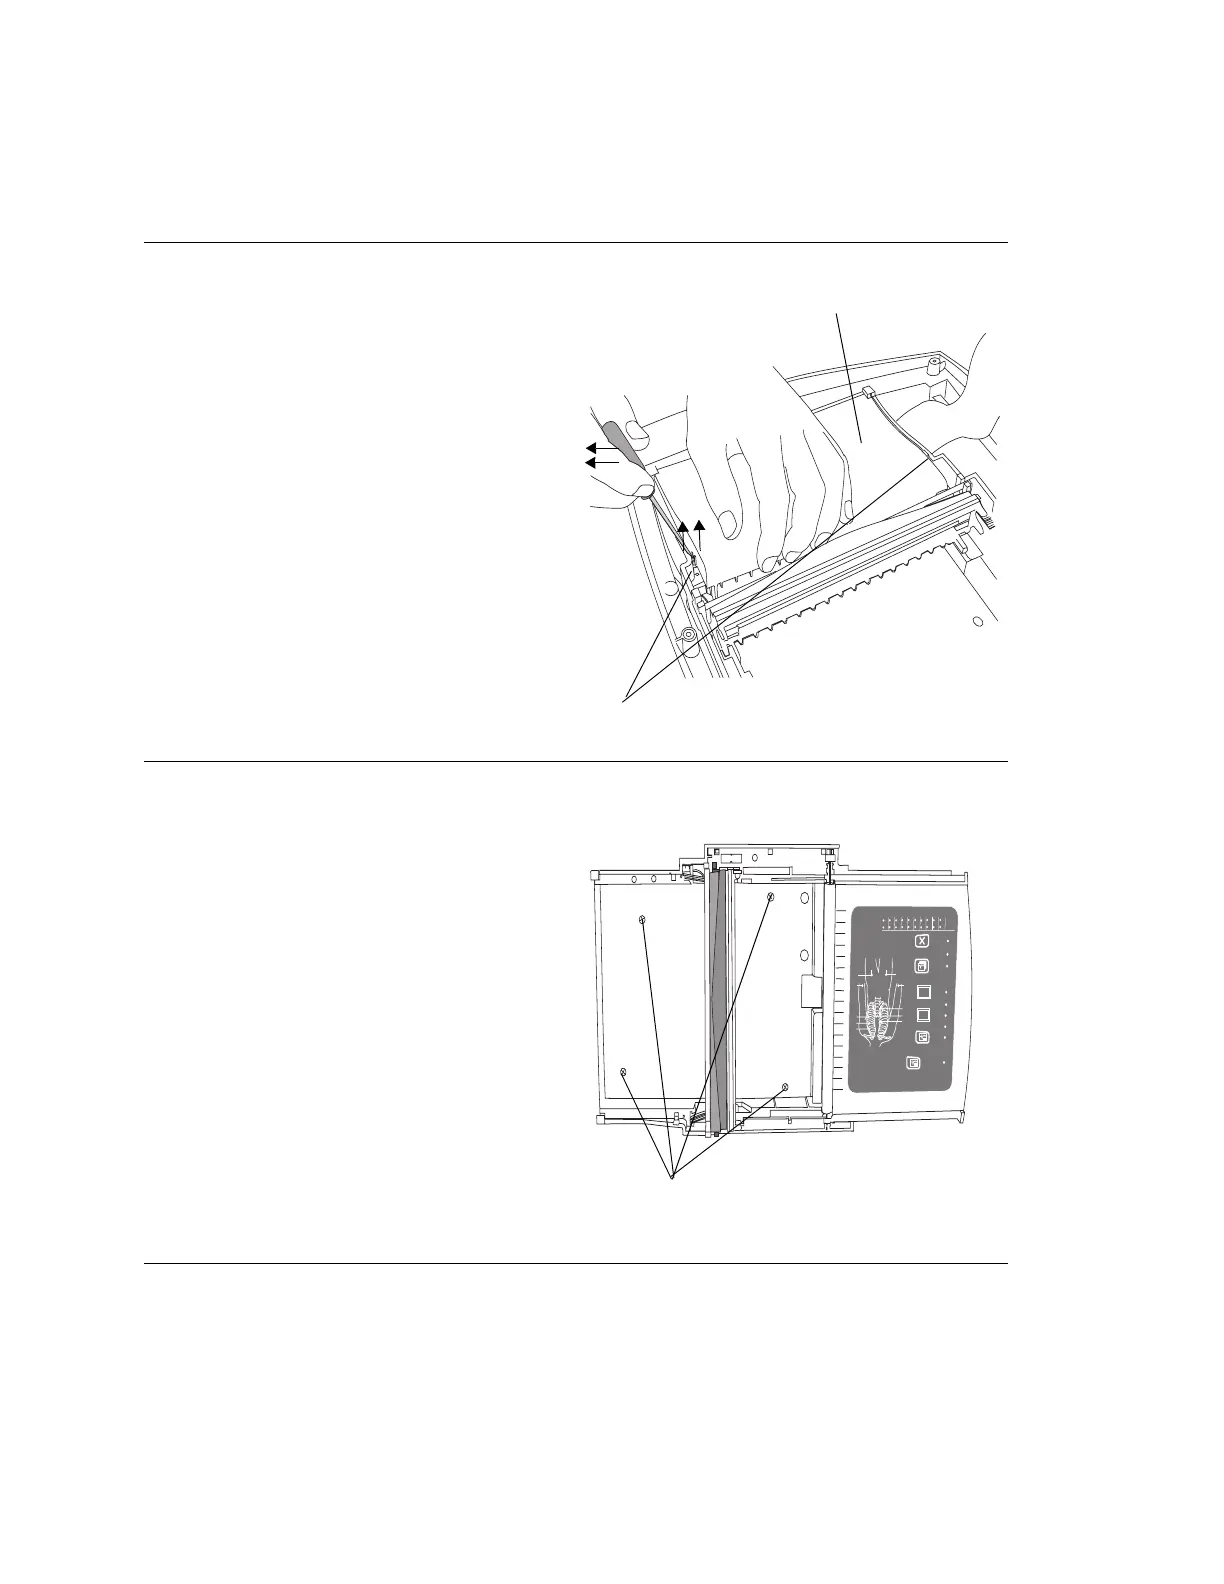
3. Insert a flat blade screwdriver into the slit
opening located on the side of the auxiliary
paper cover. Figure 33.
4. Apply outward pressure on the screwdriver
while pressing upward on the side of the
cover. Repeat process for the other side of
the cover. Lift the cover out of unit.
Figure 33. Inserting a Flat blade Screwdriver
5. Remove the 4 screws in the bottom of the
printer tray. See Figure 34.
Figure 34. Removing the Screws in the Paper Tray
Auxiliary Paper
over
Slit Openings
Quick Step Operating Instructions
Stat ECGStat ECG
Hold down for 1 second
Automatic ECG
Select
Enter Patient Data
Select
DONE
Verify ECG quality
Select
Rhythm ECG
Select to end
Select
Change settings as desired
Print
ECG
IEC C1C2C3C4C5C6R L N F
AAMIV1V2V3V4V5V6RALARLLL
VI
V2
V3
R4
V4
V5
V6
LA
LL
RL
4 Screws

 Loading...