Repairs/Adjustments
4-12 09/06 PHASER 3124 / PHASER 3125
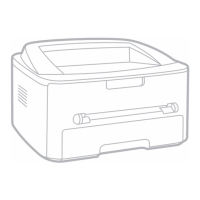
9. Disconnect 1 screw, then remove the
thermistor, Figure 8.
Figure 8
10.Disconnect the halogen lamp harnesses,
then remove 2 screws, Figure 9.
Figure 9
11.Remove 4 screws, then the fuser cover,
Figure 10.
Figure 10
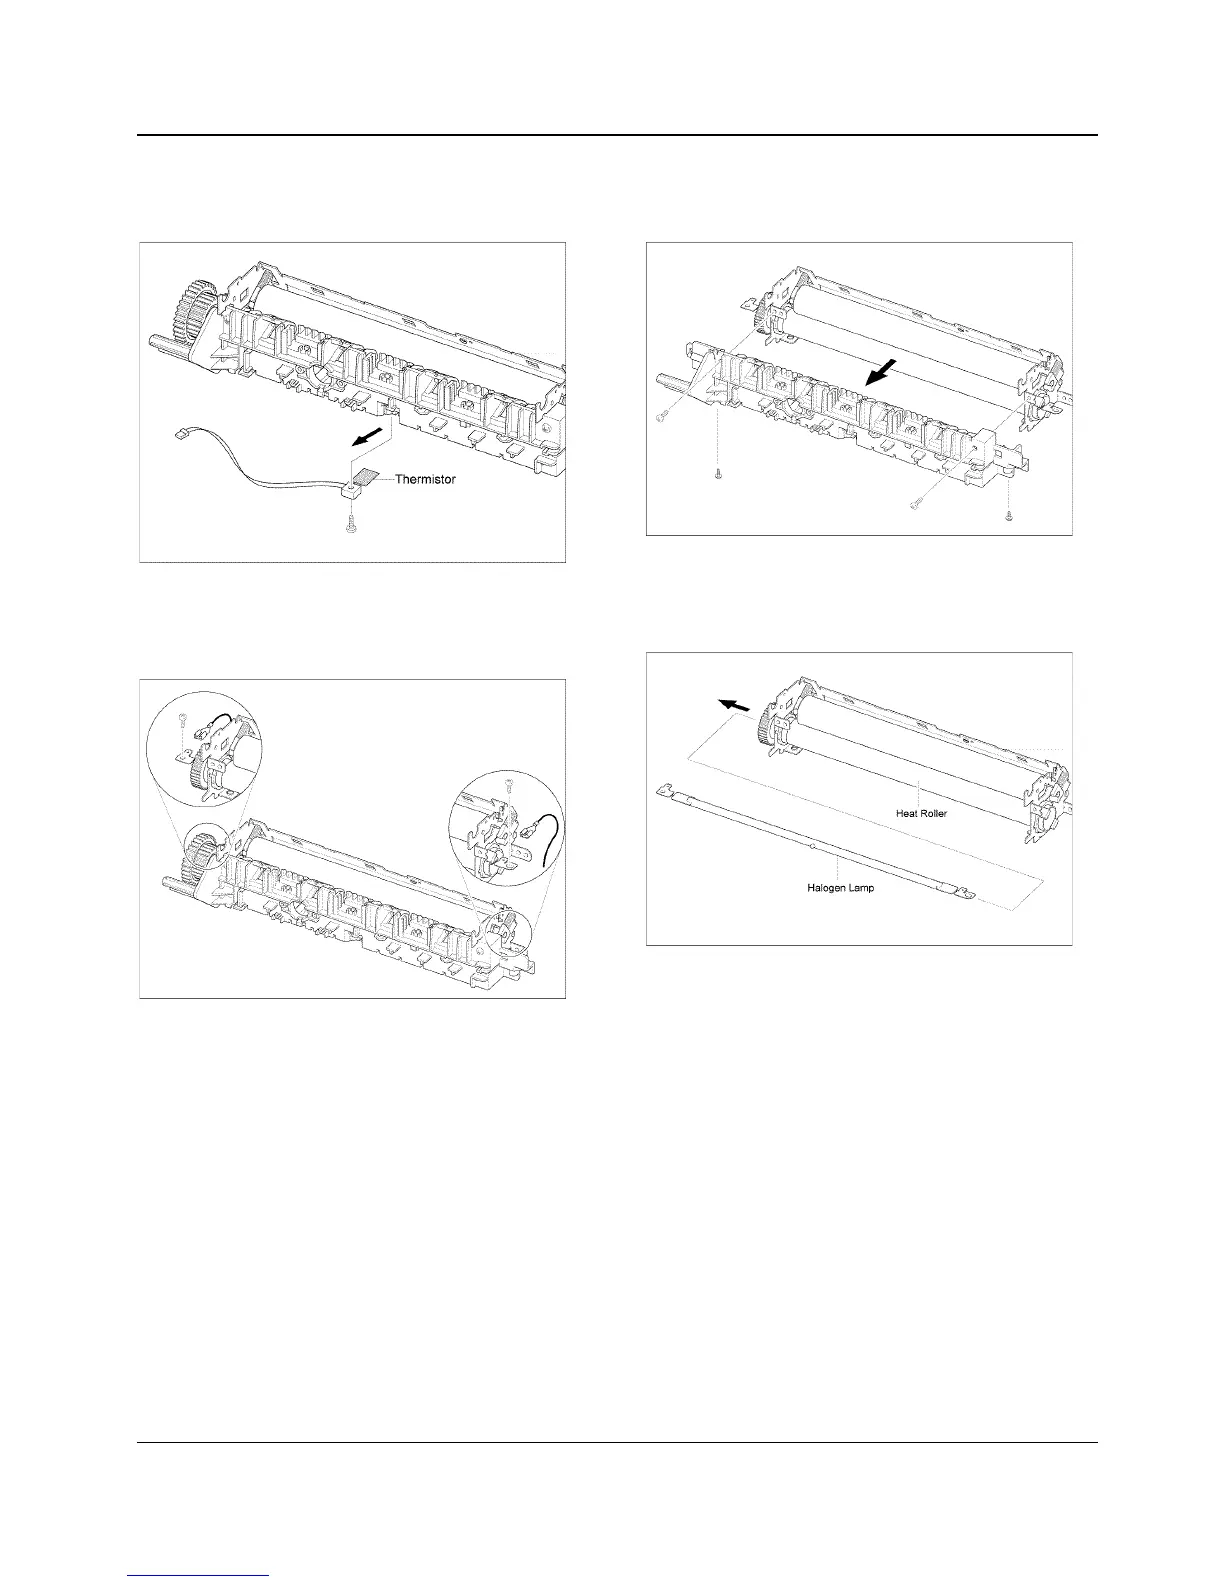
12.Slide the halogen lamp out of the fuser
and remove the halogen lamp, Figure 11.
Figure 11
Replacement
Replacement is the reverse of the removal
procedure.
 Loading...