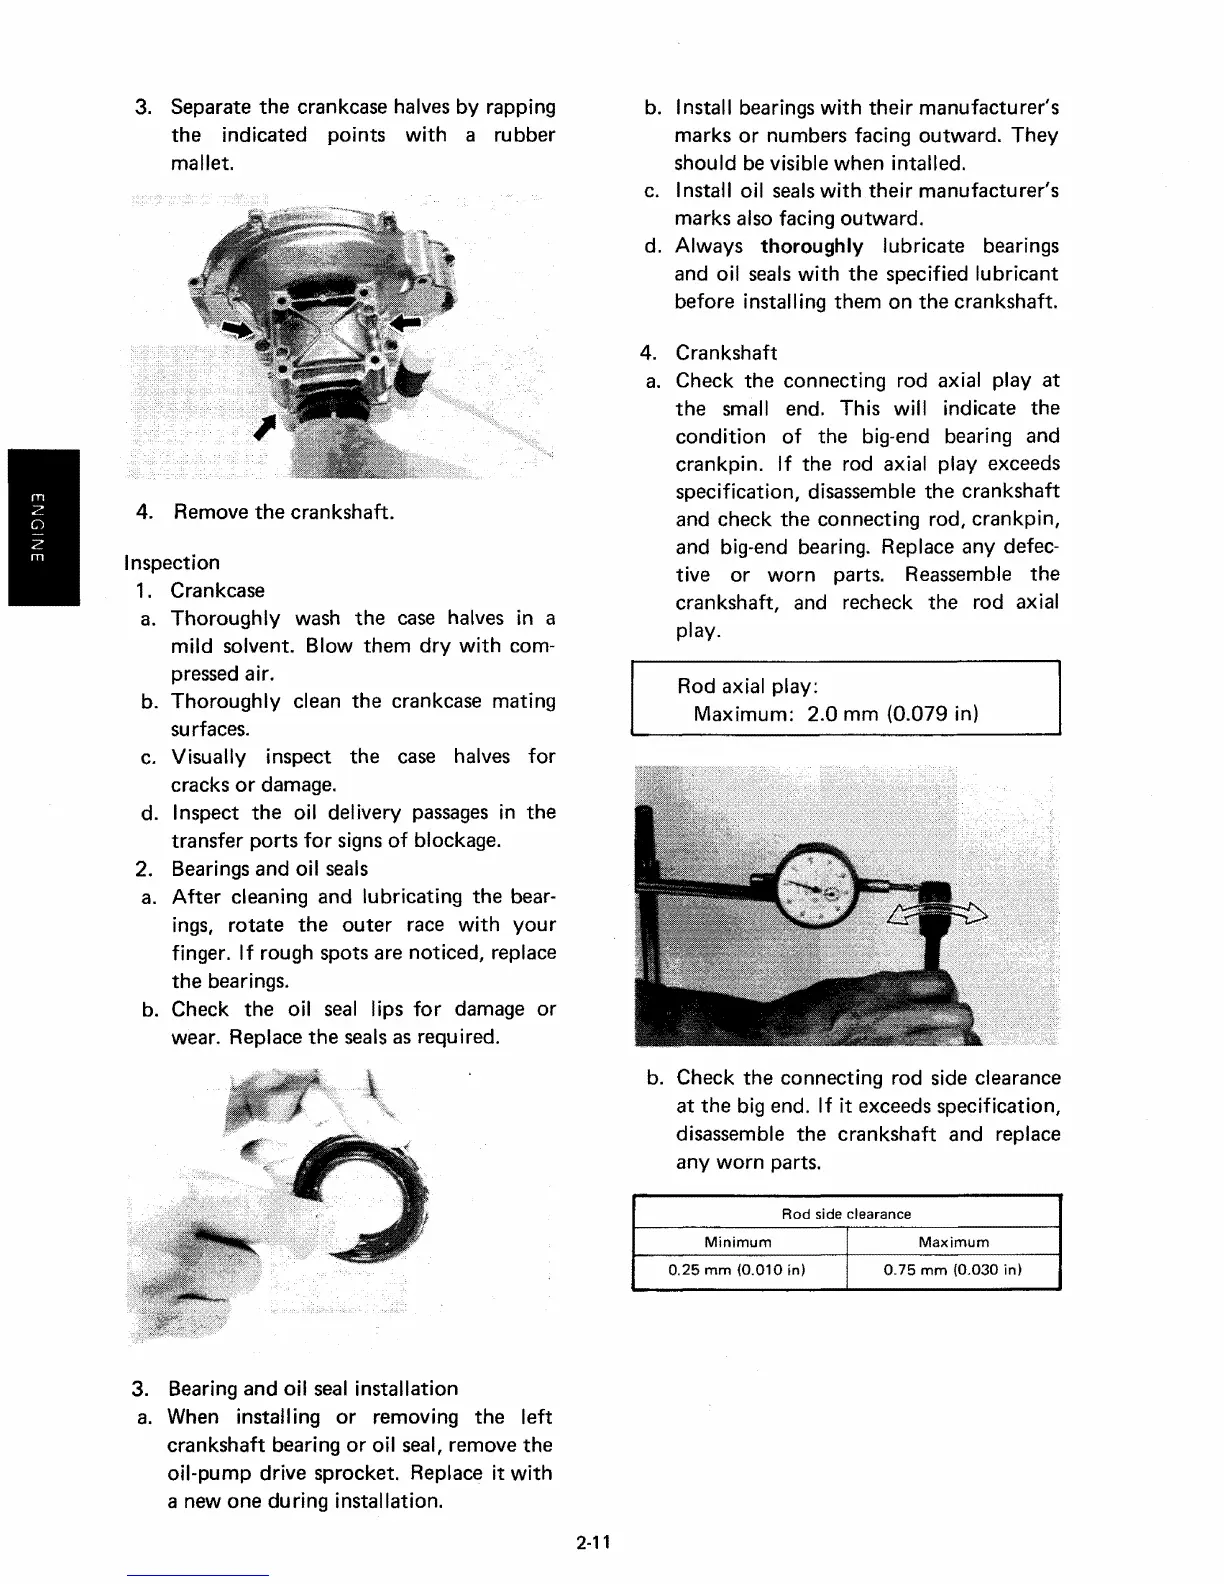
3. Separate
the
crankcase halves by rapping
the
indicated
points
with a
rubber
mallet.
4. Remove
the
crankshaft.
Inspection
1. Crankcase
a.
Thoroughly
wash
the
case halves in a
mild solvent. Blow
them
dry
with
com-
pressed air.
b.
Thoroughly
clean
the
crankcase mating
surfaces.
c. Visually inspect
the
case halves for
cracks
or
damage.
d. Inspect
the
oil delivery passages in
the
transfer
ports
for
signs
of
blockage.
2. Bearings
and
oil seals
a. After cleaning
and
lubricating
the
bear-
ings,
rotate
the
outer
race with
your
finger. If rough
spots
are noticed, replace
the
bearings.
b. Check
the
oil seal lips
for
damage or
wear. Replace
the
seals as required.
b. Install bearings with
their
manufacturer's
marks
or
numbers facing outward.
They
should be visible
when
intalled.
c. Install oil seals
with
their
manufacturer's
marks also facing
outward.
d. Always
thoroughly
lubricate bearings
and oil seals with
the
specified lubricant
before installing
them
on
the
crankshaft.
4. Crankshaft
a. Check
the
connecting rod axial play
at
the
small end. This will indicate
the
condition
of
the
big-end bearing
and
crankpin. If
the
rod axial play exceeds
specification, disassemble
the
crankshaft
and
check
the
connecting rod, crankpin,
and big-end bearing. Replace any defec-
tive or
worn
parts. Reassemble
the
crankshaft, and recheck
the
rod axial
play.
Rod axial play:
Maximum:
2.0
mm (0.079 in)
b. Check
the
connecting rod side clearance
at
the
big end. If it exceeds specification,
disassemble
the
crankshaft
and replace
any
worn
parts.
Rod side clearance
3. Bearing
and
oil seal installation
a. When install ing
or
removing
the
left
crankshaft
bearing
or
oil seal, remove
the
oil-pump drive sprocket. Replace it with
a new
one
during installation.
2·11
Minimum
0.25
mm (0.010 in)
Maximum
0.75
mm (0.030 in)
 Loading...