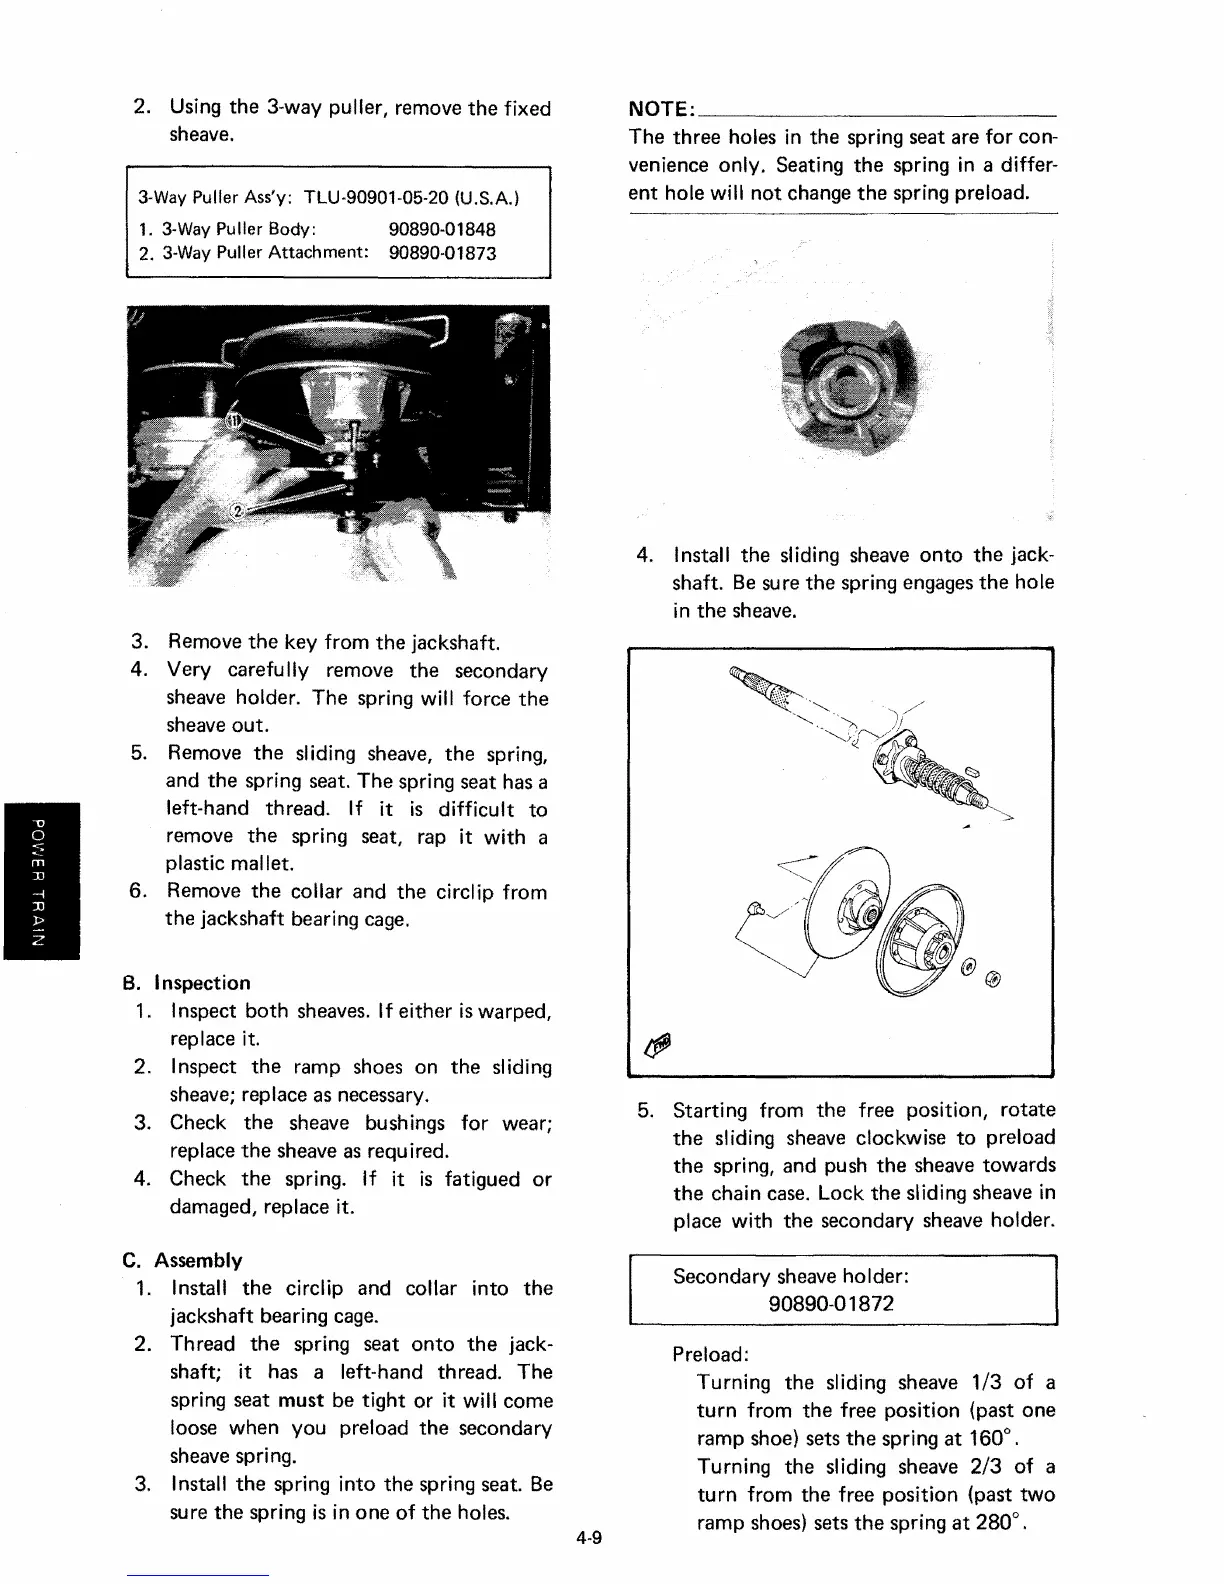
2. Using
the
3~way
puller, remove
the
fixed
sheave.
3-WayPuller Ass'y: TLU-90901-05-20 (U.S.A.)
1. 3-WayPuller Body: 90890-01848
2.
3-Way
Puller Attachment: 90890-01873
3. Remove
the
key from
the
[ackshaft.
4. Very carefully remove
the
secondary
sheave holder. The spring will force
the
sheave
out.
5. Remove
the
sliding sheave,
the
spring,
and
the
spring seat.
The
spring seat has a
left-hand thread. If it is difficult to
remove
the
spring seat, rap it
with
a
plastic mallet.
6. Remove
the
collar
and
the
circlip from
the
jackshaft bearing cage.
8. Inspection
1. Inspect
both
sheaves. If
either
is warped,
replace it.
2. Inspect
the
ramp shoes on
the
sliding
sheave; replace as necessary.
3. Check
the
sheave bushings for wear;
replace
the
sheave as required.
4. Check
the
spring. If it is fatigued or
damaged, replace it.
C. Assembly
1. Install
the
circlip and collar into
the
jackshaft bearing cage.
2. Thread
the
spring seat
onto
the
jack-
shaft; it has a left-hand th read.
The
spring seat
must
be
tight
or it will
come
loose
when
you preload
the
secondary
sheave
spring.
3. Install
the
spring
into
the
spring seat. Be
sure
the
spring is in
one
of
the
holes.
NOTE: _
The
three
holes in
the
spring seat are
for
con-
venience only. Seating
the
spring in a differ-
ent
hole will
not
change
the
spring preload.
4. Install
the
sliding sheave
onto
the
jack-
shaft. Be sure
the
spring engages
the
hole
in
the
sheave.
5. Starting from
the
free position,
rotate
the
sliding sheave clockwise
to
preload
the
spring, and push
the
sheave
towards
the
chain case. Lock
the
sliding sheave in
place with
the
secondary sheave holder.
Secondary sheave holder:
90890-01872
Preload:
Turning
the
sliding sheave
1/3
of a
turn
from
the
free position (past
one
ramp shoe) sets
the
spring
at
160
0
•
Turning
the
sliding sheave
2/3
of a
tu rn from
the
free position (past
two
ramp shoes) sets
the
spring
at
280
0
•