Faulty------..
Replace.
OK
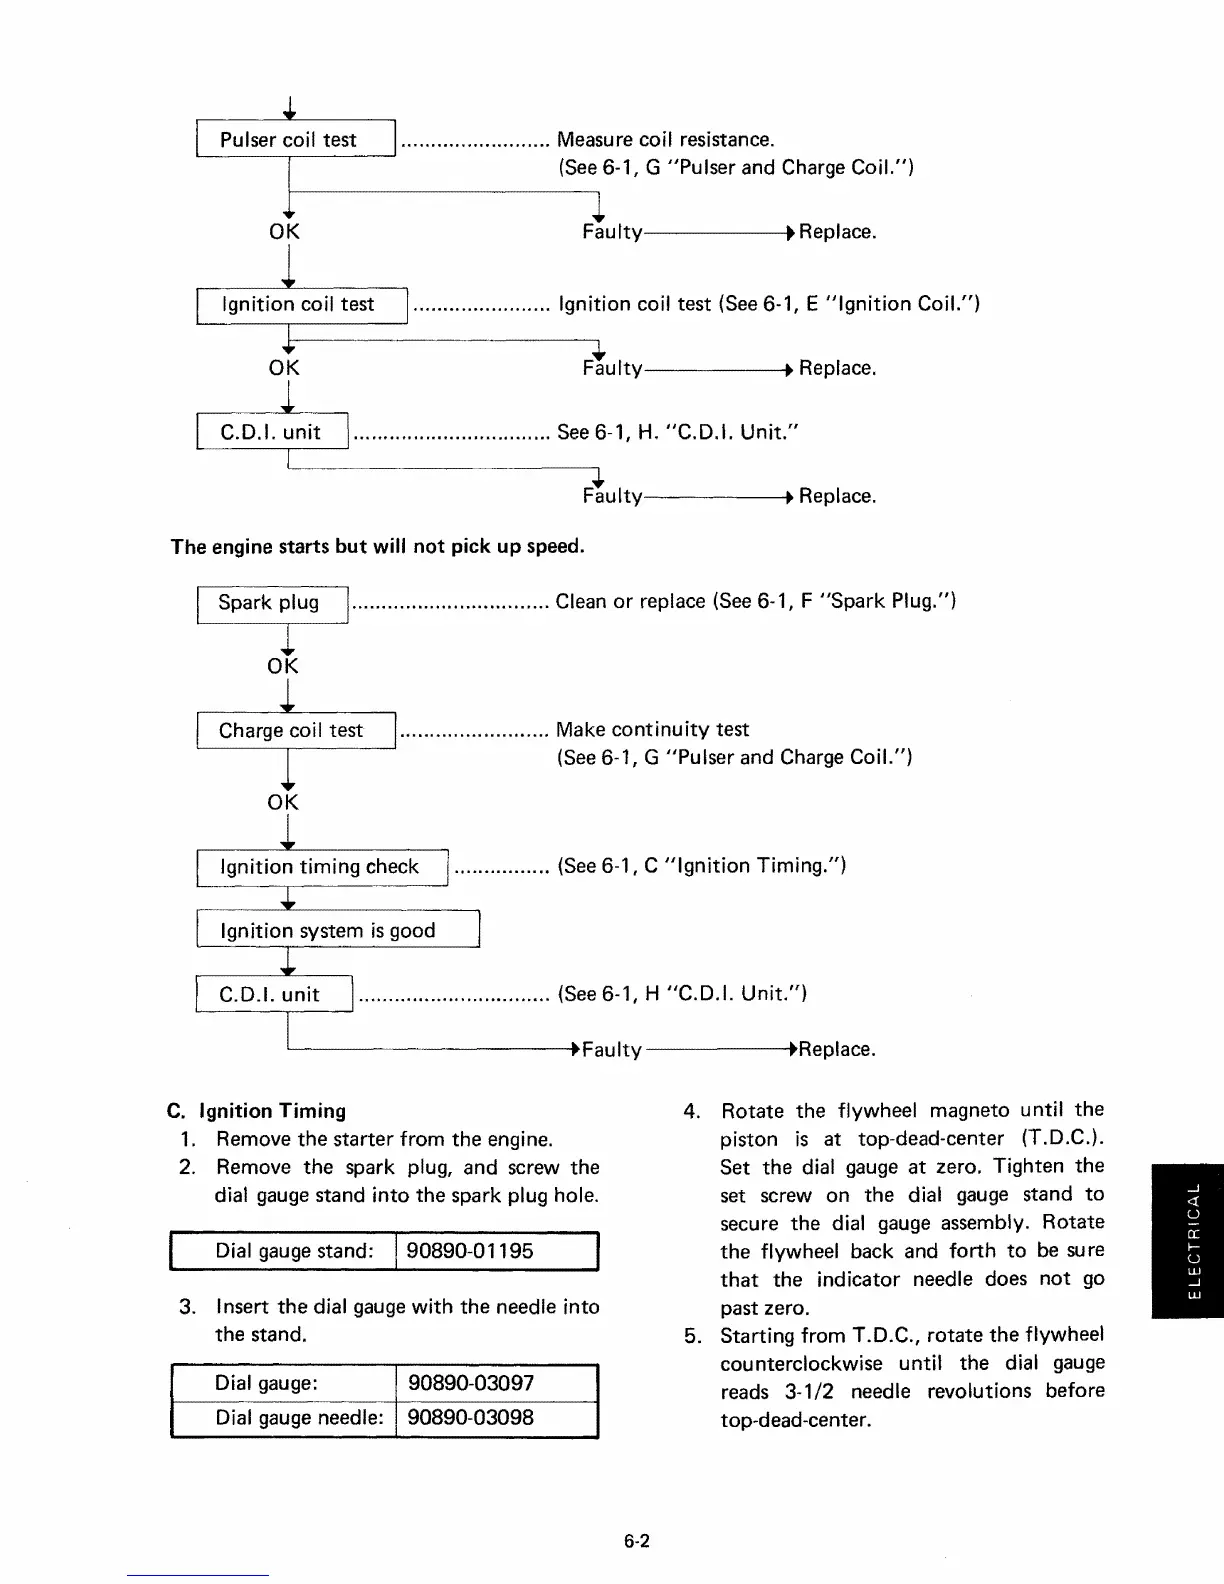
......................... Measure coil resistance.
'-----.---_
......
(See 6-1, G
"Pulser
and
Charge Coil.")
....................... Ignition coil
test
(See 6-1, E
"Iqnition
Coil.")
OK Replace.
C.D.I.?g
See 6-1, H. "C.D.1. Unit."
+
Faulty • Replace.
The
engine starts
but
will
not
pick up speed.
................................. Clean or replace (See 6-1, F
"Spark
Plug.")
......................... Make
continuity
test
'---
__
--,---
...J
(See 6-1, G
"Pulser
and
Charge Coil.")
OK
................ (See 6-1, C
"lqnition
Timing.")
................................ (See 6-1, H "C.D.1. Unit.")
L------------....Faulty
------.~Replace.
Dial gauge stand: 190890-01195
3. Insert
the
dial gauge with
the
needle into
the
stand.
C. Ignition Timing
1. Remove
the
starter
from
the
engine.
2. Remove
the
spark plug,
and
screw
the
dial gauge stand
into
the
spark plug hole.
4. Rotate
the
flywheel magneto until
the
piston is at top-dead-center (T.D.C,).
Set
the
dial gauge
at
zero. Tighten
the
set screw on
the
dial gauge stand
to
secure
the
dial gauge assembly.
Rotate
the
flywheel back
and
forth
to be sure
that
the
indicator needle does
not
go
past zero.
5. Starting from T.D.C.,
rotate
the
flywheel
counterclockwise until
the
dial gauge
reads
3-1/2 needle revolutions before
top-dead-center.
90890-03097
90890-03098
Dial gauge needle:
Dial gauge:
6-2