2-3. ASSEMBLY
AND
ADJUSTMENT
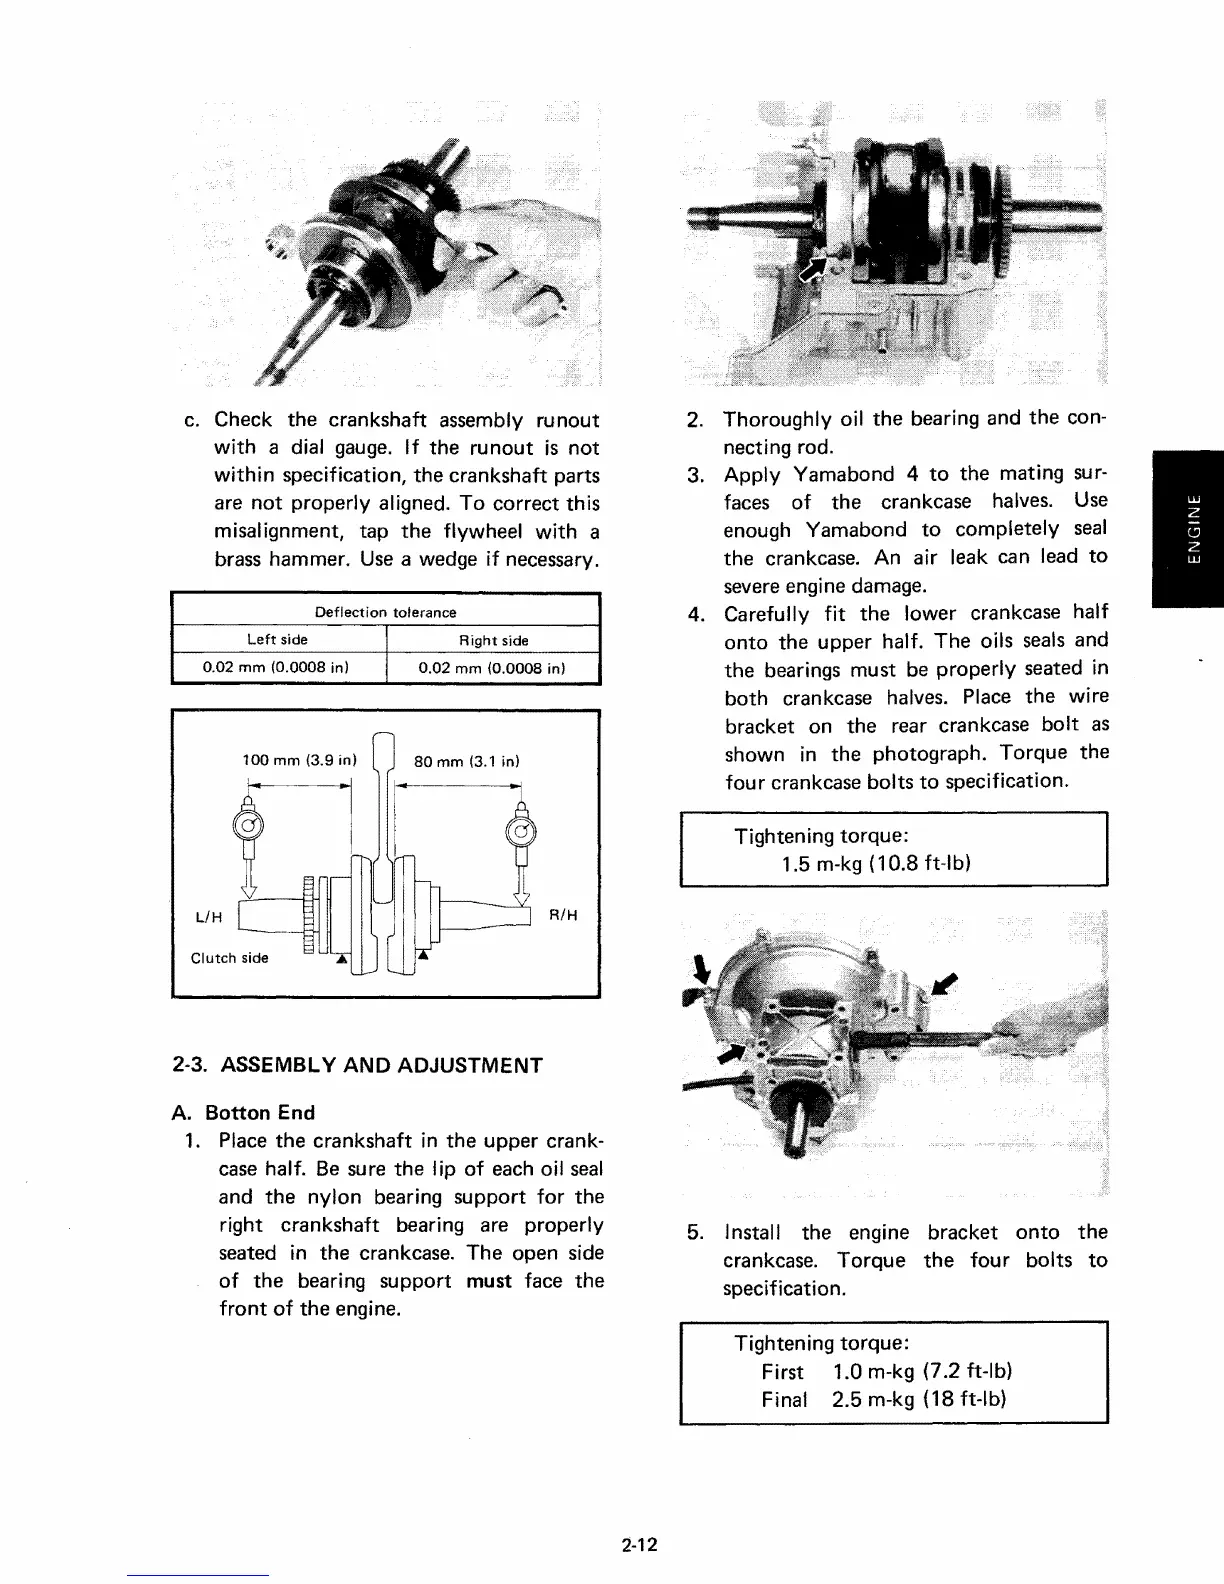
Tightening torque:
1.5 m-kg (10.8 ft-lb)
2. Thoroughly oil the bearing and the con-
necting rod.
3.
Apply
Yamabond 4
to
the mating sur-
faces
of
the crankcase halves. Use
enough Yamabond
to
completely
seal
the crankcase. An air leak can lead
to
severe
engine damage.
4. Carefully
fit
the lower crankcase
half
onto
the upper half. The oils
seals
and
the bearings must be properly seated in
both
crankcase halves. Place the wire
bracket on the rear crankcase
bolt
as
shown in the photograph. Torque the
fou r crankcase bolts
to
specification.
5. Install the engine bracket
onto
the
crankcase. Torque
the
four
bolts
to
specification.
R/H
Right
side
0.02
mm
(0.0008
in)
80
mm
(3.1 in)
Deflection
tolerance
Left
side
100
mm (3.9
in)
0.02
mm
(0.0008 in)
LlH
c. Check the crankshaft assembly
runout
with
a dial
gauge.
If the ru
nout
is
not
within
specification, the crankshaft parts
are
not
properly aligned. To correct this
misalignment, tap the flywheel
with
a
brass hammer. Use a wedge
if
necessary.
A.
Botton
End
1. Place the crankshaft in the upper crank-
case
half. Be sure the
lip
of
each oil
seal
and the
nylon
bearing support
for
the
right crankshaft bearing are properly
seated in the crankcase. The open side
of
the bearing support must face the
front
of
the engine.
Tightening torque:
First 1.0 m-kg (7.2 ft-Ib)
Final 2.5 m-kg (18 ft-Ib)
2-12