8-31
IM AQ1210-01EN
Using the Application Feature
8
Operation on the Optical Power Meter Side
AQ1210A,
AQ1215A, AQ1210E,
AQ1215E, AQ1215F,
AQ1216F
AQ1210E, AQ1215E,
AQ1215F, AQ1216F
Light source Optical power meter
Optical fiber cable under loss test
OTDR port (PORT1)
OPM port
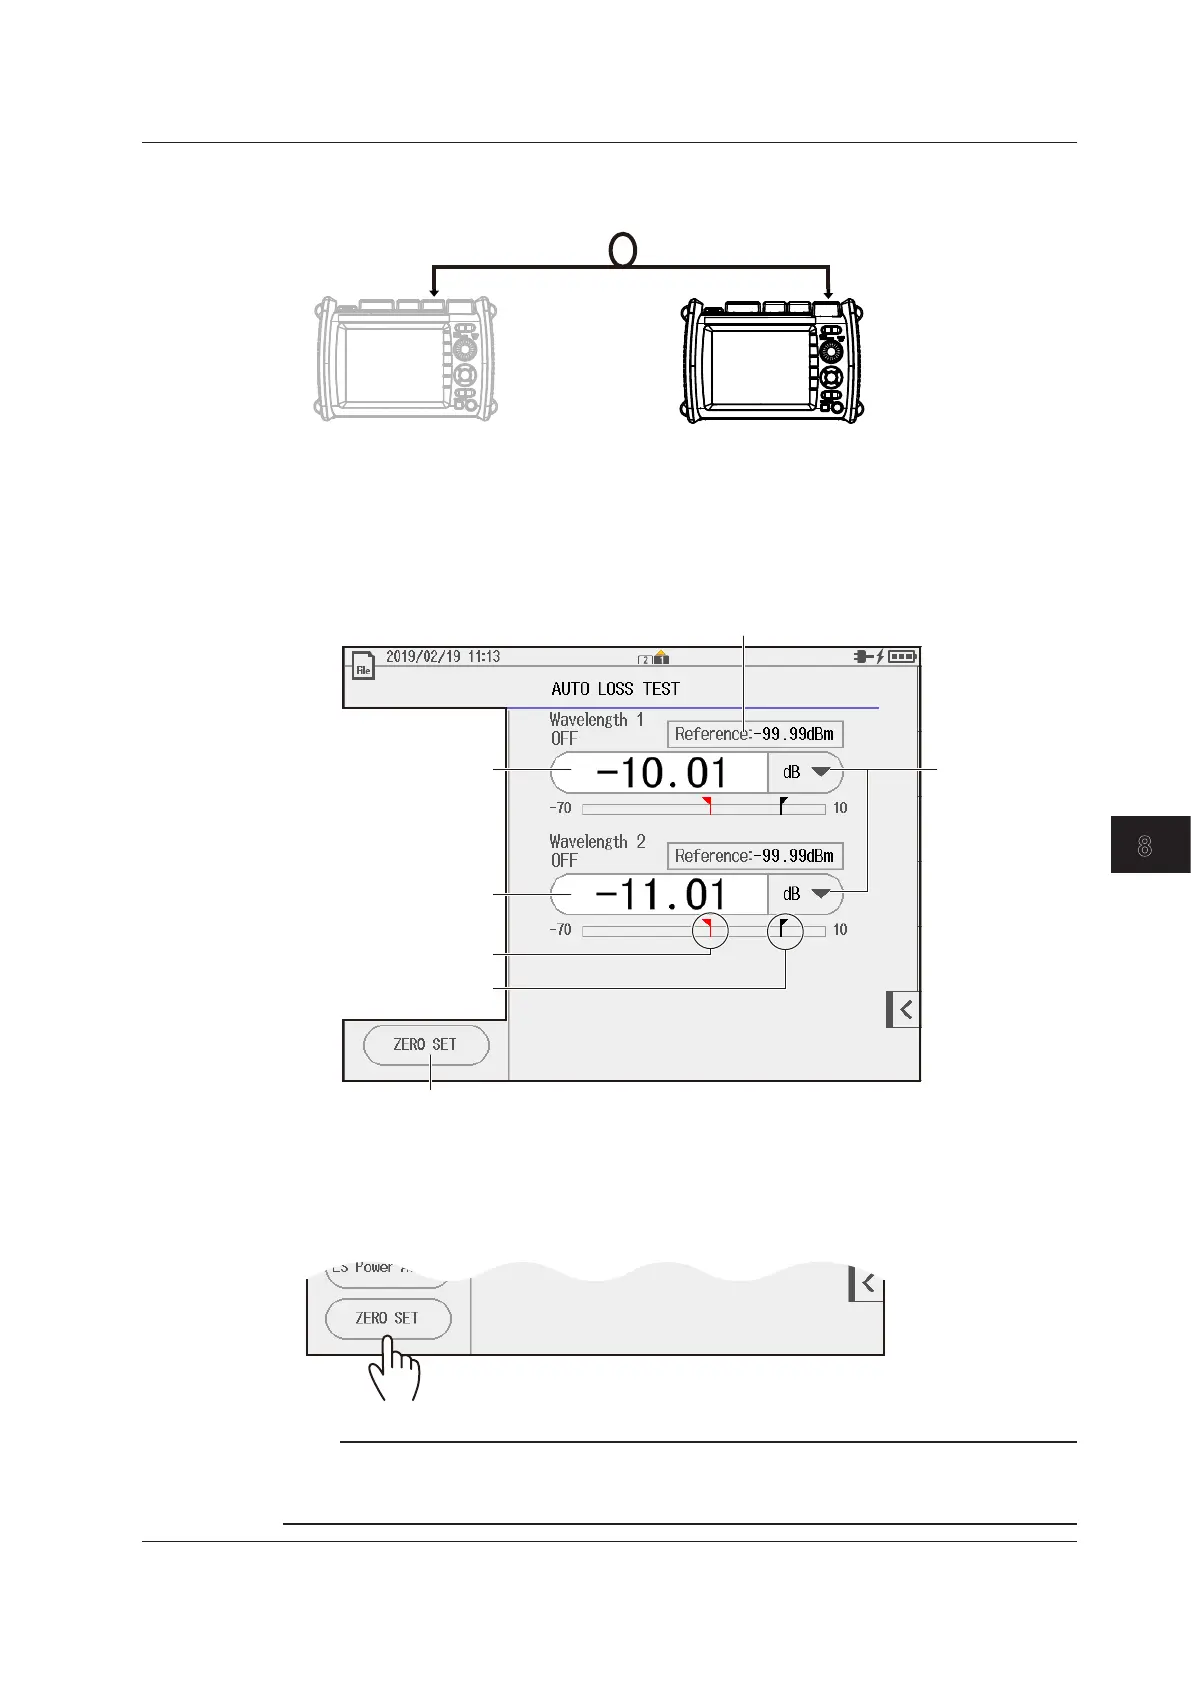
Optical Power Meter Display Screen
6.
Tap the Function soft key to select Power Meter. You can now operate the optical power meter
display screen.
Set the reference value (–80 to 40dBm).
The reference value appears if you press the DREF
soft key or set the unit to dB. See section 7.3.
Measured value of
wavelength 1
Measured value of
wavelength 2
Line indicating the lower
threshold
Line indicating the upper
threshold
Performs zero set
Set the unit
(dB, dBm, W).
See section 7.3.
Executing the Zero Set
7.
Tap ZERO SET.
Remove the optical fiber cables from the instrument and close the OPM port covers, or make sure that the
power meter is not receiving any light, and then start the optical power meter zero set procedure.
Note
Perform a zero-set whenever necessary, such as after you have turned on the power or when the ambient
temperature changes. Performing a zero-set adjusts the internal deviation of the optical power measurement
section and enables you to obtain more accurate absolute optical power values.
8.3 Performing an Auto Loss Test (Auto Loss Test)
 Loading...