EasyManuals Logo

Zebra ZQ520 Maintenance Manual

Zebra ZQ520
54 pages
To Next Page IconTo Next Page
To Previous Page IconTo Previous Page
Page #34 background imageLoading...
Page #34 background image
P1075391-001 • ZQ520 Repair Procedures • 2-34 •
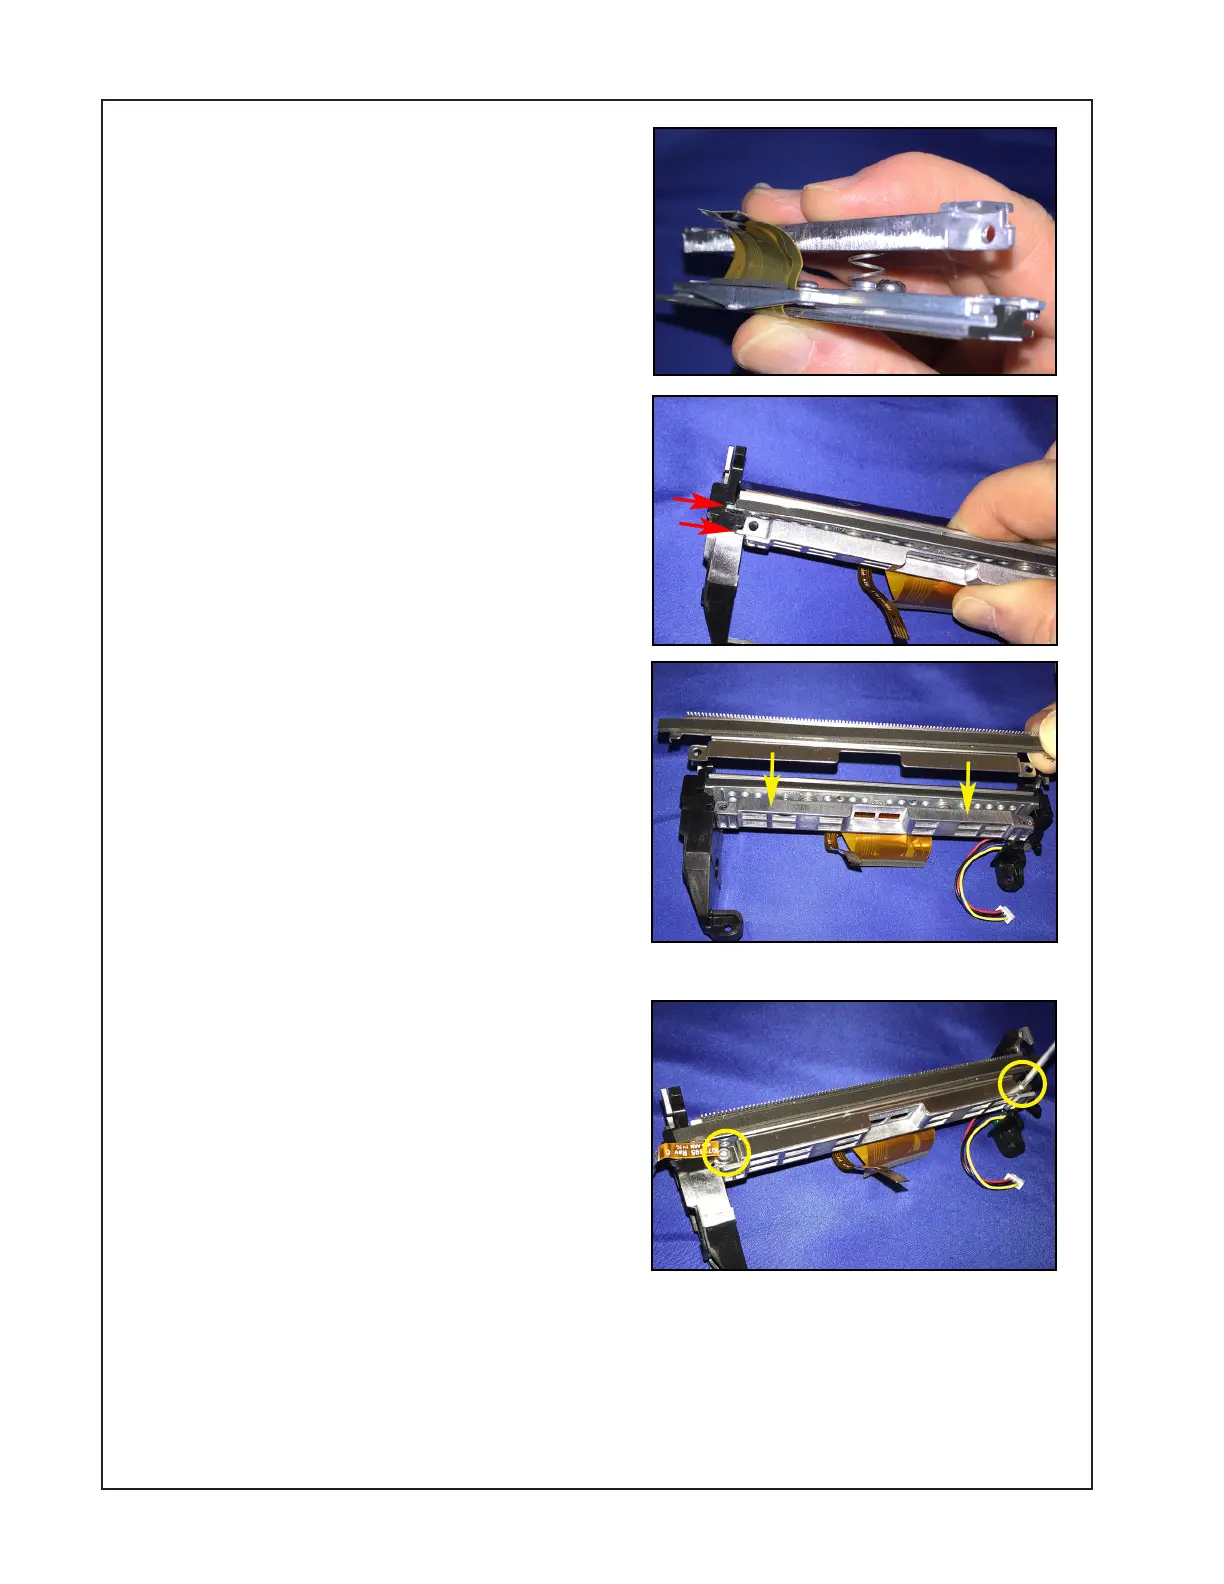
6. Press the Printhead Assembly
and the Spring Bar together such
that the opposite ends of the
springs rest on the two post on the
Printhead Bracket.
7. Pressing the Printhead Assembly
and Spring Bar together, insert the
tabs on the ends of the Printhead
into the notches (arrows) on
either side of the Frame. Slide the
mechanism forward until the tabs
on the Spring Bar are inserted into
the corresponding notches on the
Frame.
8. Install the Tear Bar onto the Spring
Bar as shown.
9. Secure the Printhead Assembly to
the Frame with the two (2) screws
using a T-8 driver (2.5 +/- 1 in. lb.).
Be sure to connect the ground strap
(where shown).

Other manuals for Zebra ZQ520

Questions and Answers:

Question and Answer IconNeed help?

Do you have a question about the Zebra ZQ520 and is the answer not in the manual?

Zebra ZQ520 Specifications

General IconGeneral
Print MethodDirect Thermal
Resolution203 dpi
Operating Humidity10% to 90% non-condensing
Storage Humidity10% to 90% non-condensing
Max Print Width4.09 in (104 mm)
ConnectivityBluetooth
BatteryPowerPrecision+
DurabilityIP54-rated
Drop SpecificationMultiple 6.6 ft./2 m drops to concrete
Media SensorsReflective and transmissive
Core Inner Diameter0.75 in (19 mm)
Thickness2.3 mil to 5.5 mil
Operating Temperature14°F to 122°F (-10°C to 50°C)
Weight1.73 lbs (0.79 kg) with battery
Supported Media Typeslabels
Max Print Speed5 in./127 mm per second

Related product manuals