P1075391-001 • ZQ520 Repair Procedures • 2-45 •
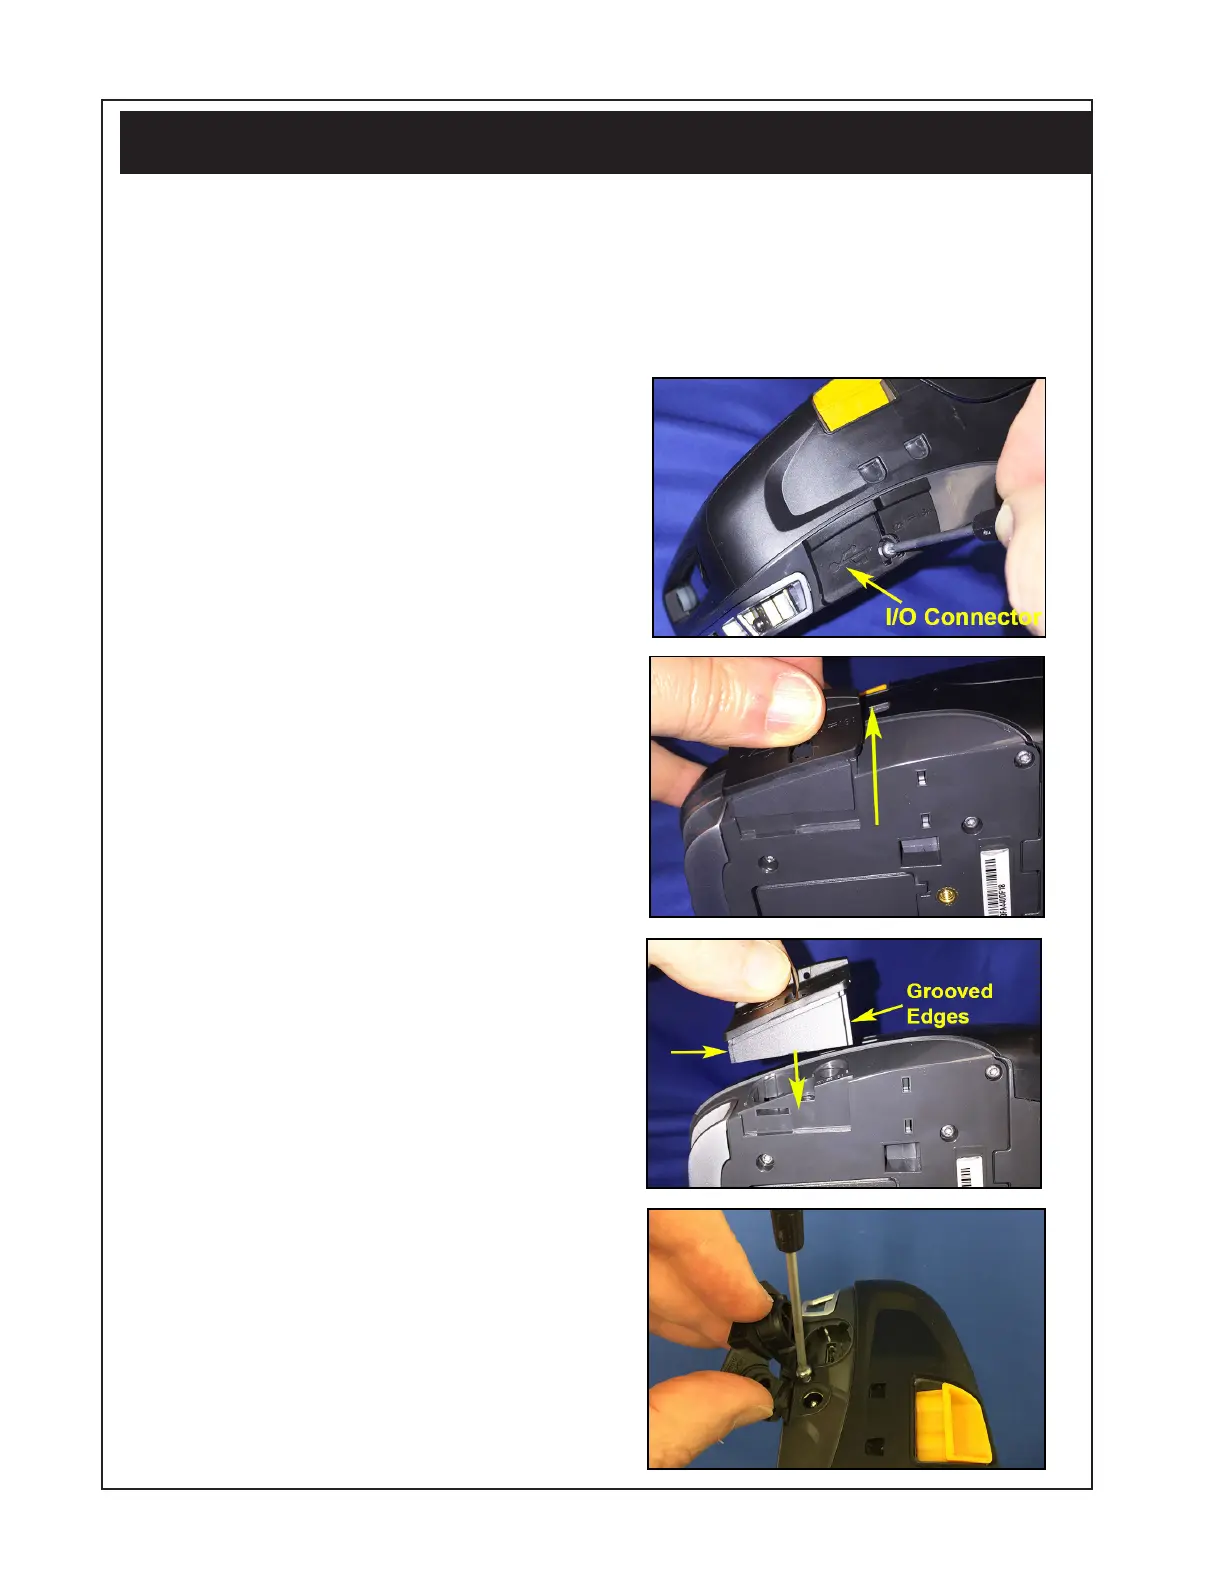
I/O Connector Door
Installation Instructions
This kit includes the parts and documentation necessary to install the
P1072539-013 I/O Connector Door. Read these instructions thoroughly before
attempting to install this kit.
Tools Required: T-8 TORX Driver (4.7 +/- 1 in. lb.)
Removing the I/O Connector Door
1. Use a TORX T8 driver to remove
the screw securing the I/O
Connector Door to the lower
housing. (Retain the screw
for installation of the new I/O
Connector Door.)
2. Slide the I/O Door up and out of
the Main Housing to remove (as
shown).
Removing the I/O Connector Door
1. Insert the grooved edges of the
I/O Door into the slot on the
bottom of the Main Housing (as
shown).
2. Use a T-8 driver to secure the I/O
Door to the Main Housing with
the screw provided.
 Loading...