EasyManuals Logo

Zebra ZQ520 Maintenance Manual

Zebra ZQ520
54 pages
To Next Page IconTo Next Page
To Previous Page IconTo Previous Page
Page #44 background imageLoading...
Page #44 background image
P1075391-001 • ZQ520 Repair Procedures • 2-44 •
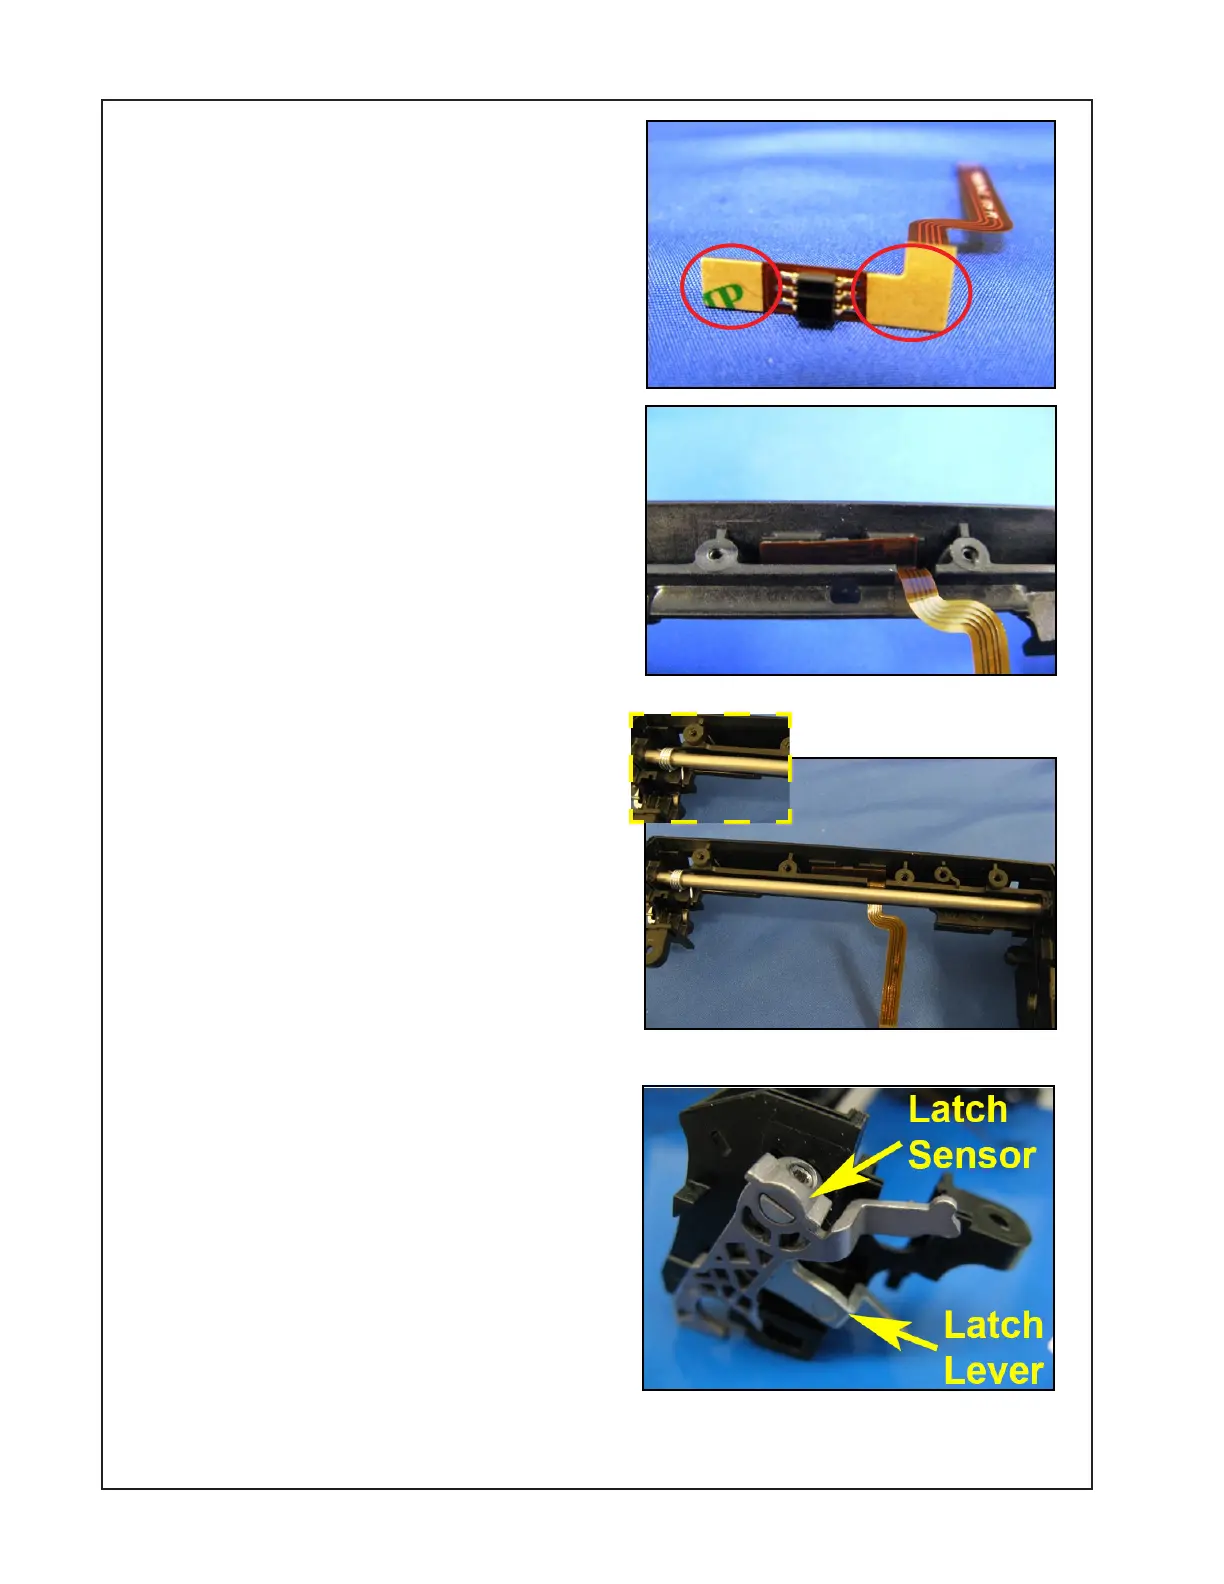
Installing the Gap Sensor Flex
Cable
1. Remove the two (2) pieces of
adhesive backing from the Gap
Sensor Cable (where shown).
2. Install the Cable into the Printer
Frame and press firmly to adhere
the Cable to the Frame. Ensure
that the sensor is aligned with the
hole in the Frame.
3. Place the Latch Torsion Spring
onto the Latch Shaft.
4. Install the Latch Shaft from
the right side of the Frame and
inserting it through the hole in the
left side of the Frame. Be sure that
the spring leg is in the slot on the
Frame (inset) and that the cable is
located under the shaft.
5. Install the right Side Latch Gear
and the left Side Latch Sensor on
the Latch Shaft and secure each
with a set screw using a 1.5 mm
Hex driver (4.7 +/- in. lb.).

Other manuals for Zebra ZQ520

Questions and Answers:

Question and Answer IconNeed help?

Do you have a question about the Zebra ZQ520 and is the answer not in the manual?

Zebra ZQ520 Specifications

General IconGeneral
Print MethodDirect Thermal
Resolution203 dpi
Operating Humidity10% to 90% non-condensing
Storage Humidity10% to 90% non-condensing
Max Print Width4.09 in (104 mm)
ConnectivityBluetooth
BatteryPowerPrecision+
DurabilityIP54-rated
Drop SpecificationMultiple 6.6 ft./2 m drops to concrete
Media SensorsReflective and transmissive
Core Inner Diameter0.75 in (19 mm)
Thickness2.3 mil to 5.5 mil
Operating Temperature14°F to 122°F (-10°C to 50°C)
Weight1.73 lbs (0.79 kg) with battery
Supported Media Typeslabels
Max Print Speed5 in./127 mm per second

Related product manuals