EasyManuals Logo

Zebra ZQ520 Maintenance Manual

Zebra ZQ520
54 pages
To Next Page IconTo Next Page
To Previous Page IconTo Previous Page
Page #43 background imageLoading...
Page #43 background image
P1075391-001 • ZQ520 Repair Procedures • 2-43 •
Removing the Gap Sensor Flex
Cable
1. Remove the Printer Chassis from
the Main Housing as described on
Page 2-16.
2. Detatch the Printer Frame from
the PCBA Bracket as detailed on
Pages 2-27 to 2-28.
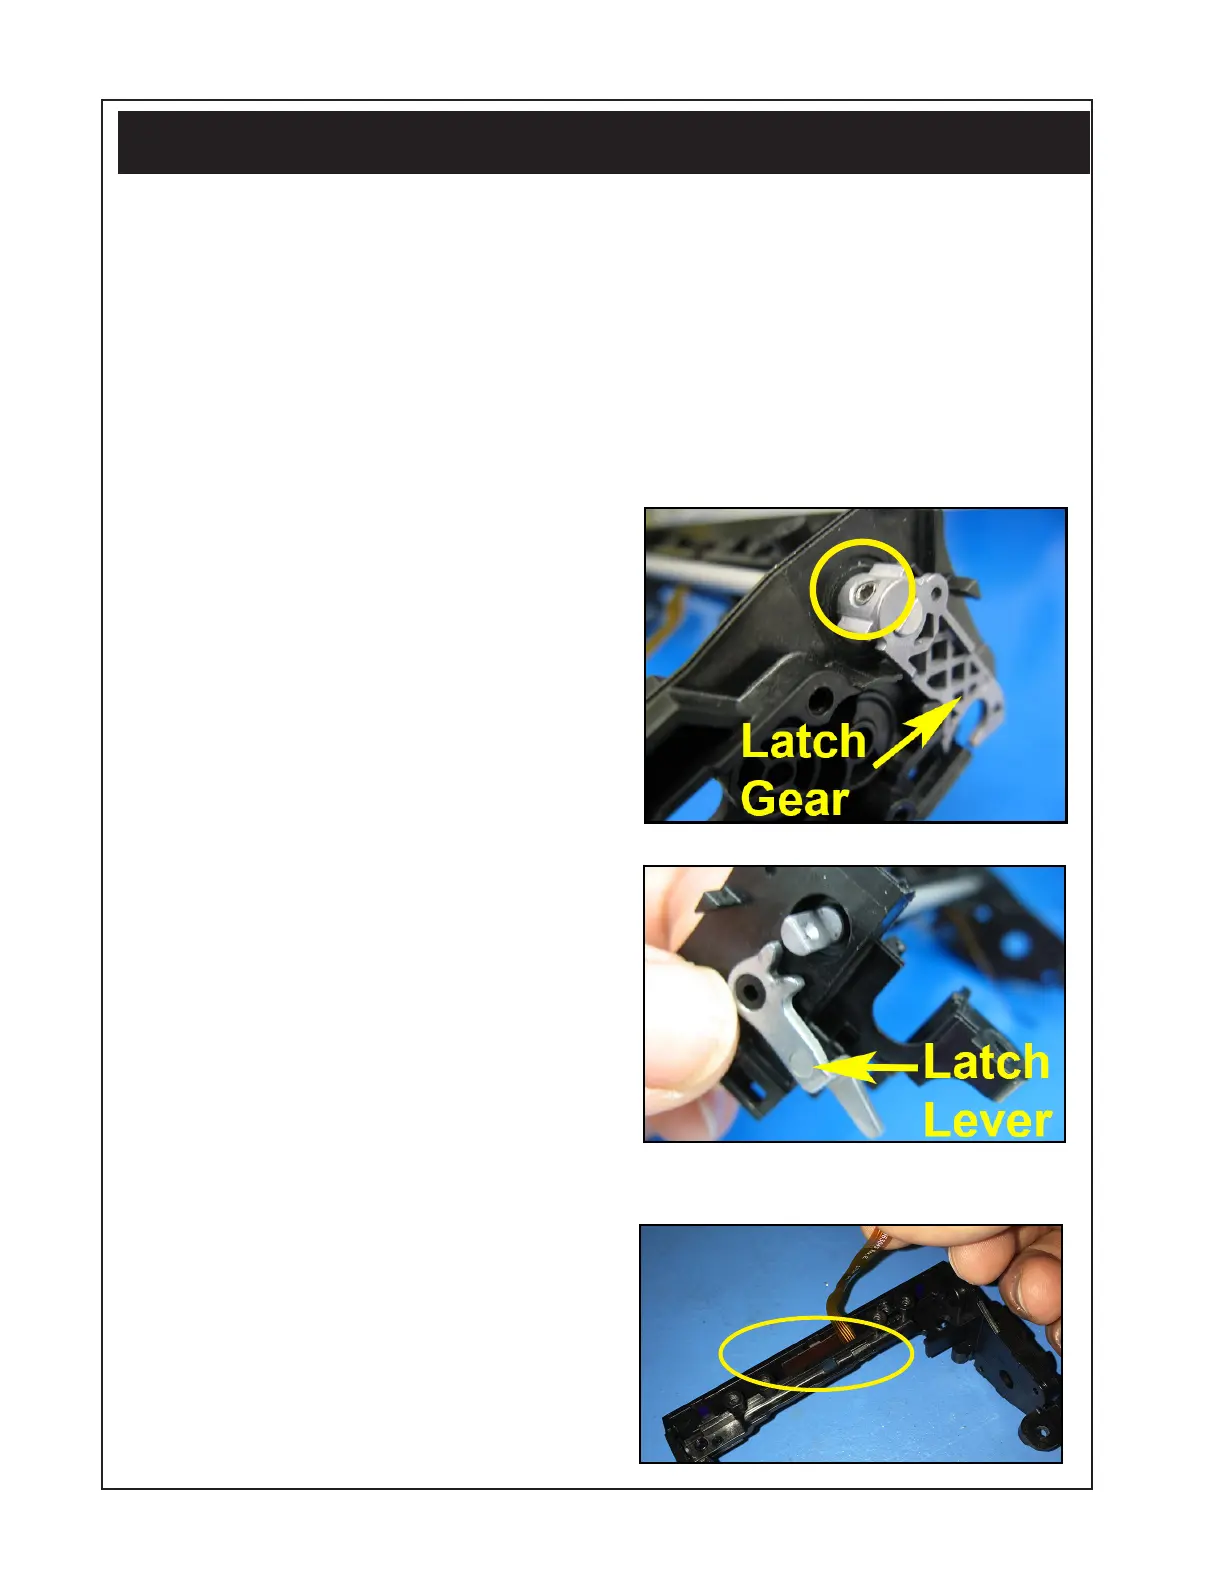
3. Use a 1.5 mm Hex driver to
remove the set screw on the right
side of the Latch Shaft Assembly
(where shown).
4. Remove the right Side Latch Gear
from the Shaft and then remove
the left Side Latch Sensor from
the Shaft. (The Latch Lever on the
left side can remain in position on
the Frame.)
5. Slide the Latch Shaft out from the
Frame.
6. Peel the Gap Sensor Cable
(circled) from the Frame.
Installation Instructions
This kit includes the parts and documentation necessary to install the
P1072539-011 Gap Sensor Flex Cable. Read these instructions thoroughly before
attempting to install this kit.
Tools Required: T-8 TORX Driver (4.7 +/- 1 in. lb.), 1.5 mm Hex Driver (4.7
+/- 1 in. lb.)
Gap Sensor Flex Cable

Other manuals for Zebra ZQ520

Questions and Answers:

Question and Answer IconNeed help?

Do you have a question about the Zebra ZQ520 and is the answer not in the manual?

Zebra ZQ520 Specifications

General IconGeneral
Print MethodDirect Thermal
Resolution203 dpi
Operating Humidity10% to 90% non-condensing
Storage Humidity10% to 90% non-condensing
Max Print Width4.09 in (104 mm)
ConnectivityBluetooth
BatteryPowerPrecision+
DurabilityIP54-rated
Drop SpecificationMultiple 6.6 ft./2 m drops to concrete
Media SensorsReflective and transmissive
Core Inner Diameter0.75 in (19 mm)
Thickness2.3 mil to 5.5 mil
Operating Temperature14°F to 122°F (-10°C to 50°C)
Weight1.73 lbs (0.79 kg) with battery
Supported Media Typeslabels
Max Print Speed5 in./127 mm per second

Related product manuals