P1075391-001 • ZQ520 Repair Procedures • 2-32 •
Installation Instructions
This kit includes the parts and documentation necessary to install the
P1072539-001 Printhead Assembly. Read these instructions thoroughly before
attempting to install this kit.
Tools Required: T-8 & T-6 TORX Drivers (4.7 +/- 1 in. lb. & 2.5 +/- 1 in.
lb.)
Removing the Printhead Assembly
1. Disassemble the printer as
described on 2-16, including
disconnecting the Printhead Cable
from the MLB.
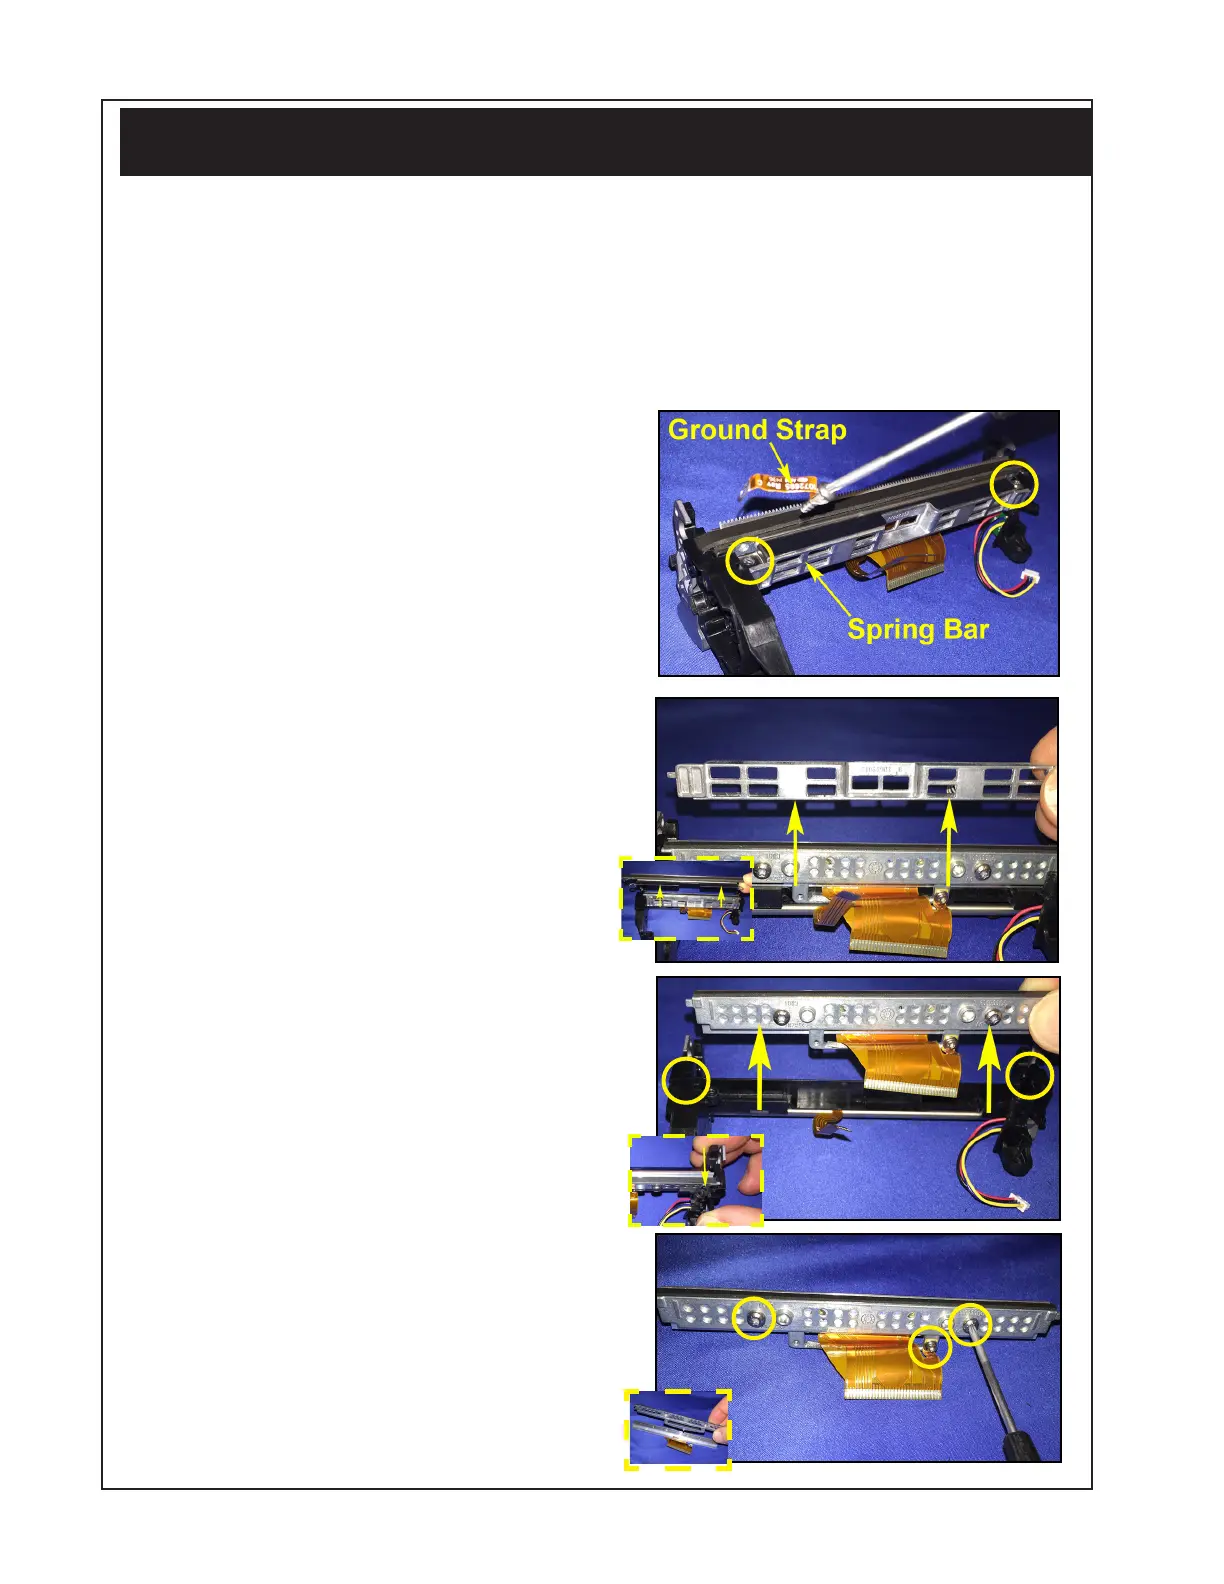
2. Use a T-8 TORX driver to remove
the (2) screws which attach the
Spring Bar and Tear Bar to the
Printer Frame (where shown). Be
sure to set aside the Ground Strap
which is held down by one of the
screws.
3. Lift the Tear Bar (inset) and then
the Spring Bar up and out of the
Printer Frame ensuring that you
retain the two (2) springs on the
back of the Spring Bar.
4. Slide the Printhead back to the
notches (circled) on each side of
the Printer Frame and lift it out of
the frame.
5. Use a T-8 driver to remove two
(2) screws attaching the Printhead
Bracket to the Printhead. Also
remove the screw securing the
printhead ground and clip to the
Bracket using a T-6 driver.
Printhead Assembly
 Loading...