43
Copyright © 2021 Nortek Security & Control LLC
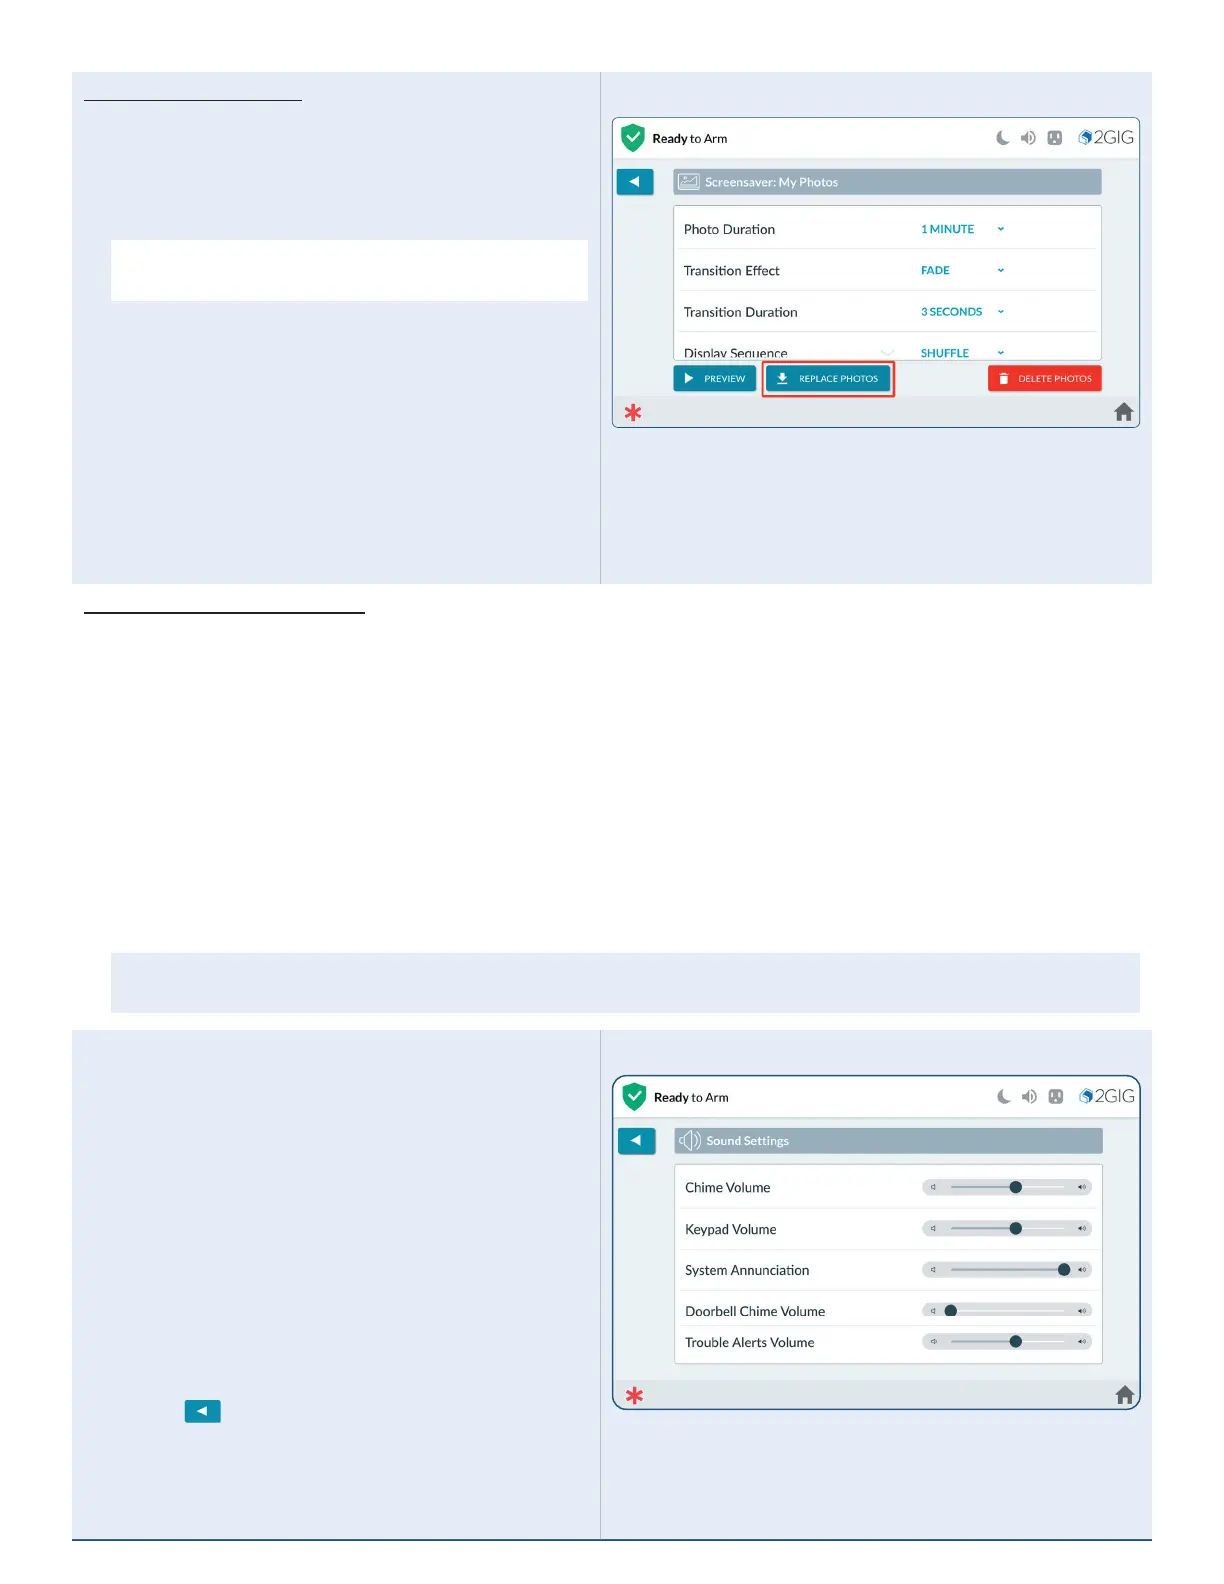
Screensaver: My Photos
1. On the Screensaver option, tap >.
2. To display your own photos:
a. Create a folder on a USB ash drive named:
“Slideshow”.
NOTE: The USB ash drive must be formated
FAT/FAT32.
b. Copy up to 50 photos to the “Slideshow” folder
on the USB ash drive. Supported le formats
include: JPG, Windows BMP, and PNG.
c. Insert the USB drive into the top of the panel
(you will need to remove the cap to expose the
USB connector).
d. Press the “Replace Photos” button.
e. Tap REPLACE PHOTOS. All previously
loaded photos will be deleted from the Panel,
and the new photos will be added.
Screen Saver - Replace Photos
Changing Screensaver Settings
Select from the following settings to adjust how your Screen Saver Photos are displayed:
1. Photo Duration – Select how long each photo will display before transitioning to the next photo (Options 30
seconds, 1, 2, or 5 minutes).
2. Transition Effect – (Options: None, Fade, Push, and Wipe).
3. Transition Duration – Number of seconds to transition between photos. (Options: 2, 3, or 5 seconds).
4. Display Sequence – Order in which the photos are displayed. (Options: By Photo Name, Shufe (Random).
5. Full Landscape Mode – Tap to Enable or Disable.
Clean Screen
To clean the screen without affecting on-screen functions, press START for 30 seconds available for cleaning.
Wipe the touchscreen with a soft, dry, microber cloth that is specially designed for cleaning sensitive surfaces.
WARNING: Once cleaning mode begins, the touchscreen and all functions will be unavailable for 30 seconds,
including the Emergency Buttons.
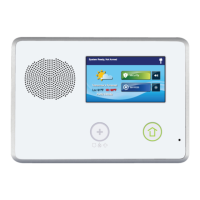
Sounds
The Sounds menu lets you adjust the volume of the
voice, chime, doorbells, keypad tones, and system
annunciations.
1. Touch and hold the desired control and then
swipe to the left to lower the volume or swipe to
the right to raise the volume:
»
Chime
»
Keypad
»
System Annunciation
»
Doorbells
»
Trouble Alerts Volume
2. Tap
when nished.
Sounds Menu Screen