90 CHAPTER 5: PERFORMING ADDITIONAL ADMINISTRATIVE TASKS
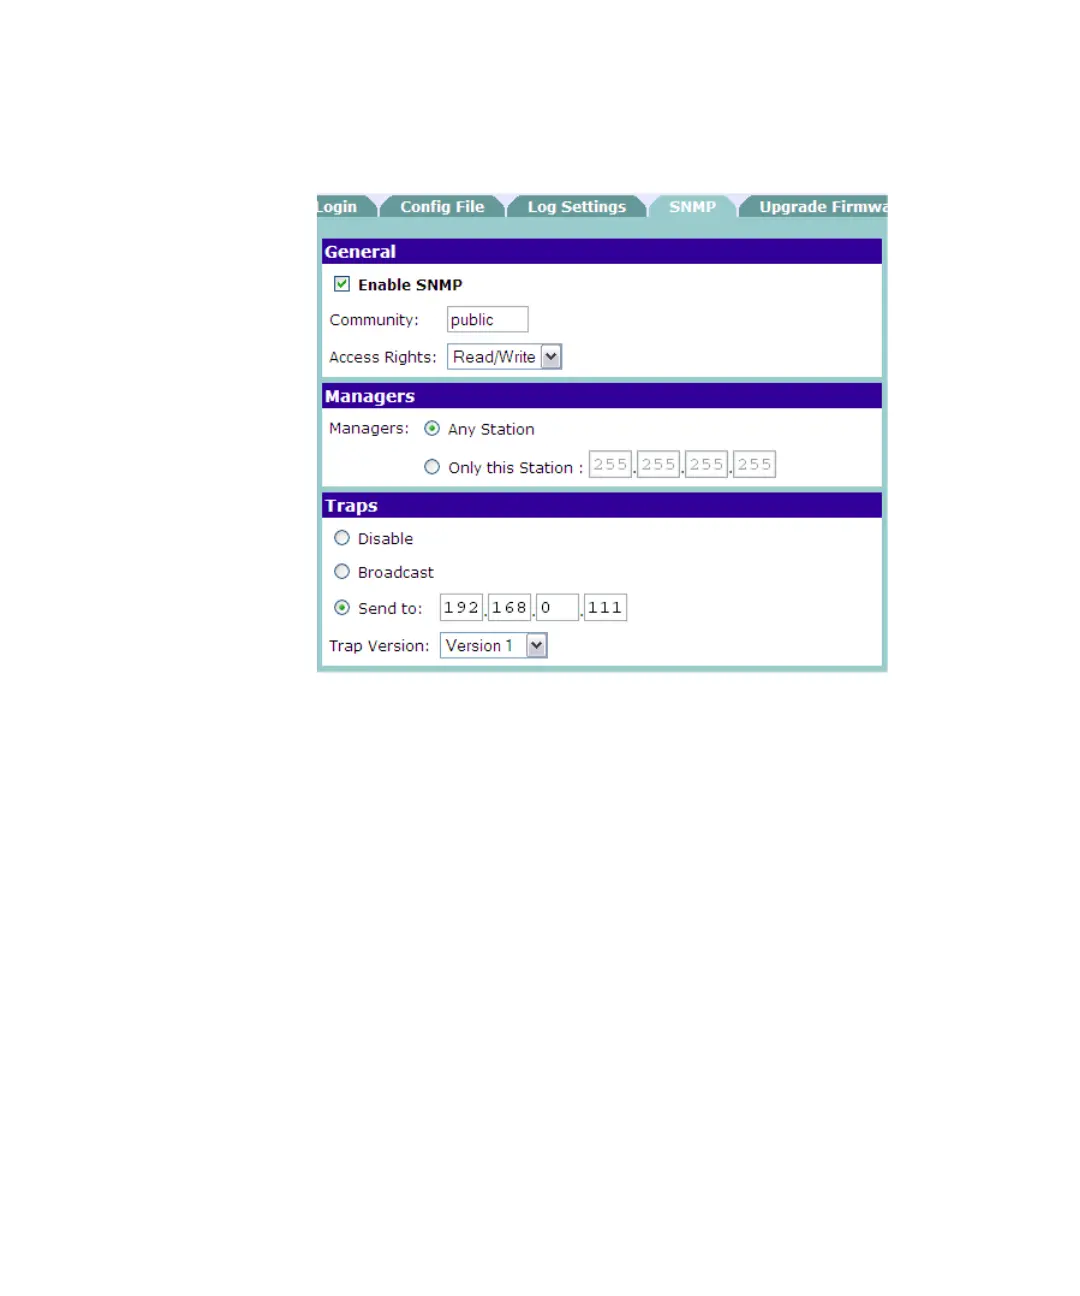
Figure 49 SNMP Screen
To configure the SNMP agent that is built into the Access Point:
1 On the menu, click Management.
2 Click the SNMP tab.
3 Select the Enable SNMP check box.
4 In Community, type the name SNMP community name (normally, either
Private or Public).
5 In Access Rights, select either:
■ Read-only – Allows get and trap operations; data can be read, but not
changed
■ Read/Write – Allows get, set, and trap operations; data can be read,
and setting changed
6 In Managers, specify a trap manager. You can set:
■ Any Station
■ Only this Station – Send traps to a specific computer. If you select this
option, you also need to type the IP address of the computer.
7 In Traps, specify how the traps will be sent. You can select: