5-16
Port 2 [GigabitEthernet1/0/2]:
Port status of LLDP : Enable
Admin status : Rx_Only
Trap flag : No
Roll time : 0s
Number of neighbors : 0
Number of MED neighbors : 0
Number of CDP neighbors : 0
Number of sent optional TLV : 0
Number of received unknown TLV : 0
As the sample output shows, GigabitEthernet 1/0/2 of Switch A does not connect any neighboring
devices.
CDP-Compatible LLDP Configuration Example
Network requirements
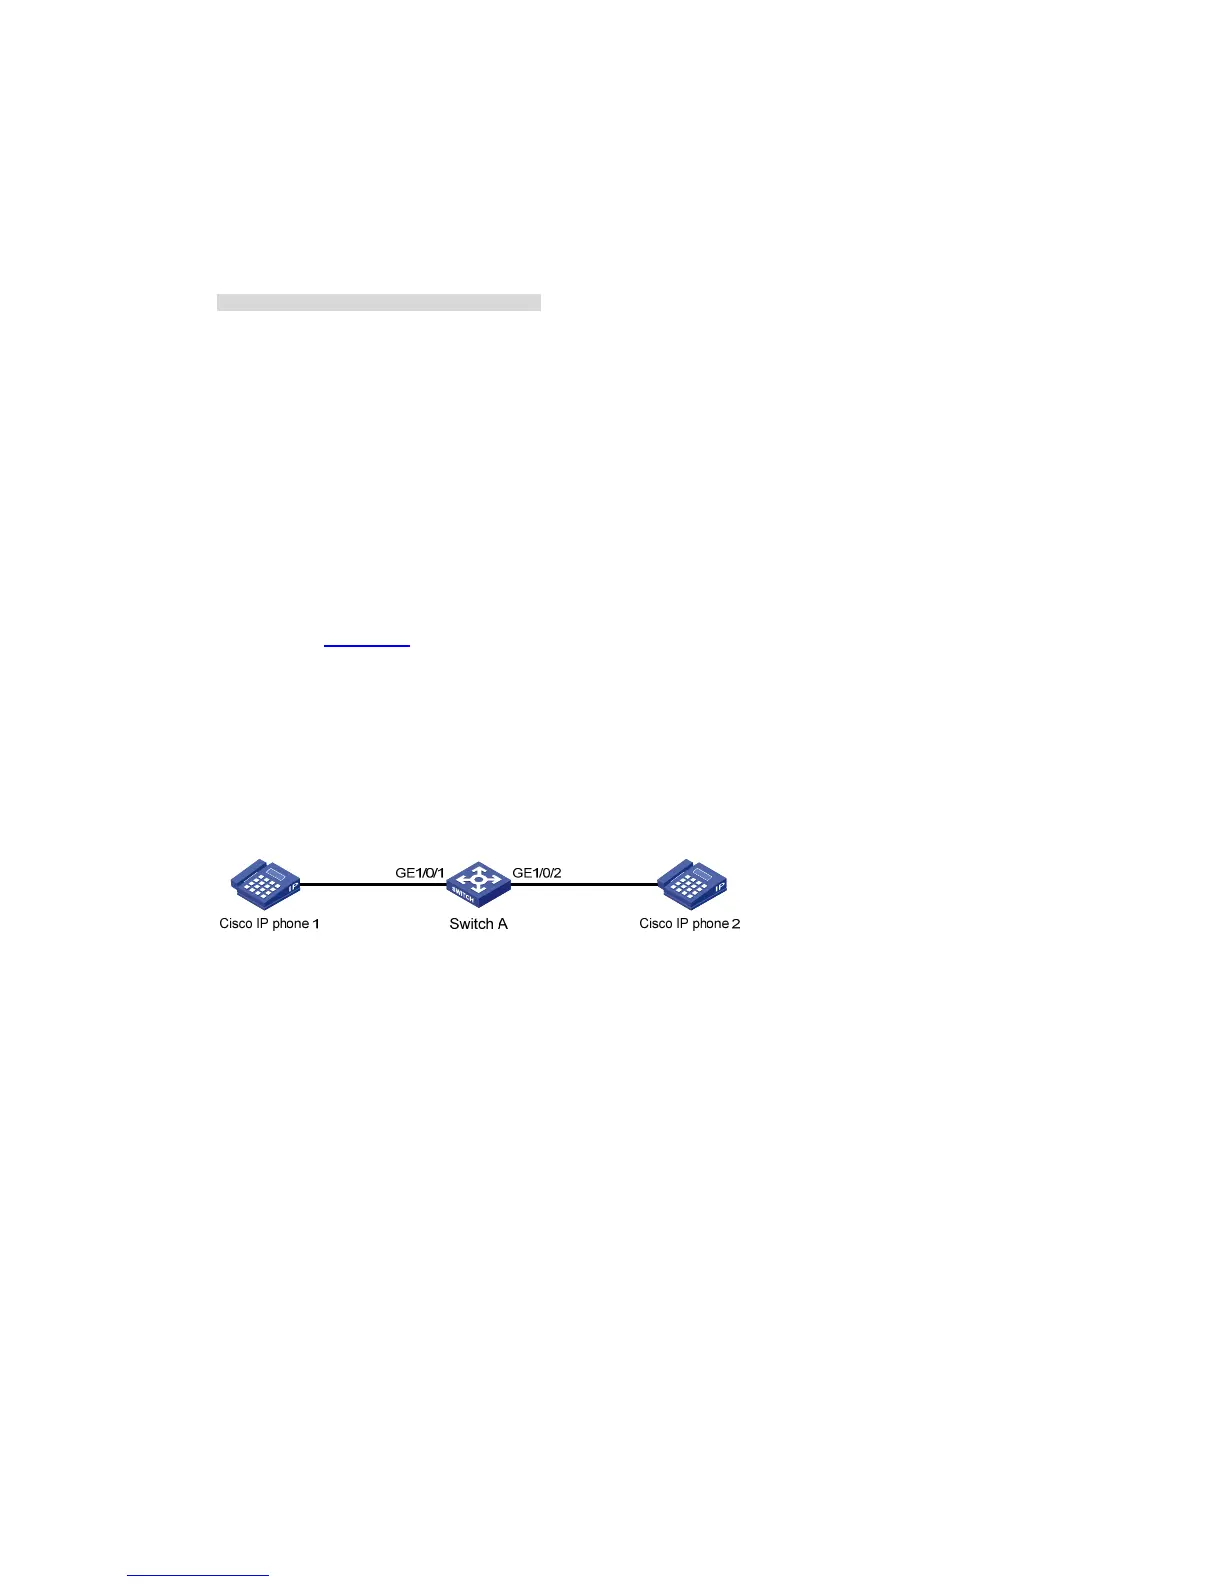
As shown in Figure 5-5:
z GigabitEthernet 1/0/1 and GigabitEthernet 1/0/2 of Switch A are each connected to a Cisco IP
phone.
z Configure voice VLAN 2 on Switch A. Enable CDP compatibility of LLDP on Switch A to allow the
Cisco IP phones to automatically configure the voice VLAN, thus confining their voice traffic within
the voice VLAN to be isolated from other types of traffic.
Figure 5-5 Network diagram for CDP-compatible LLDP configuration
Configuration procedure
1) Configure a voice VLAN on Switch A
# Create VLAN 2.
<SwitchA> system-view
[SwitchA] vlan 2
[SwitchA-vlan2] quit
# Set the link type of GigabitEthernet 1/0/1 and GigabitEthernet 1/0/2 to trunk and enable voice VLAN
on them.
[SwitchA] interface gigabitethernet 1/0/1
[SwitchA-GigabitEthernet1/0/1] port link-type trunk
[SwitchA-GigabitEthernet1/0/1] voice vlan 2 enable
[SwitchA-GigabitEthernet1/0/1] quit
[SwitchA] interface gigabitethernet 1/0/2
[SwitchA-GigabitEthernet1/0/2] port link-type trunk
[SwitchA-GigabitEthernet1/0/2] voice vlan 2 enable
[SwitchA-GigabitEthernet1/0/2] quit