Pannoramic MIDI 1.18 User’s Guide 4 Software Description
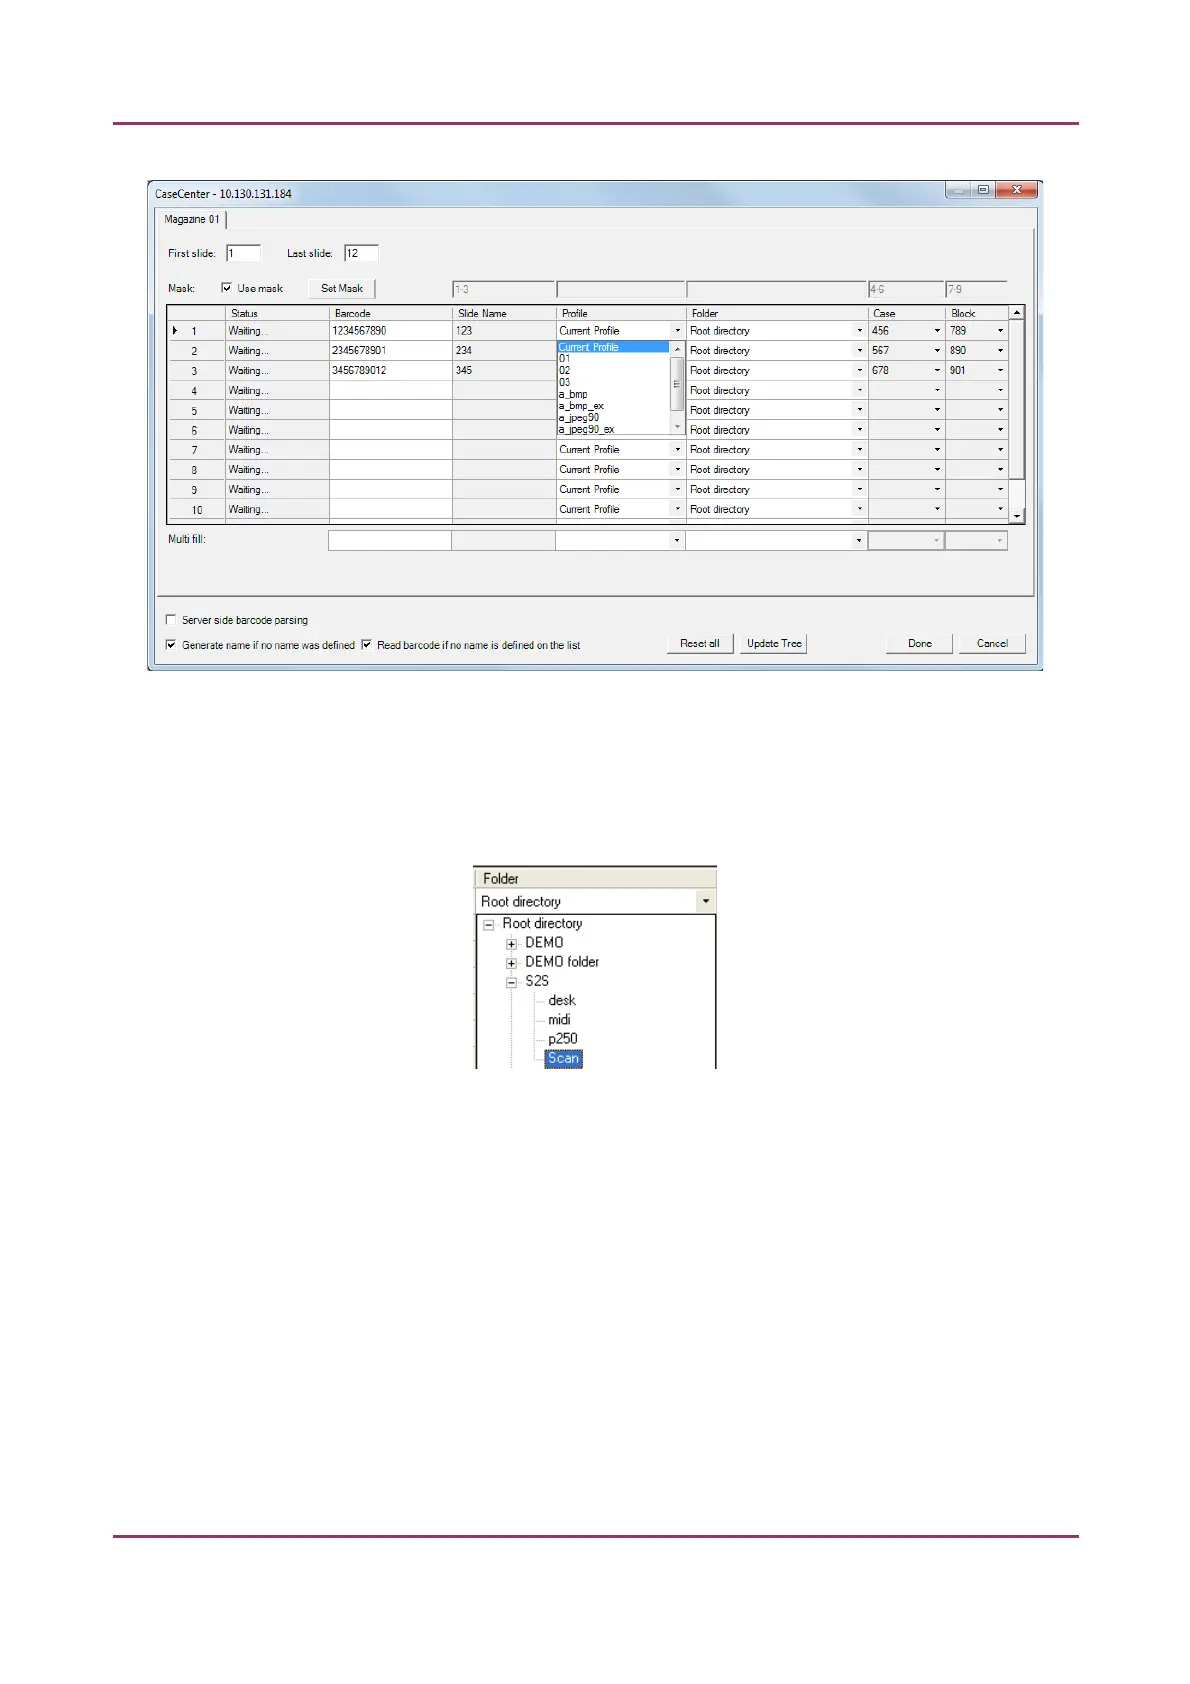
Figure 71 – Scan To Server window in Automatic Mode
• Profiles can be added by selecting a list entry from the Profile drop-down list.
• Select a folder where the slide will be scanned to. After clicking the Folder drop-
down list, a path will be displayed in which the destination folder can be selected.
Figure 72 – Folder selection
• Fill in the Case and Block fields in case you do not use masks, or select an item from
the drop-down list.
• With the Multi fill option the selected slides will be given the same input data to
their specific fields. Profile, Folder, Case, and Block fields can be auto-filled this way
by clicking the drop-down lists at the Multi fill section at the bottom of the window.
Rows can be selected one by one clicking the row headings while the Ctrl button on
your keyboard is pressed down, or select the entire form by clicking the gray field at
the top left corner.
• To erase/reset fields to default, click the Reset all button.
April 3, 2014 - Rev 1 3DHISTECH Ltd. 103(127)