/ actiNAS Manager · Storage/Share
Create New Share Folder
Steps to Create New Share Folder:
1. Click Create Share Folder.
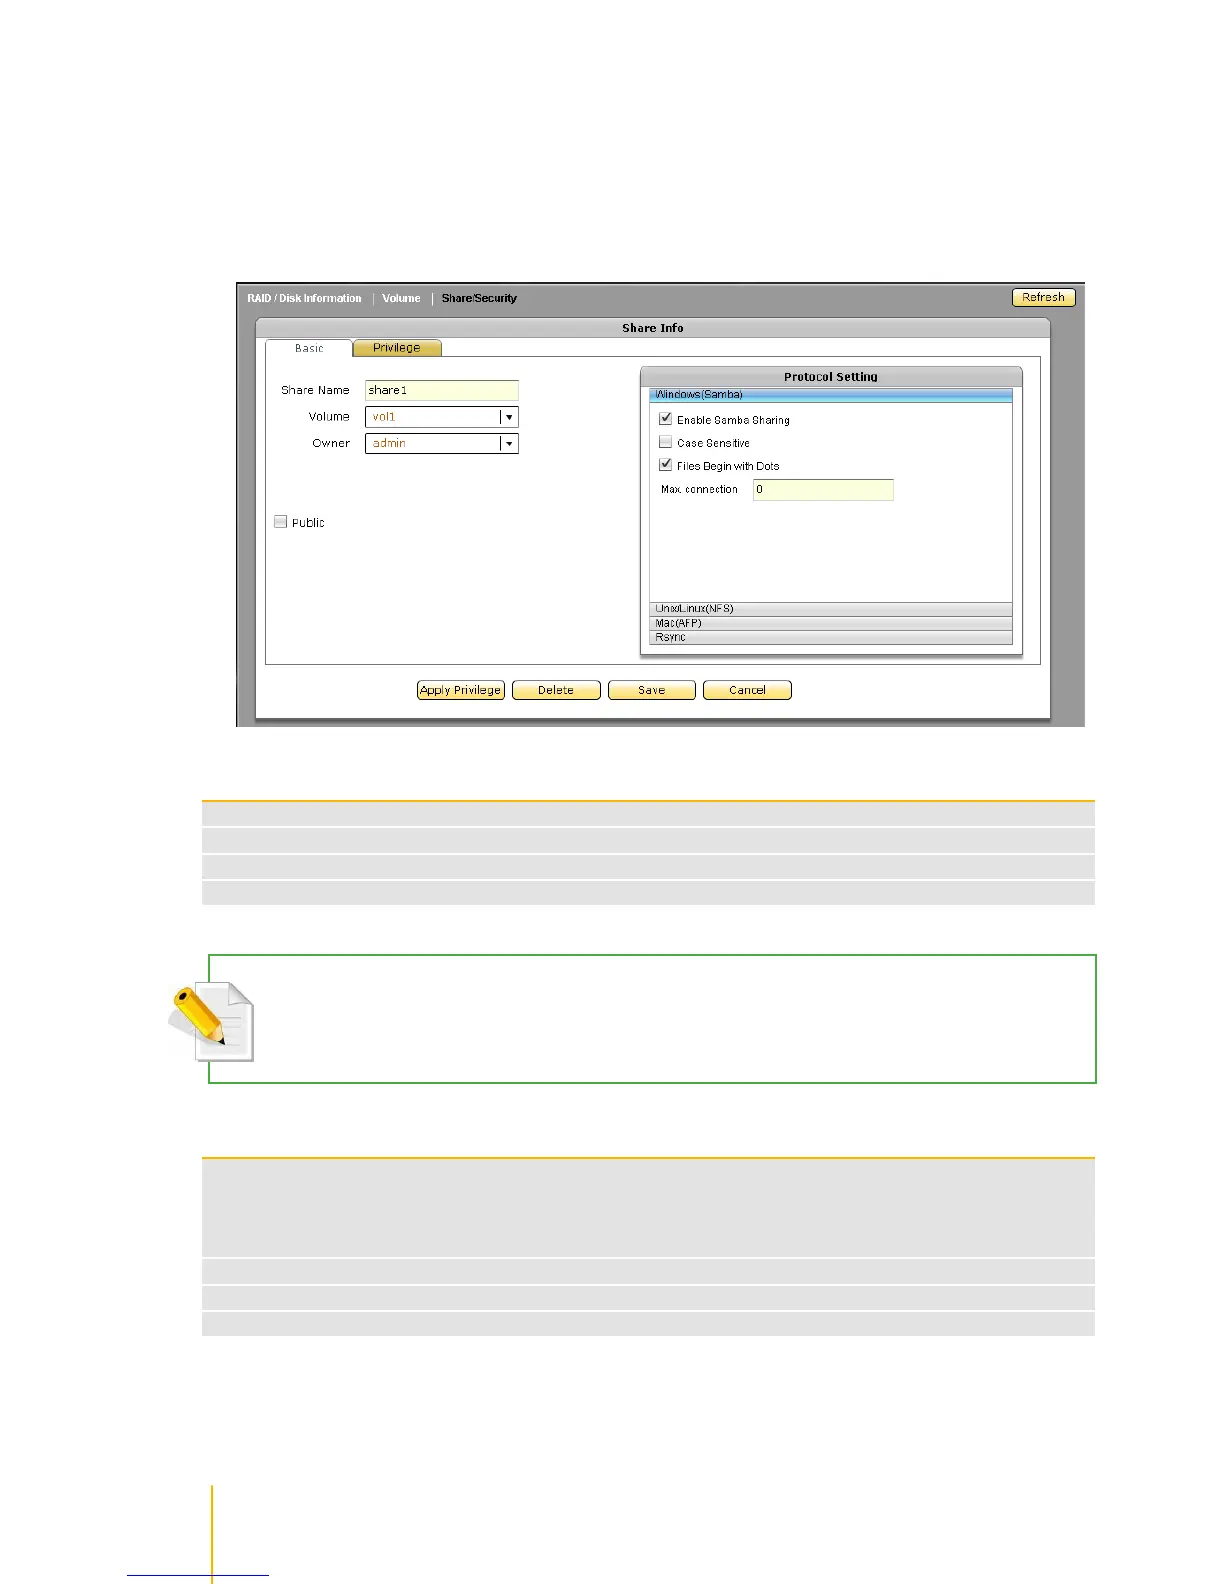
2. The Share Folder Basic Configuration screen will be displayed. Configure the necessary options.
Share Configuration Options
Enter the share folder name
Select the Volume where the share folder will be created
Set the owner of the share folder. By default, admin owns all share folders
When enabled (checked), the share folder is accessible to all users
NOTE: The share folder name does not allow space in-between characters.
NOTE: If the share folder is designated as WEB target share folder, do not enable Public option.
Share Configuration Buttons:
Use this to propagate the ACL from the parent share folder (the share name created in this
GUI) into its child directories or sub-directories (sub-folders) and files. For example, if user1
has read/write permission on a sub-directory but read-only on the main share folder, after
applying privilege, user1 will now have a read-only permission on the sub-directory.
Use this to delete the share folder.
Use this to save changes made.
Use this to undo changes made