Maintenance
68 Adept Cobra i600/i800 Robot User’s Guide, Rev G
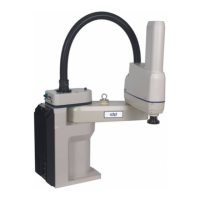
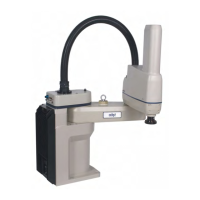
Figure 5-6. Installing AIB Chassis in Robot Base
9. Carefully insert the chassis into the robot base in the groove at the bottom of the
base - see Figure 5-6. Tilt the chassis up and into place against the robot, making
sure that none of the cables get trapped or pinched and that the chassis O-ring is
not damaged during installation.
10. Once the chassis is in place, use a 5 mm Allen key to tighten the chassis securing
screw. See Figure 5-2 on page 65 for details.
11. Connect the 200/240 VAC supply cable to the chassis AC Input connector.
12. Connect the AIB XPANEL cable to the XPANEL connector.
13. Connect any other cables that were removed from the chassis, such as XIO,
RS-232, or any others.
14. Connect the 24 VDC supply cable to the chassis +24 VDC input connector.
15. Switch on the 200/240 VAC input supply to the chassis.
16. Switch on the 24 VDC input supply to the chassis.
17. Install MicroV+ on the AIB chassis.
18. Install the application and robot configuration data on the AIB chassis.
19. Once the system has completed booting, test the system for proper operation.
Groove in robot base
for AIB chassis
placement.
 Loading...