155
ADOBE ILLUSTRATOR CS2
User Guide
6 Complete the path by doing one of the following:
• To close the path, position the Pen tool over the first (hollow) anchor point. A small circle appears next to the Pen
tool pointer when it is positioned correctly. Click or drag to close the path.
• To leave the path open, Ctrl-click (Windows) or Command-click (Mac OS) anywhere away from all objects,
choose Select > Deselect, or select a different tool in the toolbox.
Curves are easier to edit and your system can display and print them faster if you draw them using as few anchor
points as possible. Using too many points can also introduce unwanted bumps in a curve. Instead, draw widely
spaced anchor points, and practice shaping curves by adjusting the length and angles of the direction lines.
See also
“Keys for drawing” on page 527
To draw straight lines followed by curves
1 Using the Pen tool , click corner points in two locations to create a straight segment.
2 Position the Pen tool over the selected endpoint.
A convert anchor point icon appears next to the Pen tool when it is positioned correctly.
3 Dragtocreateadirectionlineandtosettheslopeofthecurvedsegmentyou’llcreatenext.Thenreleasethemouse
button.
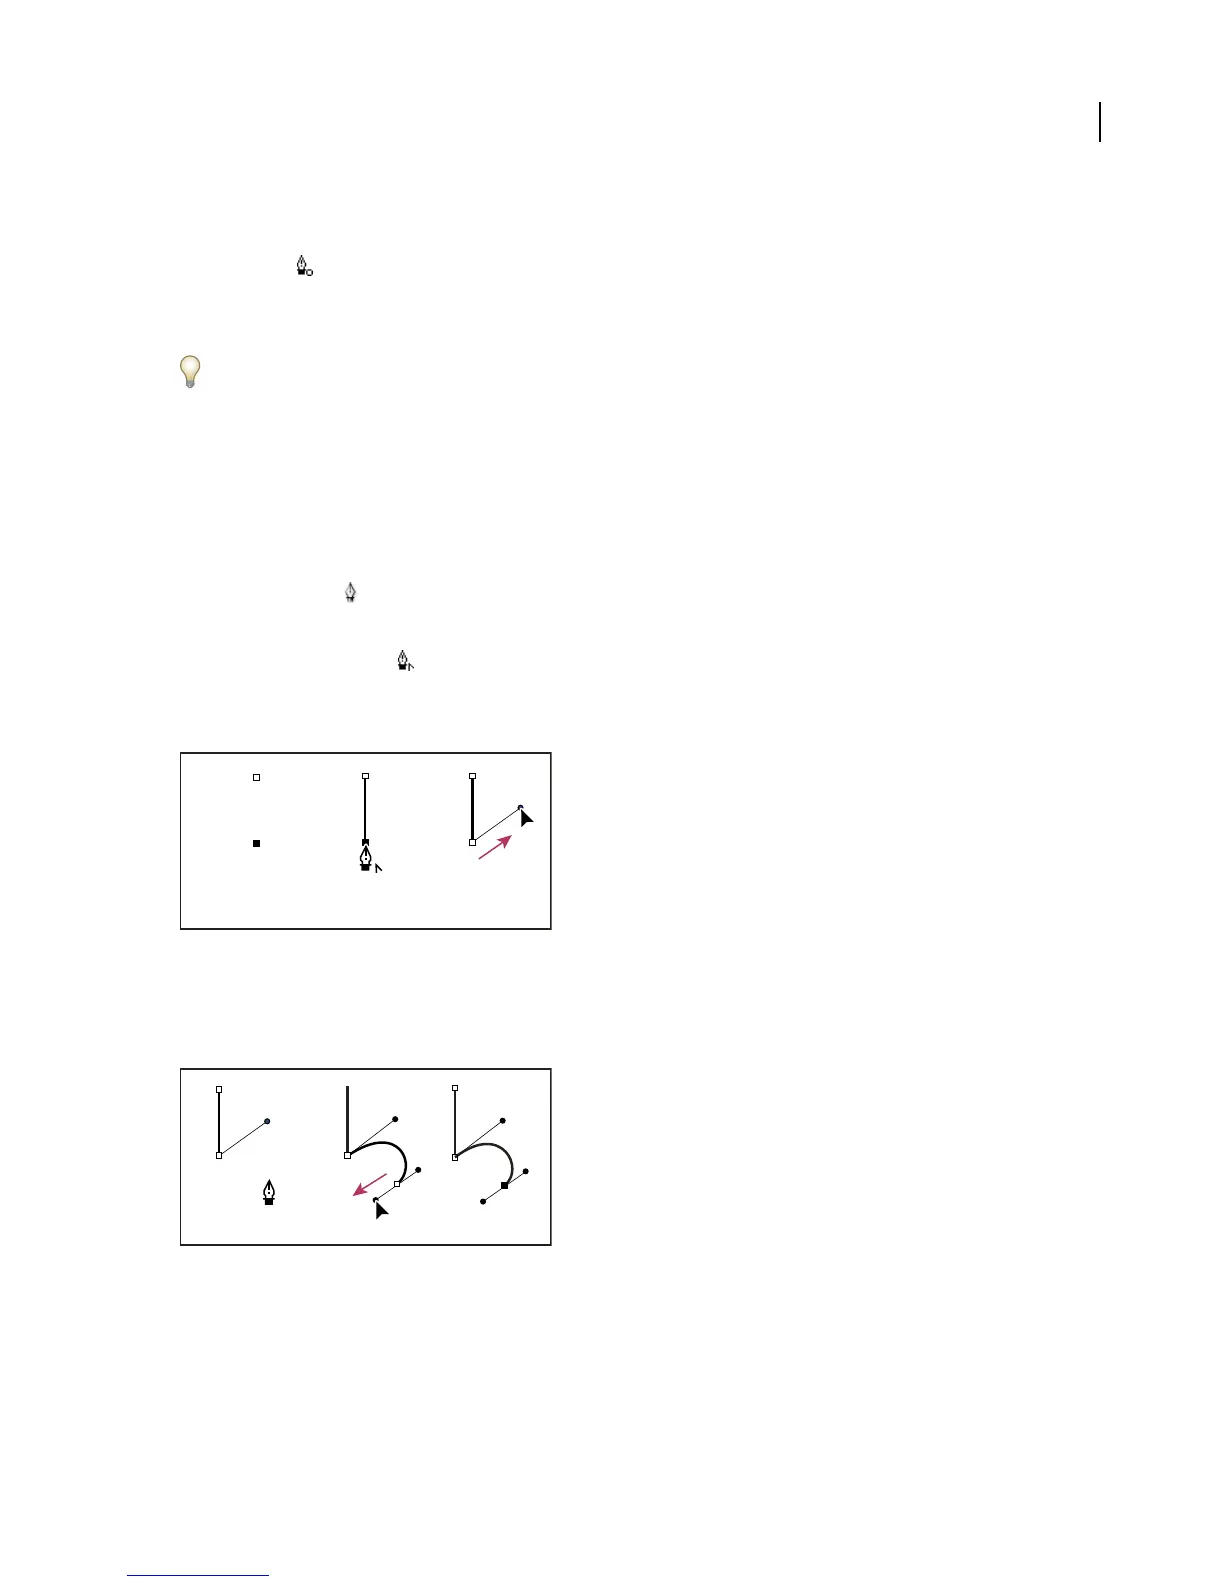
A B C
Drawing a straight segment followed by a mixed segment (part 1)
A. Straight segment completed B. Positioning Pen tool over endpoint C. Dragging direction point
4 Reposition the Pen tool where you want the curved segment to end, drag to complete the curve, and release the
mouse button.
D E F
Drawing a straight segment followed by a mixed segment (part 2)
D. Repositioning the Pen tool E. Dragging direction point F. New curve segment completed
To draw curves followed by straight lines
1 Using the Pen tool, drag to create the first smooth point of the curved segment, and release the mouse button.