179
ADOBE ILLUSTRATOR CS2
User Guide
See also
“Symbolism tool gallery” on page 174
“To set options for the symbolism tools” on page 174
Drawing flares
About flares
The Flare tool creates flare objects with a bright center, a halo, and rays and rings. Use this tool to create an effect
similar to a lens flare in a photograph.
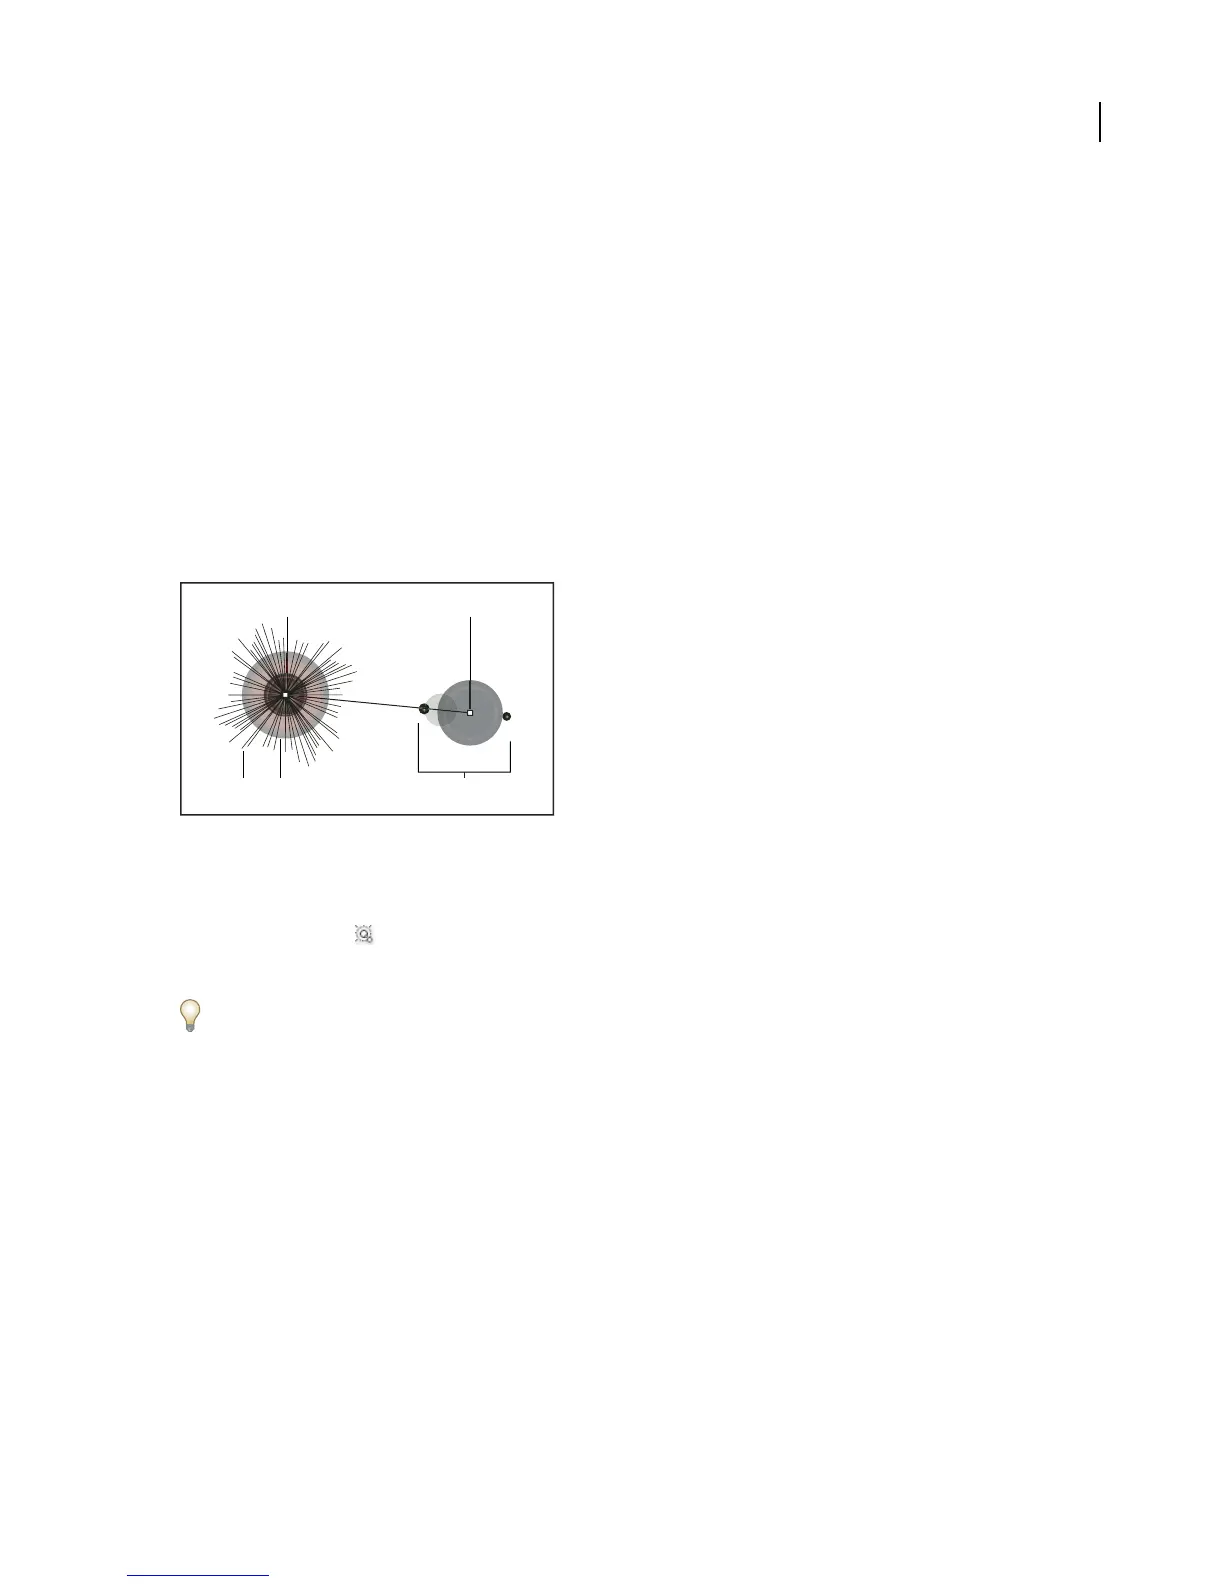
Flares include a center handle and an end handle. Use the handles to position the flare and its rings. The center
handle is in the bright center of the flare—the flare path begins from this point.
A
B
C D E
Components of a flare
A. Center handle B. End handle C. Rays (shown black for clarity) D. Halo E. Rings
To create a flare using the default settings
1 Select the Flare tool .
2 Press Alt (Windows) or Option (Mac OS), and click where you want the center handle of the flare to appear.
Flares often look best when drawn over existing objects.
See also
“Drawing tool gallery” on page 145
To draw a flare
1 Select the Flare tool.
2 Pressthe mousebuttondowntoplace thecenterhandleofthe flare, then dragtoset thesizeofthe center,the size
of the halo, and to rotate the angle of the rays.
Before releasing the mouse, press Shift to constrain the rays to a set angle. Press Up Arrow or Down Arrow to add
or subtract rays. Press Ctrl (Windows) or Command (Mac OS) to hold the center of the flare constant.
3 Release the mouse when the center, halo, and rays are as desired.
4 Press and drag again to add rings to the flare and place the end handle.