254
ADOBE ILLUSTRATOR CS2
User Guide
• To create a mesh object with a regular pattern of mesh points, select the object and choose Object > Create
Gradient Mesh. Set the number of rows and columns, and select the direction of the highlight from the
Appearance menu: Flat applies the object’s original color evenly across the surface, resulting in no highlight; To
Center creates a highlight in the center of the object; To Edge creates a highlight on the edges of the object. Enter
a percentage of white highlight to apply to the mesh object: 100% applies maximum white highlight to the object;
a value of 0% applies no white highlight to the object.
• To convert a gradient-filled object to a mesh object, select the object and choose Object > Expand. Select Gradient
Mesh,and clickOK. Theselectedobjectisconverted to ameshobjectthattakes theshape of thegradient, either
circular (radial) or rectangular (linear).
To improve performance and redraw speed, keep the size of mesh objects to a minimum. Complex mesh objects can
greatly reduce performance. Therefore, it is better to create a few small, simple mesh objects than to create a single,
complex mesh object. When converting complex objects, use the Create Mesh command for the best results.
See also
“To apply a color, pattern, or gradient to an object” on page 224
To edit mesh objects
You can edit a mesh object by adding, deleting, and moving mesh points; changing the color of mesh points and mesh
patches; and converting the mesh object back to a regular object.
• To add a mesh point, select the Mesh tool and select a fill color for the new mesh points. Then click anywhere
in the mesh object.
• To delete a mesh point, Alt-click (Windows) or Option-click (Mac OS) the mesh point with the Mesh tool.
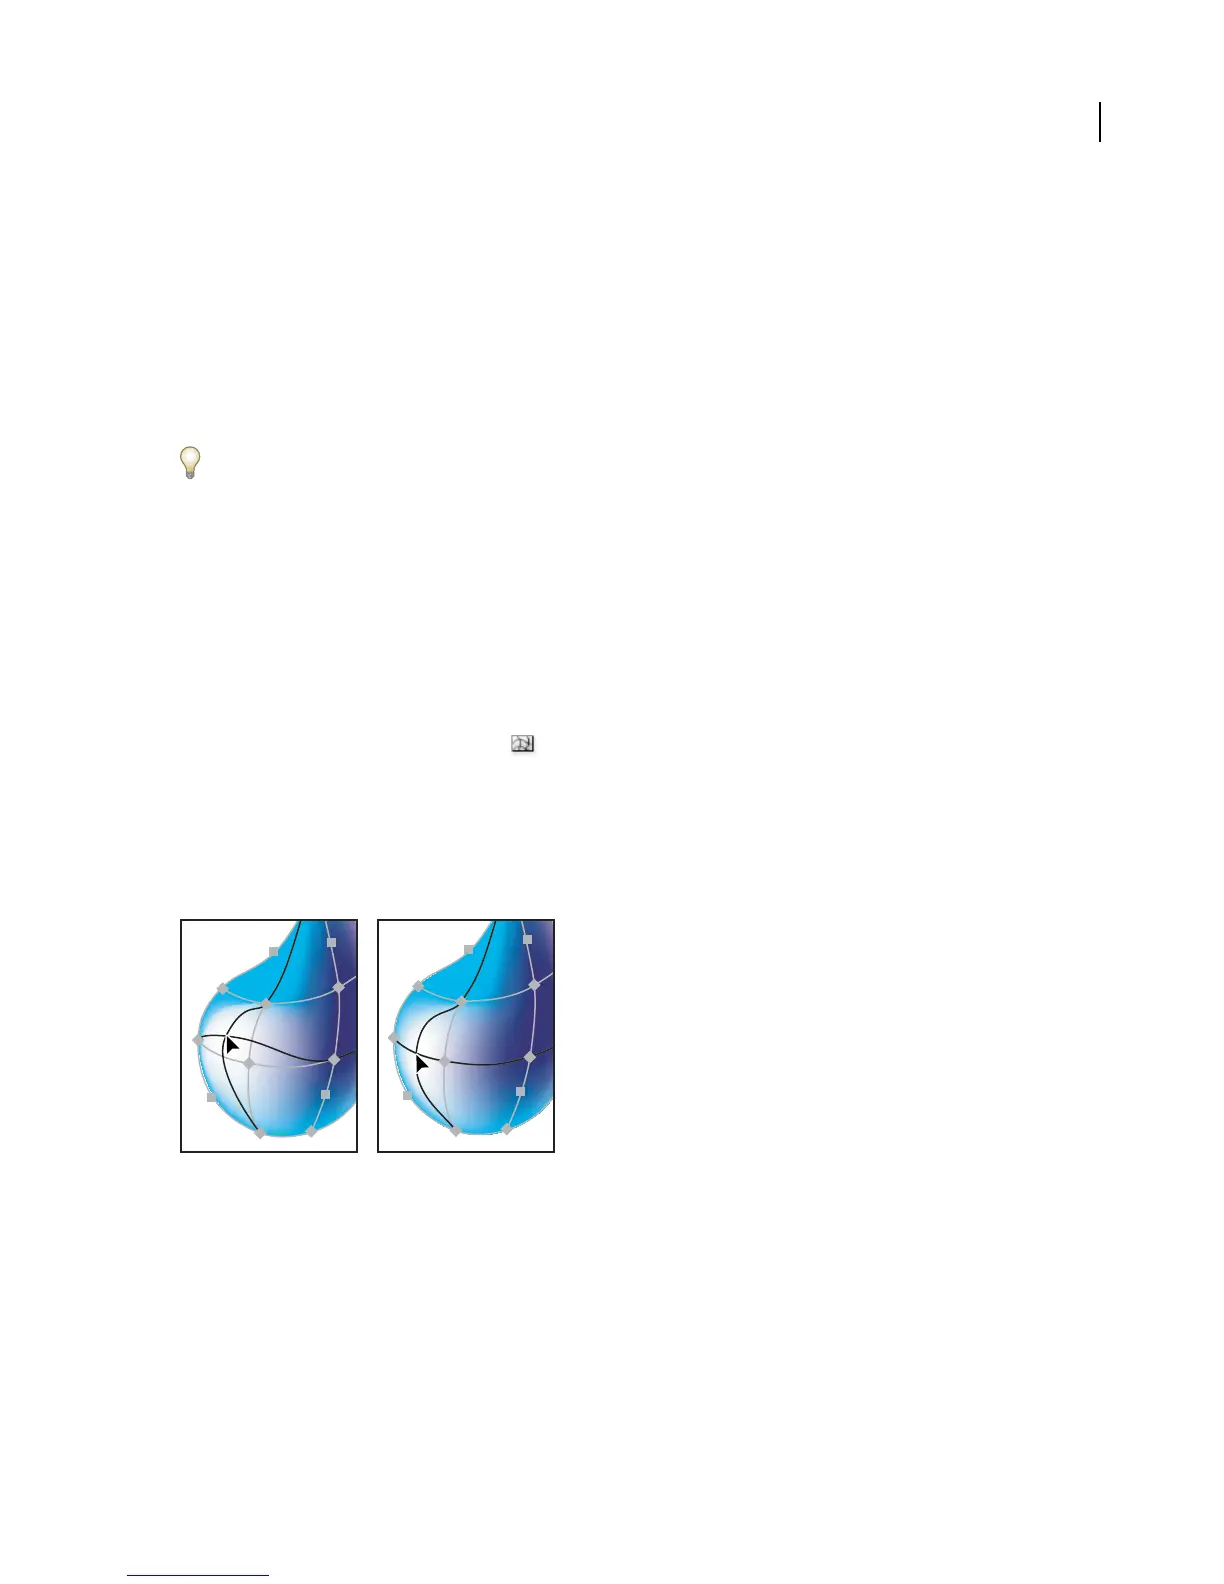
• To move a mesh point, drag it with the Mesh tool or Direct Selection tool. Shift-drag a mesh point with the Mesh
tool to keep the mesh point on a mesh line. This is a convenient way to move a mesh point along a curved mesh
line without distorting the mesh line.
Dragging to move mesh point (left) compared to Shift- dragging with the Mesh tool to constrain the point to the mesh line (right)
Note: When you select the mesh point with the Mesh tool or Direct Selection tool, direction lines appear on it. You can
drag the direction lines to edit the mesh point as you would any anchor point. Shift-drag a direction point with the Mesh
tool to move all direction lines for the mesh point at once.
• To change the color of a mesh point or mesh patch, select the mesh object, and the drag a color from the Color
palette or Swatches palette onto the point or patch. Alternatively, deselect all objects and select a fill color. Then
select the mesh object and use the Eyedropper tool to apply the fill color to mesh points or patches.