Hardware and User Interface Overview
Hardware
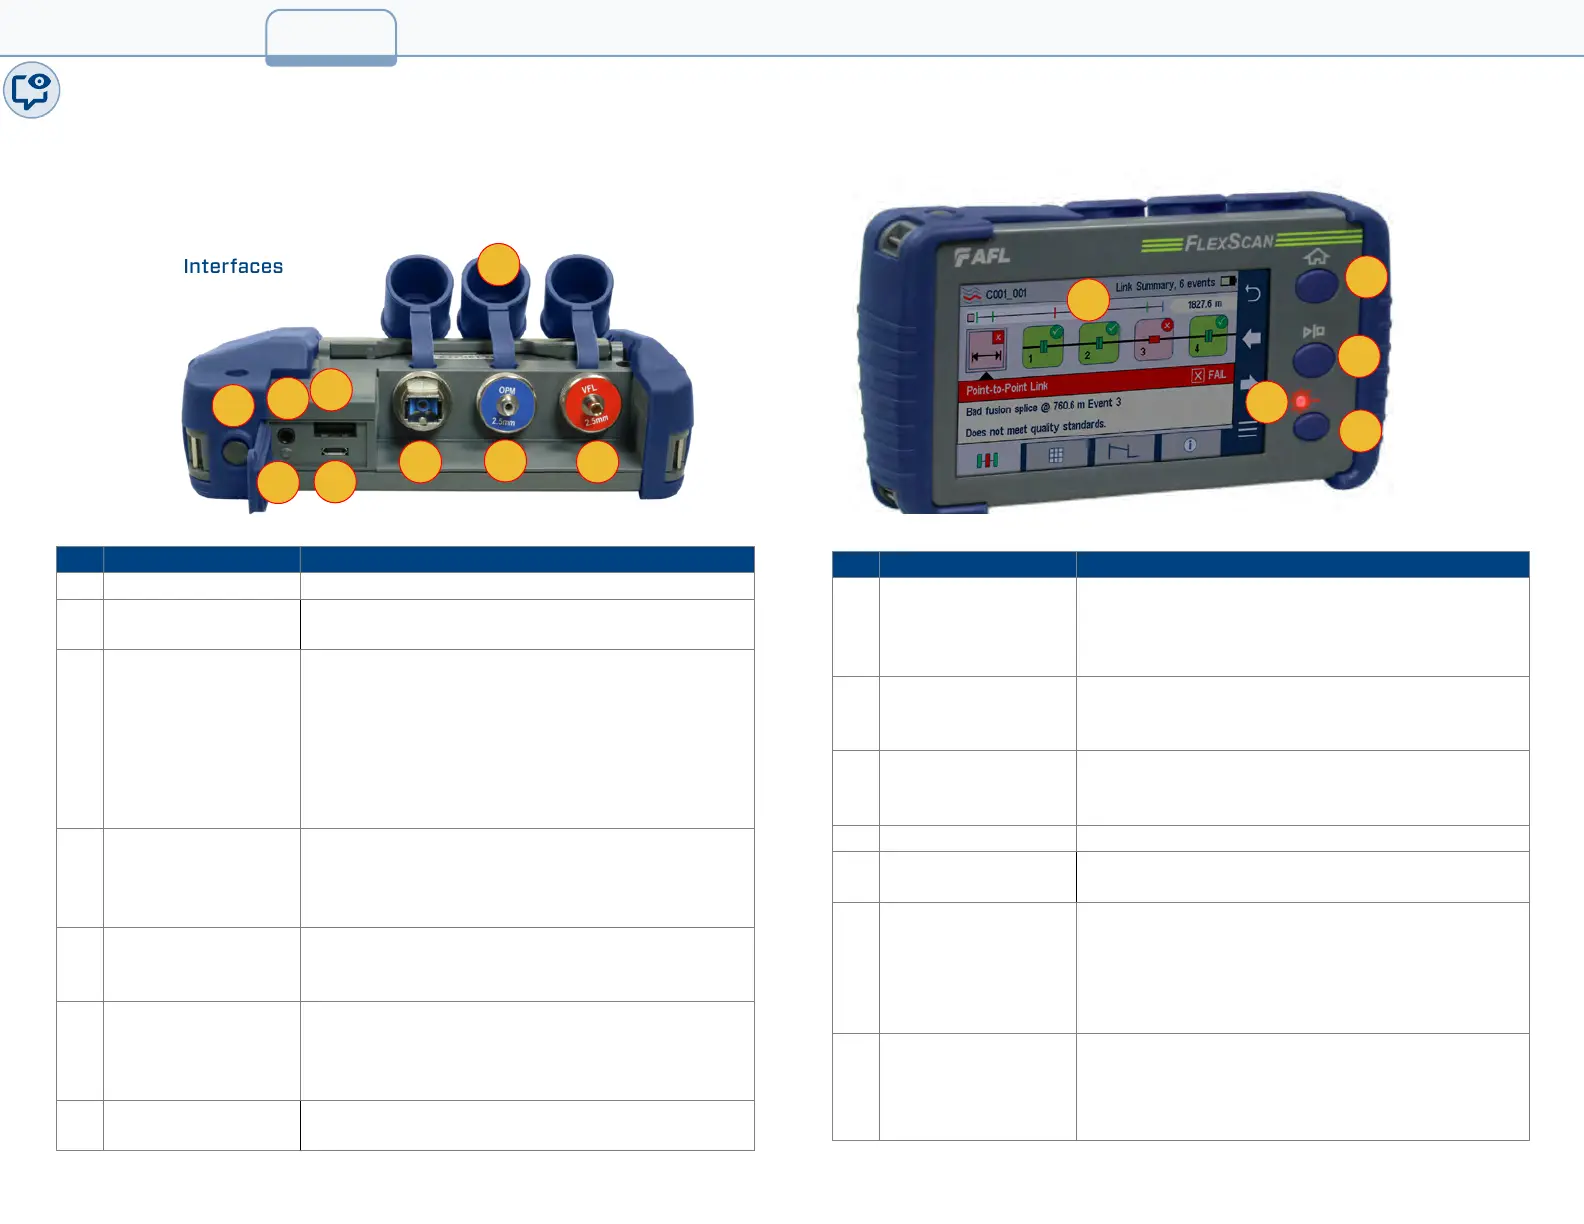
Controls and Interfaces
Ref Feature Description
1 Power button Press to power FlexScan OTDR on/off.
2
Power port (5 VDC)
This is interface for the AC power adapter/
charger.
3 AC/Charger
indicator
Illuminates when AC is connected and
indicates battery charging status.
• RED light = rechargeable battery is charging.
• GREEN light = rechargeable battery is fully
charged.
• Note: Flashing RED/GREEN = battery
charging halted due to over-temperature.
4 USB host port This USB port allows connection to a PC for
transferring stored test results; also may be
used to connect USB Flash Drive for data
storage and copying Internal les.
5 Micro-USB function
port
With the supplied USB cable, this port may be
used to connect OTDR to a USB host port on a
PC.
6 OTDR/Light Source
port
This is a CLASS I LASER output. 1550 nm only,
1650 nm only, 1310/1550 nm,
or 1310/1550/1650nm single-mode OTDR/Light
Source port, depending on model.
7
Power meter port
Optical Power Meter port. Used for power
(dBm, W) or loss (dB) measurements.
Ref Feature Description
8 VFL port This is a CLASS II LASER output. Do not stare
into beam! The VFL (visual fault locator) port
is a 650 nm (visible red) laser. Used for short-
range fault-location.
9 Dust cap Used to protect optical ports from dust/
damage. It is important to keep the dust caps
in place when the unit is not being used.
10 Touchscreen display Contains on-screen controls and menus. Used
to show setup menus, test results, and saved
test data information.
11 Home button Press to access the Home screen.
12
Test start/stop
button
Press to start a new test; or, if a test is running,
stop the current test.
13 VFL indicator When the VFL port is active this indicator
illuminates as follows:
• Flashing RED = VFL is ashing
• Solid RED = CW enabled
• OFF = VFL is off
14 VFL button Use the VFL button to control the VFL laser:
Press and hold ~ 1 sec to enable ashing
Press and hold ~ 2 sec to enable CW
Press and hold ~ 1 sec to switch off
5
2
4
5
3
1
6
7
8
9
10
14
12
11
13
1_OVERVIEW
 Loading...